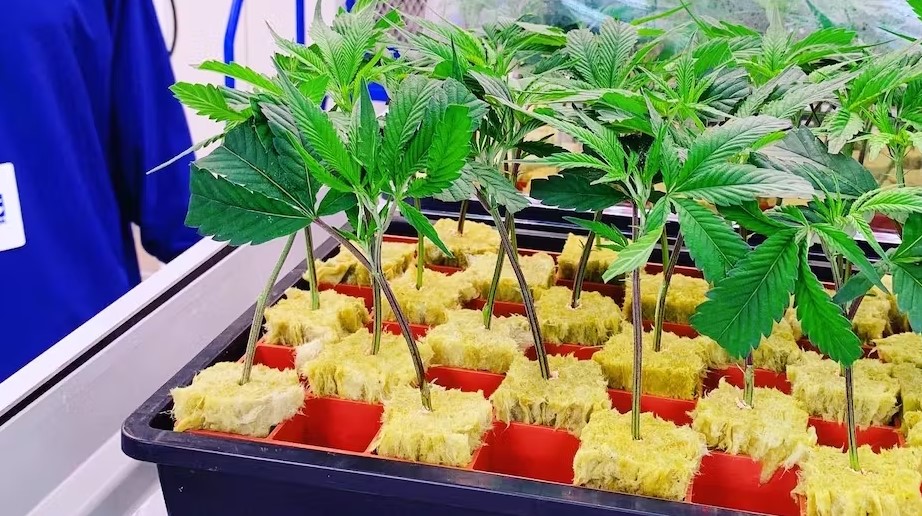
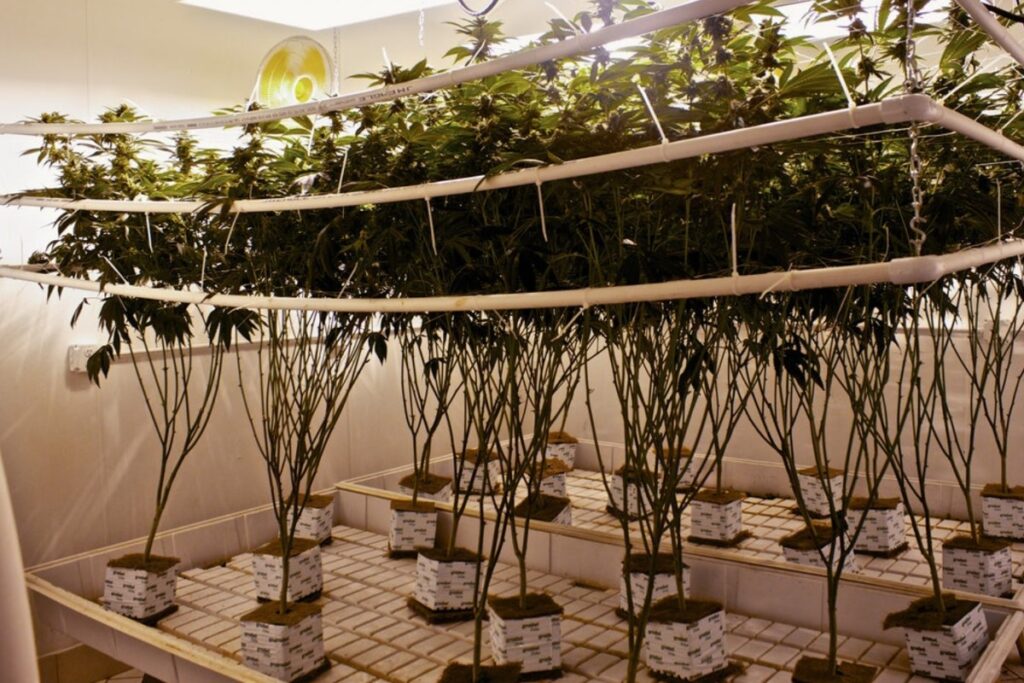
In the dynamic landscape of cannabis cultivation, the quest for optimal growth mediums and cultivation techniques is unending. Among the myriad options available, growing in Rockwool has emerged as a versatile and efficient substrate for hydroponic systems, capturing the attention of both seasoned cultivators and enthusiasts alike.
Imagine a medium that not only provides a stable foundation for your cannabis plants but also offers precise control over essential variables like moisture, pH, and nutrient absorption. In this exploration of Rockwool in cannabis cultivation, we unravel the mysteries behind its composition, delve into its unique properties, and guide you through the steps of harnessing its full potential. Get ready to embark on a journey where science meets cultivation, and discover how growing in Rockwool could be the key to unlocking unprecedented success in your cannabis growing endeavors. Welcome to the world of Rockwool – where the roots of curiosity meet the fruits of cultivation expertise.
Table of Contents
Understanding Rockwool in Hydroponics
Preparing Rockwool for Hydroponic Use
Planting Seeds and Cuttings in Rockwool
Transplanting and Integrating into Hydroponic Systems
Caring for Rockwool-Grown Plants
Pest and Disease Management in Rockwool Systems
Harvesting and Post-Harvest Considerations
Frequently Asked Questions
Understanding Rockwool in Hydroponics:
Composition and Properties
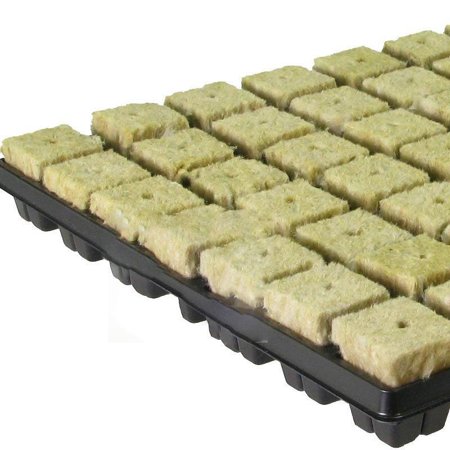
Rockwool, a stalwart in modern hydroponic systems, is a mineral-based growing medium crafted from molten basaltic rock spun into fine fibers. Its exceptional popularity in cannabis cultivation stems from a combination of unique properties that create an ideal environment for robust plant growth.
Composition: At its core, Rockwool is composed of natural materials, primarily basaltic rock and chalk. The molten mixture is spun into thin fibers, forming the characteristic wool-like texture. The result is a substrate that strikes a balance between porosity and water retention, offering an optimal environment for root development.
Properties:
- Excellent Drainage and Aeration: The fibrous structure of Rockwool fosters excellent drainage, preventing waterlogged conditions that can lead to root rot. Simultaneously, it promotes ample aeration, ensuring the roots receive the oxygen they need for healthy growth.
- pH Neutral: Rockwool typically has a neutral pH, providing a stable starting point for cultivators to tailor the pH levels according to the needs of cannabis plants. This neutrality allows for precise control over nutrient uptake.
- Water Retention: Despite its quick drainage properties, Rockwool retains sufficient moisture, ensuring a consistent water supply to the plants. This characteristic is particularly advantageous in hydroponic systems where maintaining moisture levels is critical.
- Sterile and Inert: Rockwool is inherently sterile and inert, minimizing the risk of pests, diseases, or unwanted microorganisms affecting plant health. This makes it an attractive choice for hydroponic systems where a clean, controlled environment is paramount.
- Customizable Density: The density of Rockwool can be adjusted during the manufacturing process, allowing cultivators to choose a specific density that aligns with the needs of their cannabis plants. This flexibility makes it adaptable to various growth stages.
Understanding the composition and properties of Rockwool sets the stage for its effective utilization in cannabis cultivation. As we delve deeper into this exploration, we’ll uncover the nuanced strategies for preparing and optimizing Rockwool for the thriving cannabis plants we aim to cultivate.
Advantages and Disadvantages of Growing in Rockwool
As we navigate the vast terrain of hydroponic mediums for cannabis cultivation, a judicious evaluation of the advantages and disadvantages of Rockwool is imperative. This mineral-based substrate presents a compelling case for its adoption, yet like any cultivation method, it comes with its own set of considerations.
Advantages:
- Precision Control of Growing Conditions: Rockwool’s innate neutrality allows cultivators to have precise control over the pH levels, ensuring an optimal nutrient uptake by cannabis plants. This level of control is especially crucial in hydroponic systems where nutrient delivery is finely calibrated.
- Sterility and Disease Prevention: One of Rockwool’s standout features is its sterile and inert nature. This minimizes the risk of pests, diseases, and microbial infestations that could compromise the health of cannabis plants. The clean slate provided by Rockwool sets a foundation for a healthy growing environment.
- Versatility Across Growth Stages: Rockwool’s customizable density makes it versatile across various growth stages of cannabis plants. Whether nurturing seedlings, supporting robust vegetative growth, or facilitating the flowering stage, Rockwool can be tailored to meet the specific needs of the plants.
- Excellent Water Retention and Aeration: The balance between water retention and aeration in Rockwool is a boon for cannabis cultivation. It ensures that plants receive a consistent water supply without risking waterlogging or depriving the roots of essential oxygen.
- Reusable and Environmentally Friendly: Rockwool can be reused across multiple growing cycles with proper sterilization. This not only makes it cost-effective but also aligns with sustainable cultivation practices, reducing overall environmental impact.
Disadvantages:
- Initial pH Adjustment: While Rockwool is pH neutral, it often requires an initial adjustment to bring it into the desired pH range for cannabis cultivation. This step is crucial to ensure that the substrate doesn’t hinder nutrient absorption by the plants.
- Learning Curve for Beginners: For novice cultivators, mastering the nuances of Rockwool cultivation may involve a learning curve. Understanding the optimal moisture levels, nutrient delivery, and density adjustments may take time and experience.
- Handling Fibrous Material: The fibrous nature of Rockwool can be a minor challenge during handling. Wearing protective gear, such as gloves and a mask, is advisable to prevent skin irritation and inhalation of loose fibers.
- Environmental Impact of Manufacturing: While Rockwool is reusable, the environmental impact of its manufacturing process should be considered. It involves high-temperature processes, and the raw materials must be mined, raising ecological concerns.
Comparisons with Other Growing Media
In the ever-evolving landscape of cannabis cultivation, the choice of growing media is a pivotal decision that directly impacts plant health, yield, and overall cultivation success. As we explore Rockwool in the context of hydroponics, it’s essential to compare its attributes with other popular growing media to help cultivators make informed decisions tailored to their specific needs.
1. Soil vs. Rockwool:
- Nutrient Retention: Soil is renowned for its natural nutrient content, providing a buffer for plants. Rockwool, while neutral, allows precise control over nutrient levels, ideal for hydroponic systems.
- Aeration: Soil can become compacted, impacting aeration. Rockwool, with its fibrous structure, ensures consistent aeration.
2. Coco Coir vs. Rockwool:
- Water Retention: Coco coir retains water well, offering a buffer against drying out. Rockwool provides better drainage while maintaining adequate moisture levels.
- pH Stability: Both substrates require pH adjustment initially, but coco coir tends to be more forgiving if pH fluctuates.
3. Perlite and Vermiculite vs. Rockwool:
- Aeration: Perlite and vermiculite enhance aeration but lack the water retention capacity of Rockwool.
- Nutrient Delivery: Rockwool’s precise nutrient control surpasses perlite and vermiculite, making it advantageous for hydroponic systems.
4. Hydroton (Clay Pebbles) vs. Rockwool:
- Aeration and Drainage: Hydroton excels in aeration and drainage, but Rockwool offers more stability in moisture control.
- pH Neutrality: Both substrates require pH adjustment, but Rockwool provides better control over pH levels.
5. Aeroponics vs. Rockwool in Hydroponics:
- Root Oxygenation: Aeroponics relies on misting roots with nutrient-rich water, ensuring optimal oxygenation. Rockwool provides a stable substrate with good aeration.
- Ease of Setup: Aeroponics systems may require more setup expertise compared to using Rockwool in traditional hydroponic systems.
Preparing Rockwool for Hydroponic Use
Soaking and Conditioning Techniques
Efficient preparation of Rockwool is a critical step that sets the stage for successful hydroponic cannabis cultivation. This section will guide you through essential soaking and conditioning techniques to ensure that your Rockwool is primed for optimal plant growth.
1. Preparing for Use:
- Before soaking, wear protective gear such as gloves and a mask to minimize exposure to loose fibers.
- Trim excess material from the sides of Rockwool cubes to facilitate proper water absorption.
2. pH Adjustment:
- Measure the pH of the Rockwool before soaking to establish a baseline. It may initially be slightly alkaline.
- Prepare a pH-adjusted nutrient solution, typically around 5.5 to 6.5, and use it for soaking.
3. Soaking Duration:
- Submerge the Rockwool cubes or slabs in the pH-adjusted nutrient solution.
- Soaking times vary but typically range from 1 to 24 hours, allowing the Rockwool to absorb water and stabilize its pH.
4. Drain Excess Water:
- After soaking, allow the excess water to drain from the Rockwool. This ensures that the substrate is moist but not waterlogged.
- Ensure proper drainage to prevent over-saturation, which can impede oxygenation to the roots.
5. Conditioning for Seedlings:
- For germinating seeds, maintain a higher humidity environment by covering the Rockwool cubes with a clear dome or plastic wrap until seedlings emerge.
- Gradually acclimate seedlings to lower humidity levels as they develop.
6. Monitoring pH Levels:
- Regularly monitor the pH levels of the Rockwool throughout the cultivation process. Adjust the nutrient solution as needed to maintain the desired pH range.
7. Additional Tips:
- For larger Rockwool slabs, ensure even soaking by allowing water to penetrate from multiple points.
- Avoid squeezing or compressing Rockwool excessively, as this can reduce its air-filled porosity.
Proper soaking and conditioning of Rockwool create an environment conducive to successful hydroponic cannabis cultivation. This initial step establishes a foundation for optimal nutrient absorption, aeration, and root development. As we move forward, we will delve into the specific techniques for planting seeds and cuttings in Rockwool, ensuring a seamless transition from preparation to the early stages of plant growth.
pH and EC Adjustments for Optimal Performance while growing in Rockwool
Fine-tuning the pH (potential hydrogen) and EC (electrical conductivity) levels of your Rockwool is a crucial aspect of ensuring that your cannabis plants receive the right balance of nutrients for robust growth. In this section, we’ll explore the significance of pH and EC in Rockwool preparation and provide practical guidance for achieving optimal performance.
1. Understanding pH in Rockwool:
- Rockwool is inherently pH neutral, but it’s essential to confirm its baseline pH before use.
- Aim for a pH range between 5.5 and 6.5 for Rockwool, as this is optimal for nutrient absorption by cannabis plants.
2. pH Adjustment Steps:
- Use a pH meter to measure the pH of the Rockwool.
- If the initial pH is outside the recommended range, adjust it using pH-up or pH-down solutions.
- Gradually add the solution while monitoring the pH until it falls within the desired range.
3. Electrical Conductivity (EC) in Rockwool:
- EC measures the concentration of dissolved salts in the nutrient solution, indicating its strength.
- Rockwool’s inert nature allows cultivators to precisely control the nutrient solution’s EC, ensuring it matches the needs of the cannabis plants.
4. EC Adjustment Steps:
- Measure the initial EC of the nutrient solution.
- Adjust the nutrient concentration using fertilizers or water to achieve the desired EC level.
- Aim for an EC level that corresponds to the specific growth stage of your cannabis plants.
5. Importance of Balanced pH and EC:
- A balanced pH ensures that essential nutrients are in their most bioavailable forms, promoting optimal nutrient uptake.
- Proper EC levels prevent over-fertilization or nutrient deficiencies, providing a stable nutrient environment for the plants.
6. Monitoring Throughout the Growth Cycle:
- Regularly monitor and adjust the pH and EC levels throughout the growth cycle, especially during nutrient solution changes.
- As plants progress through different growth stages, adapt the nutrient solution to meet their changing nutritional requirements.
7. Testing and Record-Keeping:
- Conduct regular checks using reliable pH and EC meters.
- Maintain a record of adjustments made to the nutrient solution to track the plant’s response and refine your cultivation practices over time.
Ensuring that Rockwool is appropriately conditioned with the right pH and EC levels establishes a foundation for optimal nutrient availability and uptake. This meticulous preparation sets the stage for healthy cannabis plants and will be integral as we move forward into the next stages of planting seeds and cuttings in Rockwool.
Sterilization and Disease Prevention
Maintaining a sterile environment is paramount in hydroponic cultivation to safeguard against potential diseases and ensure the health and vitality of your cannabis plants. In this section, we’ll delve into the critical steps of sterilizing Rockwool and implementing measures for disease prevention.
1. Importance of Sterilization:
- Rockwool’s sterile nature is one of its key advantages, but additional sterilization measures help mitigate any potential contamination.
- Sterilization eliminates unwanted microorganisms that could harm your plants.
2. Pre-Soaking Sterilization:
- Before soaking Rockwool, consider sterilizing it by soaking in a mild hydrogen peroxide solution (about 3% concentration).
- Soak the Rockwool for 15-30 minutes in the hydrogen peroxide solution to eliminate any existing contaminants.
3. Heat Sterilization:
- For new or unused Rockwool, consider heat sterilization. Place the Rockwool in an oven or autoclave at temperatures around 180-200°C (356-392°F) for at least 30 minutes.
- This process ensures the complete elimination of any potential pathogens.
4. Maintaining Sterility During Handling:
- Wear clean gloves and work in a clean environment when handling Rockwool.
- Avoid touching the Rockwool unnecessarily, especially after sterilization, to prevent introducing contaminants.
5. Disease Prevention Measures:
- Implement preventive measures such as maintaining proper air circulation, cleanliness in the growing area, and regular equipment sanitation.
- Monitor plants for signs of diseases, and promptly address any issues to prevent the spread of pathogens.
6. Quarantine Procedures for New Plants:
- If introducing new plants, particularly from external sources, consider implementing quarantine procedures.
- Isolate new plants for a period to observe for potential signs of diseases before integrating them into the main cultivation area.
7. Regular Monitoring and Maintenance:
- Regularly monitor the overall health of your cannabis plants, focusing on signs of diseases such as wilting, discoloration, or unusual growth patterns.
- Implement a routine maintenance schedule to clean and sterilize equipment, trays, and any materials in contact with the plants.
Ensuring the sterility of Rockwool and implementing robust disease prevention measures are crucial steps in establishing a healthy growing environment for cannabis plants.
Planting Seeds and Cuttings in Rockwool
Germination Strategies for Cannabis Seeds Growing in Rockwool
The germination phase is a pivotal moment in the life cycle of cannabis plants, laying the groundwork for robust growth and development. When utilizing Rockwool as your growing medium, specific strategies can optimize the germination process. In this section, we’ll explore effective germination strategies tailored to cannabis seeds in Rockwool.
1. Selection of Quality Seeds:
- Begin with high-quality cannabis seeds sourced from reputable breeders or suppliers.
- Choose seeds that are mature, dark, and have a firm, intact shell for better germination success.
2. Pre-Soaking Rockwool Cubes:
- Before placing seeds, ensure Rockwool cubes are pre-soaked in pH-adjusted water or a mild nutrient solution.
- Allow excess water to drain, leaving the Rockwool cubes moist but not waterlogged.
3. Seed Placement:
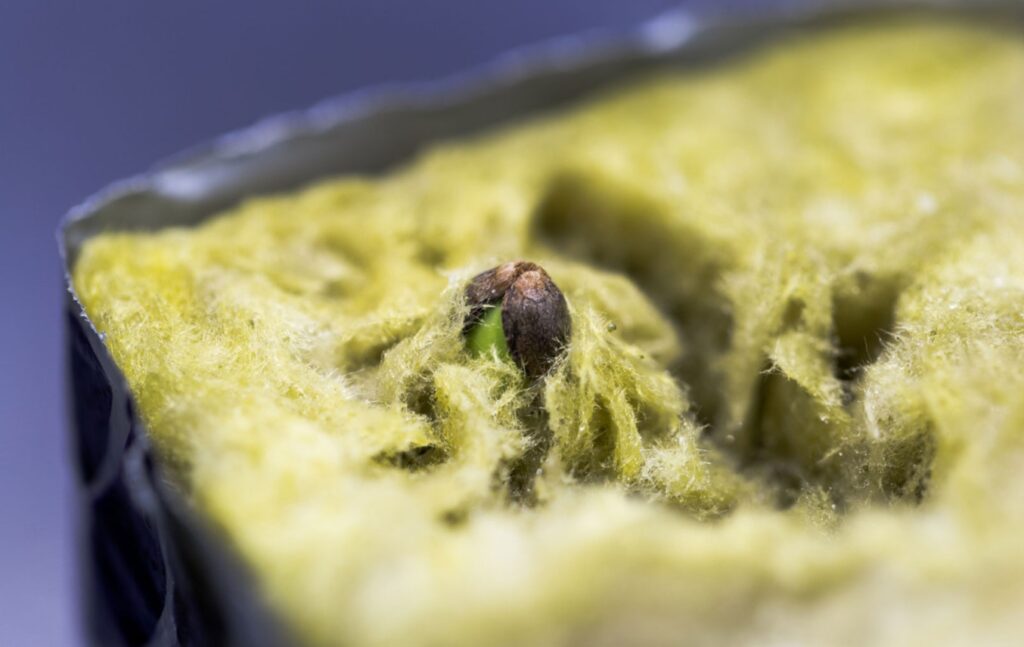
- Create a small indentation in the center of each Rockwool cube using a pencil or similar tool.
- Gently place a single seed into each indentation, ensuring it is positioned at a depth of about 1/4 to 1/2 inch.
4. Humidity Management:
- Maintain high humidity levels during the germination phase by covering the Rockwool cubes with a clear dome or placing them in a humidity dome.
- This helps create an environment conducive to seedling emergence.
5. Temperature Control:
- Ensure optimal temperature conditions, ideally between 70-80°F (21-27°C), to facilitate prompt and uniform germination.
- Using a seedling heat mat can aid in maintaining consistent temperature levels.
6. Light Exposure:
- While not essential during the germination phase, providing a low-intensity light source can help guide emerging seedlings.
- Indirect or ambient light is sufficient until the seedlings develop their first set of true leaves.
7. Patience and Observation:
- Exercise patience during the germination process, as it can take anywhere from a few days to a week for seeds to sprout.
- Regularly check for signs of germination, such as the emergence of the seedling’s cotyledons.
8. Transplanting Seedlings:
- Once seedlings have developed a few sets of leaves and roots are visible at the base of the Rockwool cube, they are ready for transplanting into the main hydroponic system.
Following these germination strategies in Rockwool provides a solid foundation for healthy seedling development. As we progress, we’ll explore specific techniques for nurturing cuttings in Rockwool, ensuring a seamless transition from germination to the vegetative growth phase.
Cloning Techniques for Cuttings growing in Rockwool
Cloning, or asexual propagation, offers a reliable method for replicating desirable cannabis plants with consistent genetics. When employing Rockwool as your growing medium, specific cloning techniques can enhance the success of cuttings, ensuring a smooth transition from parent plant to new, thriving clones.
1. Selection of Parent Plants:
- Choose healthy and vigorous parent plants with desirable traits, such as high cannabinoid content, yield, and resistance to pests or diseases.
- Opt for plants in the vegetative stage for optimal cloning success.
2. Preparing Rockwool Cubes:
- Soak Rockwool cubes in a pH-adjusted water or mild nutrient solution, ensuring they are thoroughly saturated.
- Allow excess water to drain, leaving the Rockwool cubes moist but not overly wet.
3. Taking Cuttings:
- Use a sharp, sterilized blade to take cuttings from the parent plant. Select sections with actively growing tips, as these contain the most viable cells for root development.
- Cuttings are typically 4-6 inches in length and should include at least one set of leaves.
4. Trimming and Leaf Reduction:
- Trim excess leaves from the lower portions of the cutting, leaving only a few leaves at the top.
- Reducing the number of leaves minimizes moisture loss and redirects energy towards root development.
5. Rooting Hormone Application:
- Dip the cut end of each cutting into a rooting hormone to stimulate root growth.
- Shake off excess powder to avoid overdosing, and ensure an even coating on the cut end.
6. Inserting Cuttings into Rockwool Cubes:
- Create a small hole in the center of each Rockwool cube using a pencil or similar tool.
- Gently insert the cut end of each cutting into the hole, ensuring it is securely positioned.
7. Humidity Dome and Environment:
- Place the Rockwool cubes with cuttings in a humidity dome or create a mini-greenhouse environment to maintain high humidity.
- Maintain a consistent temperature between 70-80°F (21-27°C) for optimal root development.
8. Monitoring and Transplanting:
- Regularly check the cuttings for signs of root development, typically visible through the drainage holes of the Rockwool cubes.
- Once roots are well-established, usually in 10-14 days, transplant the rooted cuttings into the main hydroponic system.
9. Providing Indirect Light:
- During the initial rooting phase, provide indirect or low-intensity light to the cuttings to encourage root growth.
- Transition to higher light levels gradually as the clones develop.
Implementing these cloning techniques in Rockwool ensures a high success rate for rooting cuttings, allowing cultivators to replicate and preserve the genetic traits of prized cannabis plants.
Transplanting and Integrating into Hydroponic Systems
Transplanting cannabis plants from Rockwool into a hydroponic system marks a critical juncture in their growth journey. This phase demands careful consideration of timing, methods, and seamless integration with various hydroponic systems. Additionally, anticipating and addressing potential challenges ensures a smooth transition, setting the stage for optimal plant development.
1. Timing for Transplanting:
- Transplanting should be timed to coincide with the development of a robust root system within the Rockwool cubes.
- Typically, this occurs 10-14 days after rooting for cuttings or once seedlings have established sturdy roots.
2. Methods for Transplanting:
- Gently remove the Rockwool cubes from their initial rooting environment.
- Place the Rockwool cubes directly into the hydroponic system or transfer the plants to new Rockwool cubes within net pots, depending on the specific hydroponic setup.
3. Integration with Various Hydroponic Systems:
- Nutrient Film Technique (NFT):
- Place Rockwool cubes with plants into the NFT channels, ensuring a secure fit.
- Adjust the flow rate of the nutrient solution to provide a thin film over the Rockwool, delivering nutrients directly to the roots.
- Deep Water Culture (DWC):
- Set Rockwool cubes in net pots, allowing roots to hang into the nutrient-rich water.
- Ensure the water level provides continuous contact with the Rockwool cubes.
- Drip System:
- Position Rockwool cubes within the drip system, allowing a nutrient solution to drip onto the growing medium.
- Adjust drip intervals based on the specific needs of the cannabis plants.
- Aeroponics:
- Hang Rockwool cubes with plants in the aeroponic chamber, ensuring that misted nutrient solution reaches the exposed roots.
- Monitor misting intervals and adjust according to plant requirements.
4. Addressing Potential Challenges when growin in Rockwool:
- Transplant Shock:
- Minimize transplant shock by handling plants and Rockwool cubes with care during the transition.
- Maintain stable environmental conditions to reduce stress.
- Nutrient Discrepancies:
- Monitor nutrient levels in the hydroponic system to ensure they align with the needs of cannabis plants.
- Adjust nutrient solutions based on the growth stage and specific requirements.
- Temperature Fluctuations:
- Maintain consistent temperatures in the hydroponic environment to prevent temperature shock.
- Adequate ventilation and temperature control systems help regulate the growing conditions.
- Root Health:
- Regularly inspect roots for signs of diseases or nutrient deficiencies.
- Implement preventive measures, such as maintaining sterile conditions and optimizing nutrient delivery.
5. Gradual Adjustment:
- Allow a period of gradual adjustment for plants transitioning from Rockwool to the hydroponic system.
- Monitor plant response and make adjustments as needed for lighting, nutrient concentration, and environmental factors.
6. Record-Keeping:
- Maintain detailed records of transplanting dates, methods employed, and any adjustments made.
- This documentation aids in refining cultivation practices for future crops.
By meticulously considering the timing, methods, and potential challenges associated with transplanting Rockwool-grown cannabis plants into hydroponic systems, cultivators set the stage for a successful integration that fosters vigorous growth and bountiful yields.
Caring for Plants Growing in Rockwool
Proper care for Rockwool-grown cannabis plants is instrumental in achieving optimal yields and ensuring the health of the crop. This section provides actionable real-world information on nutrient management, monitoring pH and EC levels, and optimizing environmental factors for robust growth.
1. Nutrient Management and Feeding Schedules:
- Nutrient Solutions:
- Utilize a well-balanced nutrient solution designed for hydroponic cultivation.
- Consider using specialized cannabis nutrients, adjusting formulations based on the growth stage (vegetative or flowering).
- Feeding Schedules:
- Follow a consistent feeding schedule, adjusting nutrient concentrations as plants progress through different growth phases.
- Typically, a higher nitrogen concentration is suitable for the vegetative stage, while a higher phosphorus and potassium concentration is beneficial during flowering.
Table 1: Example Nutrient Schedule for Growing in Rockwool
| Growth Stage | Nitrogen (N) | Phosphorus (P) | Potassium (K) |
|---|---|---|---|
| Seedling | 3 | 2 | 1 |
| Vegetative | 4 | 2 | 3 |
| Flowering | 2 | 4 | 6 |
- EC Levels:
- Regularly monitor the Electrical Conductivity (EC) of the nutrient solution to ensure it aligns with the growth stage.
- Adjust EC levels based on the specific needs of cannabis plants, avoiding over-fertilization or nutrient deficiencies.
2. Monitoring pH and EC Levels:
- pH Levels:
- Regularly measure and adjust the pH of the nutrient solution to maintain it within the optimal range of 5.5 to 6.5.
- Fluctuations in pH can impact nutrient availability, affecting plant health and growth.
- EC Levels:
- EC levels indicate the concentration of nutrients in the solution.
- Monitor and adjust EC levels based on the growth stage. Higher EC levels are generally suitable for flowering.
Table 2: Target pH and EC Ranges for Growing in Rockwool
| Growth Stage | Target pH Range | Target EC Range (mS/cm) |
|---|---|---|
| Seedling | 5.5-6.0 | 0.8-1.2 |
| Vegetative | 5.5-6.5 | 1.2-2.0 |
| Flowering | 5.5-6.5 | 2.0-2.5 |
- Tip:
- Use pH-up or pH-down solutions to adjust pH gradually.
- Keep a log of pH and EC measurements, noting any adjustments made.
3. Environmental Factors for Growing in Rockwool:
- Temperature:
- Maintain a temperature range between 70-80°F (21-27°C) during the vegetative stage.
- For flowering, slightly lower temperatures (65-75°F or 18-24°C) can enhance resin production.
- Humidity:
- Aim for humidity levels around 40-60% during the vegetative stage.
- Reduce humidity to 40% or lower during flowering to prevent mold and promote resin development.
- Lighting:
- Provide a consistent and adequate light cycle, typically 18 hours of light during the vegetative stage and 12 hours during flowering.
- Adjust light intensity based on plant response and strain requirements.
- Air Circulation:
- Ensure proper ventilation to prevent stagnant air and minimize the risk of pests or diseases.
- Use fans to maintain a gentle breeze, strengthening plant stems and promoting efficient gas exchange.
- Tip:
- Regularly monitor and adjust environmental conditions based on plant response.
- Employ environmental control systems, such as heaters, air conditioners, and dehumidifiers, to maintain optimal conditions.
By implementing these comprehensive guidelines for nutrient management, pH and EC monitoring, and environmental optimization, cultivators can foster the health and productivity of Rockwool-grown cannabis plants throughout their growth cycle. Regular observation, timely adjustments, and adherence to feeding schedules contribute to the success of the cultivation endeavor.
Pest and Disease Management in Rockwool Systems
Cultivating cannabis in Rockwool systems offers numerous benefits, but growers must be vigilant in managing potential pests and diseases to ensure a healthy and thriving crop. In this section, we’ll explore common pests and diseases in hydroponic environments and provide specific prevention and control measures tailored to Rockwool-based systems.
1. Common Pests When Growing in Rockwool:
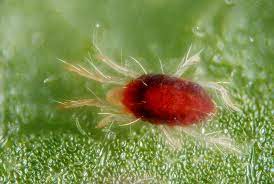
- Spider Mites:
- Identification: Tiny arachnids that feed on plant sap, causing stippling and webbing.
- Prevention and Control:
- Maintain proper humidity levels, as spider mites thrive in dry conditions.
- Introduce predatory mites as a natural control method.
- Aphids:
- Identification: Small, soft-bodied insects that feed on plant sap and excrete honeydew.
- Prevention and Control:
- Implement biological controls such as ladybugs or lacewings.
- Use insecticidal soaps or neem oil for mild infestations.
- Thrips:
- Identification: Tiny, slender insects that feed on plant cells, causing stippling and deformed growth.
- Prevention and Control:
- Introduce beneficial insects like predatory mites or pirate bugs.
- Apply neem oil or insecticidal soap.
2. Common Diseases when Growing in Rockwool:
- Pythium (Root Rot):
- Identification: Brown, slimy roots, wilting, and yellowing of leaves.
- Prevention and Control:
- Maintain proper nutrient and pH levels to discourage Pythium growth.
- Use beneficial bacteria like Bacillus subtilis to suppress Pythium.
- Powdery Mildew:
- Identification: White powdery spots on leaves and stems.
- Prevention and Control:
- Ensure proper air circulation to reduce humidity.
- Apply fungicides containing sulfur or potassium bicarbonate.
- Botrytis (Gray Mold):
- Identification: Gray, fuzzy mold on flowers and buds.
- Prevention and Control:
- Maintain low humidity during flowering.
- Remove affected plant parts and improve ventilation.
3. Prevention and Control Measures Specific to Growing in Rockwool:
- Sterilization Practices:
- Sterilize Rockwool before use to eliminate potential pathogens.
- Soak Rockwool in a hydrogen peroxide solution to prevent disease transmission.
- Proper Drainage:
- Ensure adequate drainage in Rockwool to prevent waterlogging, reducing the risk of root diseases.
- Use raised platforms or sloping trays to facilitate drainage.
- Integrated Pest Management (IPM):
- Implement IPM strategies, including regular monitoring and early intervention.
- Rotate the use of pest control methods to prevent the development of resistance.
- Quarantine Procedures:
- Quarantine new plants before introducing them to the Rockwool system.
- Monitor quarantined plants for signs of pests or diseases before integration.
- Regular Monitoring:
- Inspect plants regularly for any signs of pests or diseases.
- Take swift action at the first sign of infestation to prevent further spread.
Implementing these tailored prevention and control measures specific to Rockwool systems ensures a proactive approach to managing pests and diseases. By combining proper sanitation, vigilant monitoring, and targeted interventions, cultivators can maintain a healthy growing environment and safeguard their cannabis crop.
Harvesting and Post-Harvest Considerations
The culmination of a successful cannabis cultivation cycle is the harvest, a moment that demands careful timing and precise techniques to maximize yield and potency. In this section, we’ll explore the optimal timing and techniques for cannabis harvest in Rockwool systems, as well as considerations for cleaning and reusing Rockwool and post-harvest processing tips.
1. Timing and Techniques for Cannabis Harvest:
- Flowering Period Observation:
- Harvesting timing is critical and depends on the strain and desired effects.
- Monitor trichomes using a magnifying glass for the ideal balance of cloudy and amber trichomes.
- Flush Before Harvest:
- Implement a flushing period before harvest to remove excess nutrients from the plant.
- Use pH-balanced water to flush the Rockwool substrate.
- Selective Harvesting:
- Consider a staggered or selective harvest for plants with varying maturation rates.
- Harvesting the top colas first allows lower buds more time to develop.
- Techniques for Harvesting:
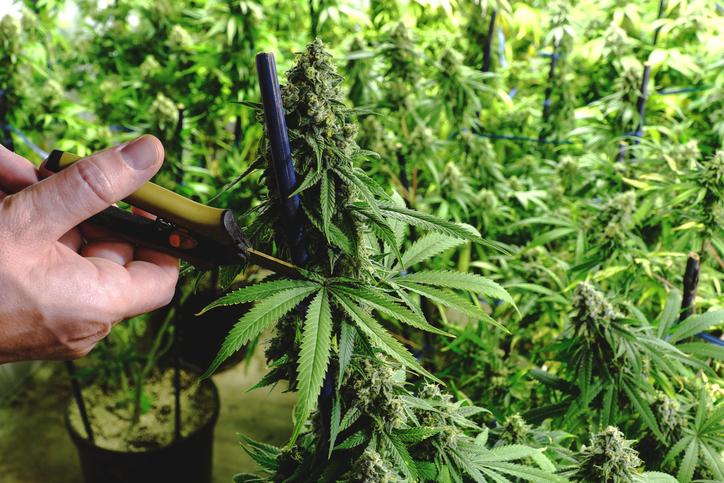
- Use clean, sharp scissors or pruning shears to cut branches during harvest.
- Handle the plants gently to avoid damaging trichomes and contaminating the final product.
2. Cleaning and Reusing Rockwool:
- Initial Cleaning:
- After harvesting, remove the remaining plant material from the Rockwool.
- Rinse the Rockwool thoroughly with water to eliminate any residual nutrients.
- Sterilization Techniques:
- Sterilize Rockwool before reuse to prevent the carryover of pests and diseases.
- Heat sterilization or soaking in a diluted hydrogen peroxide solution are effective methods.
- pH Adjustment:
- Adjust the pH of the Rockwool to the desired level before reuse.
- Soak the Rockwool in a pH-adjusted nutrient solution to prepare it for the next crop.
- Drying Process:
- Allow the Rockwool to dry completely after cleaning and sterilization.
- Ensure proper ventilation to prevent mold or bacterial growth.
3. Post-Harvest Processing Tips:
- Drying and Curing:
- Hang harvested buds in a dark, well-ventilated space for drying.
- After drying, proceed with the curing process in sealed jars for several weeks to enhance flavor and potency.
- Trimming:
- Trim excess leaves and stems from dried buds using sharp scissors.
- Manicure buds to enhance visual appeal and market value.
- Quality Control:
- Regularly inspect stored buds for any signs of mold or pests.
- Ensure proper humidity and temperature levels in storage to maintain quality.
- Record-Keeping:
- Keep detailed records of the harvest date, strains, and any notable observations.
- This information is valuable for refining cultivation practices in future cycles.
- Waste Management:
- Dispose of leftover plant material responsibly, following local regulations.
- Consider composting or recycling plant waste where feasible.
Frequently Asked Questions
Q1: What is Rockwool, and why is it used for cannabis cultivation?
A: Rockwool is a mineral wool substrate made from basalt rock and chalk. It is widely used in cannabis cultivation due to its excellent water retention, aeration properties, and inert nature, providing a stable and supportive medium for plant growth.
Q2: How do I prepare Rockwool for cannabis cultivation?
A: To prepare Rockwool, soak it in pH-adjusted water or a mild nutrient solution, ensuring it is thoroughly saturated. Allow excess water to drain, leaving the Rockwool moist but not waterlogged, creating an optimal environment for seed germination or cutting rooting.
Q3: Can Rockwool be reused, and how do I clean it?
A: Yes, Rockwool can be reused with proper cleaning and sterilization. After harvesting, remove plant material, rinse the Rockwool with water, and sterilize it through methods like heat sterilization or soaking in a diluted hydrogen peroxide solution.
Q4: What are the advantages of using Rockwool in hydroponics?
A: Rockwool offers excellent water retention, aeration, and pH stability. It is sterile, preventing the growth of harmful pathogens, and provides a consistent medium for plant growth. Its versatility makes it suitable for various hydroponic systems.
Q5: How do I prevent and manage pH fluctuations in Rockwool systems?
A: Regularly monitor the pH of nutrient solutions and adjust as needed using pH-up or pH-down solutions. Maintaining a pH range of 5.5 to 6.5 is crucial for nutrient availability and plant health.
Q6: What are common challenges in Rockwool-based cannabis cultivation?
A: Challenges may include overwatering, improper pH levels, and nutrient imbalances. Additionally, careful disease prevention and monitoring are essential to address potential issues such as root rot or mold.
Q7: Can I use Rockwool for both seed germination and cloning?
A: Yes, Rockwool is suitable for both seed germination and cloning. It provides a consistent and sterile environment for seeds to sprout and offers excellent support for the rooting of cuttings.
Q8: Are there alternatives to Rockwool for cannabis cultivation?
A: Yes, alternatives include coco coir, perlite, and vermiculite. Each has its advantages, and the choice depends on factors like water retention, aeration, and the specific needs of the cultivation system.
Q9: How do I prevent pests and diseases in Rockwool systems?
A: Implementing sterilization practices, maintaining proper drainage, and following integrated pest management (IPM) strategies are crucial. Regular monitoring, quarantine procedures for new plants, and a clean environment contribute to pest and disease prevention.
Q10: Can Rockwool be recycled, and how should it be disposed of?
A: Yes, Rockwool can be recycled. Many recycling facilities accept Rockwool for processing. When disposing of it, check local regulations, and if recycling is unavailable, consider using it in construction or landscaping projects.

