

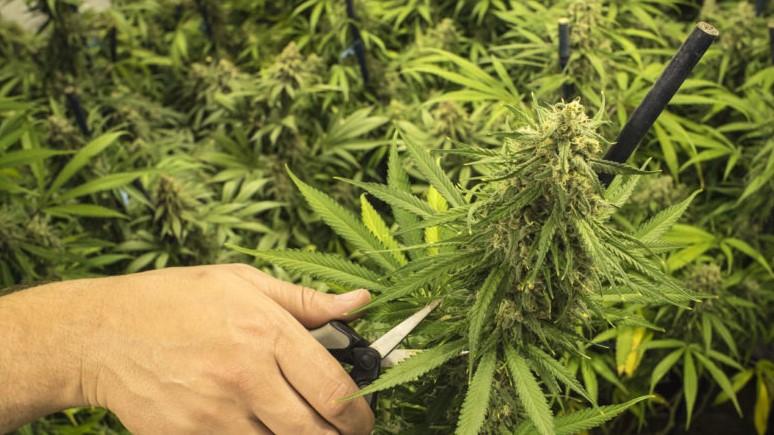
Brown hairs? Milky trichomes? When and how to harvest autoflowering cannabis plants?
The best time to harvest autoflowering plants depends on factors such as proper flushing and the desired effect. Every plant is different and the only way to be sure is to take into account all the signs your plant is giving you. Note in particular the colour of the hairs (pistils) and the condition of the trichomes.
After you flush your autoflowering plants properly, there is a “harvest window”. That describes the time when the plants are ready to harvest. You also have to decide when to harvest your autoflowering plants. There are several things to consider and depending on when you harvest in this harvest window you can achieve a different type of effect. Read on to learn when is the best time to harvest autoflowering cannabis.
When is my autoflowering plant ready for harvest?
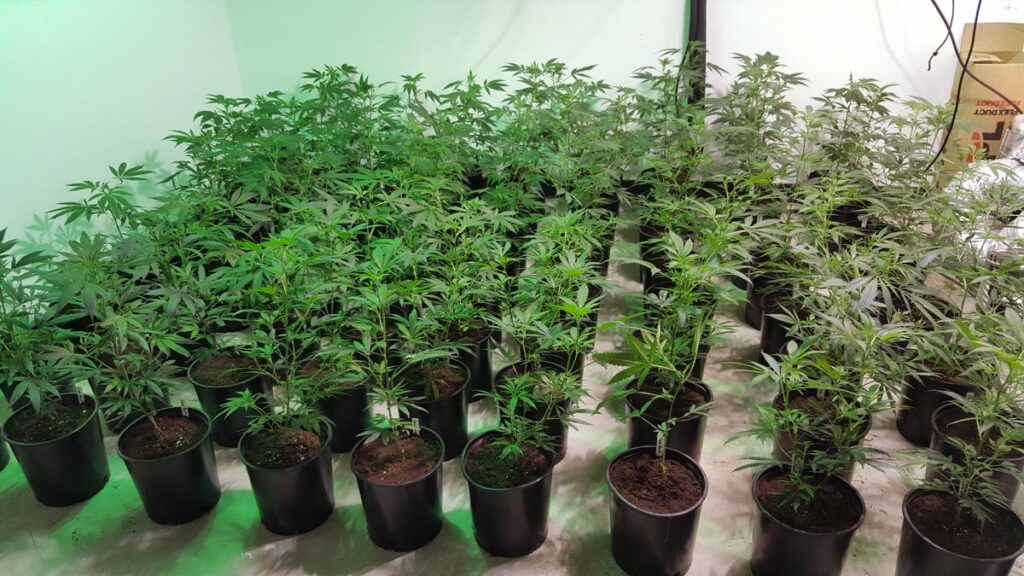
It doesn’t matter if you grow indoors or outdoors, the time comes when the plants are ready to harvest.
Well, harvesting itself isn’t hard at all. When you’re a first-time grower it can be difficult to know exactly when to harvest it. Depending on the strain ( Indica or Sativa dominant) and whether it’s an autoflowering strain or a photoperiod strain, it can take much longer or less time.
| Average time from Seed Germination to Harvest | ||
| Type: | Autoflowering strains | Photoperiod strains |
| Sativa | 10 weeks | up to 16 weeks |
| Indica | 8-9 weeks | around 12 weeks |
The best time to harvest cannabis depends on a combination of factors and the effect you want to achieve. The harvest time can be pushed back a bit if you want to flush your plants properly (washing out the soil to get fertilizer residue out of the plant) or if you want to achieve a more or less Indica-like effect.
Again, if you prefer a more Sativa-like effect, earlier harvest in the harvest window is desirable. So it also depends on the type of effect you prefer.
Seasonal harvest planning
Planning the harvest according to the seasons depends on the location (place of residence) and knowledge of the expected weather. For example, in summer you can get up to 15 hours of sunlight, but when autumn comes, the amount of sunlight decreases drastically.
Reducing the amount of light per day (to 12 hours per day) triggers flowering in photoperiod strains, i.e. the plants switch from the vegetative phase (growth) to the productive phase (flowering). Autoflowering strains, however, are exempt from this light cycle and will flower automatically after a certain age (size).
However, depending on when you grow your autoflowering plants, more light per day can result in a higher yield and less light per day can result in a lower yield as a result.
Planning the harvest according to seasons
The best way to stay in control is to create a grow calendar before you germinate your seeds. In some places, there can be as little as 9.5 hours of sunlight per day in winter. So by planning ahead you can get more yields and know when to harvest your plants.
The best time of day to harvest your autoflowering plants is early in the morning, before sunrise. If you can, leave your plants in the dark for 48 hours before harvest. Leaving your plants in complete darkness for up to 48 hours will let your plant know that it is about to die and it will make one last attempt to produce more trichomes, resulting in a better (more potent) harvest.
This also applies to the plant grown indoors, but since you’re growing indoors, you don’t need to harvest before sunrise. You can simply turn off the lights in your grow room and leave the plants there in the dark for about 2 days.
The Vegetative Phase: week 1-5
Before you look for signs that your plant is fully mature, it needs to go through the entire vegetative phase. This begins as soon as your plant begins photosynthesis. From week 1 to week 5 for autoflowering strains.
In the vegetative phase (also known as the growth phase ) your plants only develop their structure (leaves, trunk and stalks). Although they don’t produce flowers at this stage, this is very important because at this stage your plant will grow the leaves necessary for photosynthesis and develop the branches and stems that will support your plant and flowers.
Without a proper vegetative period, even the branches can break off as the buds get thick and mature, and if the plant doesn’t grow enough, that will affect the yield as well.
Before your autoflowering plants are in the “harvest window,” the buds must first develop and mature. This begins when the plant enters pre-flowering (after around weeks 3-5) and can last up to 5 weeks (depending on the strain).
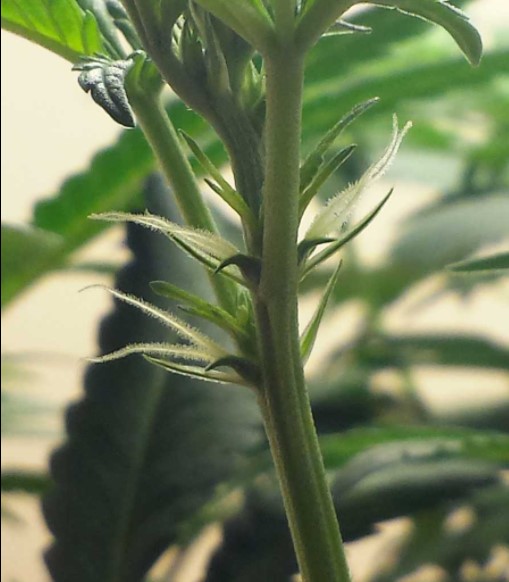
Pre-flowering
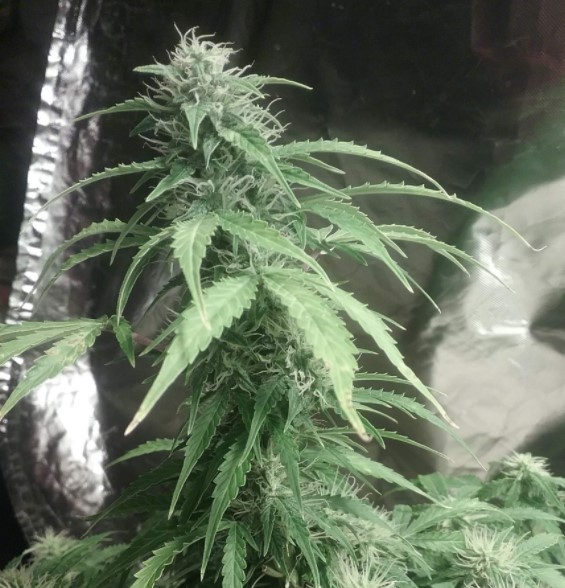
Around week 3-5, your autoflowering plant will enter pre-flowering and you will see stigmas (white hairs) emerge from the pistils. The pistils contain the ovule, style and stigma and are responsible for producing the seeds when pollinated (by male plants).
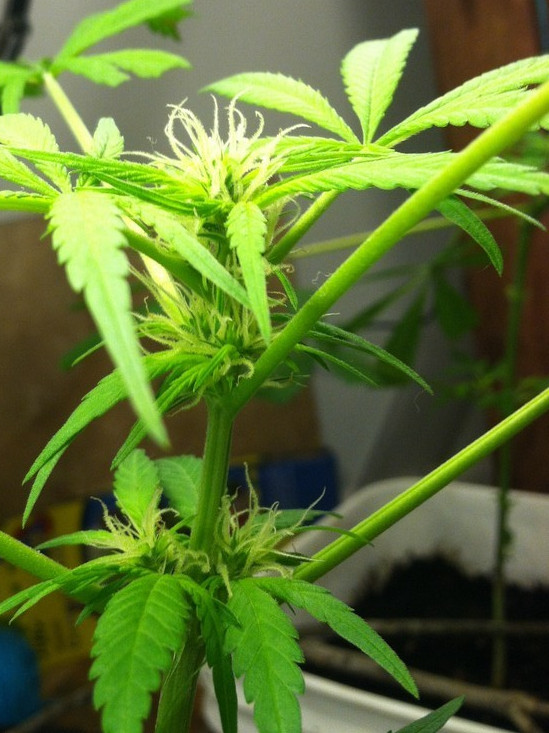
Second Week of Flowering
In the second week of the flowering phase, the autoflowering plant has already developed many buds and many stigmas (white hairs) can already be seen. The buds are now getting bigger and thicker every day.
In this phase, the plants usually start to smell quite strongly. If you are growing indoors and smell is a problem, it is recommended to install a carbon filter to eliminate the smell.
As you can see from the pictures, the buds start to develop a lot of pistils and the trichomes become more and more. Cannabis plants usually start smelling at some point in their life, but this can vary greatly depending on the strain.
Week 8
Third Week of Flowering
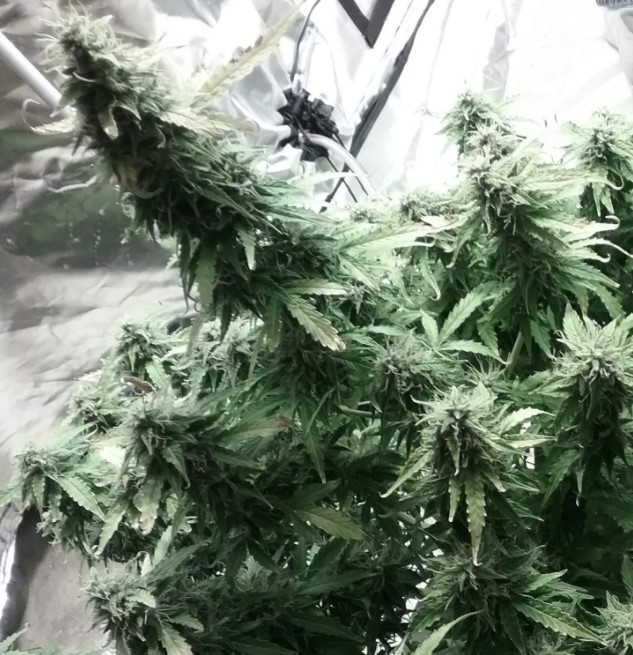
In the third week of flowering the buds start to mature, you may be able to see the tips of some stigmas turning brown. Also, the amount of trichomes becomes more visible, although the trichome heads have not yet reached their full potential in terpene and cannabinoid production.
By this week the buds should start to thicken, with some pistils already turning brown and some strains starting to develop different hues. Puffy calyxes are a sign that the plant is ready for harvest and something to look out for.
Fourth Week of Flowering
By the 4th week of flowering almost all of the stigmas (hairs) will have turned brown, the calyxes have become fat & bulging and there will be an abundance of trichomes on the buds and petals. The trichomes will contain plenty of terpenes and cannabinoids, but will not be fully mature and will not have reached their maximum potency.
This is the last week before harvest, you as a grower will be pleased with the density and aroma of the buds. At this stage, you are just waiting for the buds to be ready for harvest.
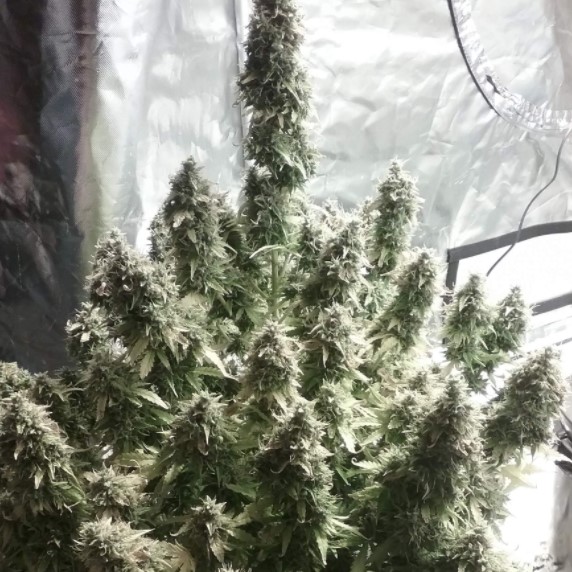
Week Five of Flowering
By week 5 of flowering, your plant should be fully mature, covered in trichomes and loaded with the cannabinoids you love.
After your plant has fully completed its life cycle, it is ready to be harvested. So if you’re wondering when to harvest autoflowering cannabis, now is the time. However, this does not mean that you can smoke it immediately. In order to properly smoke your buds and experience the flavours and effects, the buds still need to be properly dried and ideally fermented.
You can clearly see that some pistils are still white, but the majority is already brown and the buds are covered in milky trichomes, meaning the plant is ready to be harvested and has a stronger cerebral effect.
Flushing the Growing Medium
The first step to harvesting your autoflowering plants is to “flush” the plant. Flushing consists of washing the excess nutrients from the medium and roots. This is the best way to ensure buds aren’t too pungent, remove harmful chemicals, and have a delicious smell and taste. This process should be started 1-2 weeks before harvest, especially if you are using synthetic nutrients. This gives the plant time to use the remaining sugars and nutrients it has stored. If not flushed, excess amounts of both will end up in the end product and be burned with the bud, giving the smoke a harsh and harsh character.
How long to flush depends on the growing medium (soil, Rockwool, etc.), but the result is the same. Purged cannabis has an incomparable smoother smoke.
When you start the flush is up to you, but a surefire sign that an autoflowering plant is ready to go on this diet is yellowing of the leaves. If the fan leaves (large leaves) have been lush and green throughout the vegetative phase and the first few weeks of flowering, the first signs of yellowing will let you know it’s time to start flushing.
The Harvest Window
The harvest window refers to the last few days of the autoflowering cannabis plant’s life cycle. As soon as you start flushing, it starts: the leaves turn yellow, the plant stops absorbing nutrients and is almost ready to harvest.
Tip: When the plant is in the harvest window, you need to look at different parts of the flowers. You can achieve a more cerebral effect, a physical effect, or a mix of both if you know exactly when to harvest to get the desired effect.
You need to look at a combination of the following items in order to harvest at just the right time.
The stated harvest time of seed banks
Almost all seed banks will give you an approximate time in weeks for a particular strain to go from germination to harvest. This schedule depends on your growing method and should not always be used as a guide to harvest.
Of course, this information can be used as a guide, but remember that the breeders of these strains create premium growing conditions, so your cultivation of these strains will depend very much on the growing conditions you provide.
Depending on the light intensity, cannabis plants can take less or longer to harvest than indicated. So you should harvest the variety you are growing not when the dealer tells you to, but when the plant gives you the cues to do so.
When the plants use less water
When a cannabis plant is almost ready to harvest, it won’t absorb as much water as it’s in the process of maturing its buds and doesn’t need to grow anymore.
Throughout the life cycle of the plant, you can observe how long it takes for the soil (earth) to dry out.
When the plant matures and stops absorbing much water, that’s a sign that it’s almost time to harvest.
While this is not an exact statement, it should be taken into account, however, it should not be used as the sole parameter for harvesting buds.
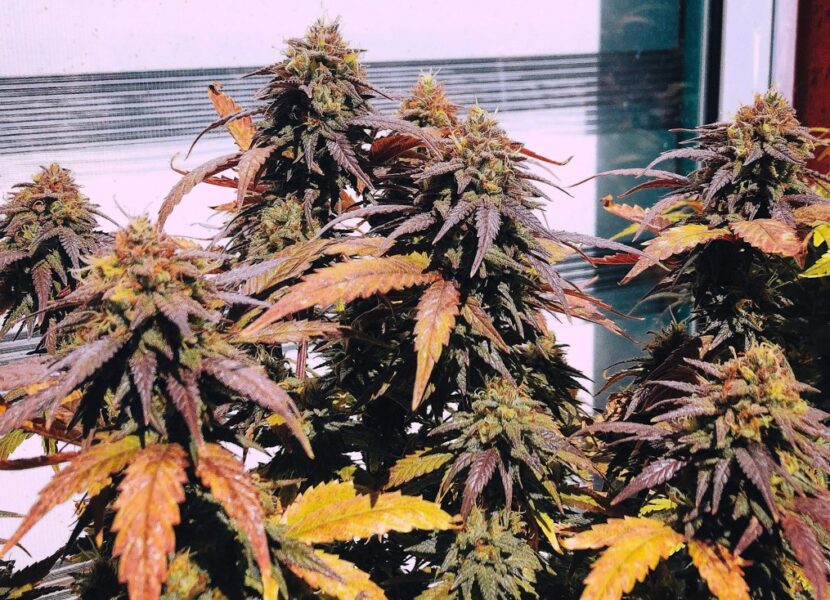
Yellowing and dying fan leaves
If the soil has been properly flushed out, at the end of an autoflowering plant’s life cycle you will see the leaves yellowing and dying. This means that the plant stops absorbing nutrients and concentrates energy on the buds.
(Note: It is normal for photoperiod plants to yellow their leaves at the end of their life cycle, even without rinsing out the soil)
Yellowing leaves are a sign of deficiency (or age) and are a problem at any other stage, but in the last few weeks, it’s perfectly normal. And it means that the excess nutrients have been successfully removed and the autoflowering plants are ready to be harvested.
Swollen Calyx
Calyxes are part of a cannabis plant that protects the reproductive organs and forms the flower. They hold the seeds when a plant is pollinated and are the first sign of flower formation, starting out as a bunch of small calyx-shaped leaves and growing larger until the flowers are fully formed.
As you approach harvest time, you will notice the calyxes becoming round and bulging. This is another sign that the plant is getting mature.
The Colour of the Stigma
Pistils grow from the stigmas (as mentioned above) and they can be a sign that the plant is fully mature. These long, hair-like organs on the surface of the flower are initially whitish-green in colour and darken to brown and red over time.
This sign should not be used as a rule with autoflowering strains as some autoflowering strains can have brown pistils and still take a few weeks to harvest.
The stigmas are the part of the cannabis plant that collects the pollen to produce seeds. If not pollinated they will turn brown and wilt, when around 60-70% of the pistils are brown it means a plant has reached the end of its life cycle and is ready or close to harvest.
This method is easy to perform and doesn’t require any special equipment, but it’s not the most accurate or reliable. New pistils can appear overnight, delaying harvest time. Some strains also tend to produce dark-coloured pistils regardless of how ripe they are.

The condition of the trichomes
The sticky trichomes basically consist of a stem and a head or cap, they contain terpenes and cannabinoids that are produced in the head of the trichomes and are responsible for the aroma of a plant.
The smell of a cannabis plant becomes more intense during the flowering phase as there are more trichomes on the plant and when you reach the harvest window the trichomes also go through a maturation process.
A better indication of plant maturity than looking at stigmas is to look at the trichomes. The sticky resin crystals are found on buds as they age. These resin crystals contain most of the THC and other cannabinoids.
The colour of the trichomes is considered the standard indicator to identify the right time to harvest the cannabis plant. When your plant is ready to be harvested, the trichomes start to wither too slowly, the cannabinoids metabolize or degrade, and depending on when you harvest them, you get a different effect from the end product.
Cannabis trichomes harvest time
Although you can view the trichomes without any equipment (magnifying glass), a simple magnifying glass should be enough to get a good look at the plant’s trichomes. However, professional growers will most likely invest in a quality jeweller’s loupe to get a better look at the trichomes.

Professional growers take this a step further and often use digital microscopes to get the best view of the buds. Depending on the laws where you live, you may find such microscopes in grow shops or cannabis dispensaries. Customers can use these to ensure the cannabis has been properly grown and harvested prior to purchase.
Under the microscope, trichomes appear like mushrooms made of crystal-clear, hand-blown glass. As the plant approaches harvest time, their transparent appearance becomes cloudy, and as they mature even longer, they turn amber. If this is your first grow, it will take a while to learn to tell them apart.
Early harvest and late harvest
What happens if you can’t harvest as planned and have to postpone your harvest date?
If for some reason you are forced to harvest your plants sooner or later, either the trichomes are not fully mature or they are already overripe and already breaking down their active compounds.
Depending on whether you harvest earlier or later, the mode of action will also change, not just the potency, so you should look at your plant and decide what is best for your case.
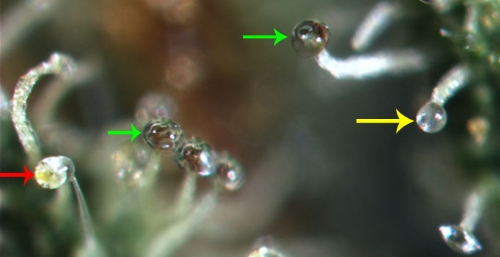
| Do not harvest when most of the hairs are still white and just sticking out | Harvest when at least 40% of the white hairs have turned and… | ||
| Clear trichomes(green arrows) | Trichomes 50% clear / 50% milky | Mostly milky trichomes(yellow arrow) | Milky trichomes turn amber(red arrow) |
| Low cannabinoid content (THC, CBD, CBN) | Moderate THC content | Highest THC content | A little less THC, more CBN |
| Doesn’t have enough potency yet and harvesting at this point will affect the quality of the final yields | The buds are still getting bigger, the smell of the strain hasn’t fully developed yet. Harvesting at this stage tends to produce a more energetic or “cerebral” high. | 50-70% of white hair has discoloured. When most of the trichomes are milky, you will get the most intense high with the greatest euphoria and pain-relieving effects. | 70-90% of white hair has discoloured. When trichomes have turned amber, cannabis tends to produce a relaxing, narcotic high. |
Earlier harvest
So if something happens that forces you to harvest your plants sooner or later, the plants may not reach their full potency or the effect may be different. If you harvest too early, the trichomes won’t be fully mature and the effect won’t be as strong. Now let’s look at how early harvesting impacts the ingredients and effects based on trichomes.
Immature or clear trichomes
Immature or clear trichomes are not strong because cannabinoids are not yet fully developed. This means that they have a weaker psychoactive effect. Avoid harvesting at this stage if possible, but keep an eye out as it won’t be long before the trichomes turn cloudy.
In the last few weeks of flowering and even on harvested cannabis buds, the trichomes can post-ripen and turn cloudy or amber in a few days. So keep an eye on them so you harvest at the right time.
Mature or cloudy trichomes
When the trichomes are mature or cloudy, they are at their highest potency. You should harvest the plants now if you want a cerebral high. Keep in mind that it is not possible for all trichomes to mature as the plant will continue to produce new trichomes until it is harvested.
To achieve this effect, you can harvest the plants when around 85% of the trichomes on the plant are cloudy, with the other 15% being a mix of amber and clear trichomes.
If you harvest late, the trichomes will begin to age and as they turn amber, the THC will begin to convert to CBN, resulting in an Indica – like physical effect.
Even though the trichomes have gone from cloudy to amber, the plants are still within the limits of high potency, but since the THC has turned into other cannabinoids, the effect will have changed as well.
This isn’t usually a problem if you’re aiming for a potent Indica high, but timing your harvest is crucial if you’re hoping for a Sativa effect.
Overripe or amber trichomes
Overripe trichomes are those that have turned amber because the THC has converted to CBN. Although not desired by many, some growers prefer a more physical and narcotic effect from the plant.
Remember that you can harvest your plants whenever you want. Knowing the effects of clear, cloudy, and amber trichomes can help you harvest your plants effectively to achieve the desired effect. You don’t necessarily need to harvest when the trichomes are 85% cloudy or amber.
For example, you can harvest cannabis when the trichomes are 50% amber and 50% cloudy for a balanced effect, or in any ratio, you want as long as you don’t harvest too early.
In summary
Knowing when to harvest autoflowering cannabis isn’t an exact science, but these rules should help you harvest autoflowering plants effectively. For the best results, you should combine the methods outlined above.
If you want to harvest THC-rich buds, you should harvest when 50-70% of the pistils (hairs) have changed colour and most trichomes have turned cloudy. This is the standard indicator of the best time to harvest cannabis.
We hope that after reading this article you’ve got a good idea of when to harvest autoflowering cannabis.
Also, remember that the cannabis harvest does not end with the harvesting of the buds; The process of harvesting cannabis also includes drying and fermenting (curing). These processes are also important when growing cannabis. If you have any questions or problems, please feel free to leave us a comment below!
Thanks for your blog, nice to read. Do not stop.