
Indulging in a delicious cake is one of life’s simplest pleasures, but have you ever considered adding a little something extra to take your dessert game to the next level? Imagine biting into a rich, decadent cake that not only satisfies your sweet tooth but also delivers a subtle yet potent buzz. Yes, we’re talking about the ultimate combination of two of life’s greatest pleasures: weed and cake.
If you’re ready to take your baking skills to new heights, you’re in luck because we’re about to reveal the secrets to making the perfect weed cake. So, grab your apron and let’s get started on this sweet journey that will tantalize your taste buds and lift your spirits.
I. Decarboxylation of your Weed
- What is Decarboxylation?
- Why Decarboxylation is Important in Making Weed Cake
- Steps to Decarboxylate Your Weed
- Ingredients Needed
- Step-by-Step Instructions on Making Weed Cake
- Tips for Baking the Perfect Weed Cake
III. Things to Know Before Eating Weed Cake
- Proper Dosage
- How Long it Takes to Feel the Effects
- Possible Side Effects of Eating Weed Cake
- Precautions to Take When Consuming Weed Cake
Decarboxylation of your Weed
If you’re planning to make weed cake, one of the most important steps is decarboxylation. Decarboxylation is the process of heating cannabis to activate the THC and other cannabinoids in the plant. Without decarboxylation, the weed won’t have the psychoactive effects that make it so desirable.
What is Decarboxylation?
When cannabis is fresh, it contains THCA (tetrahydrocannabinolic acid), which is not psychoactive. In order to activate the THC, the plant material needs to be heated to a certain temperature. This process is called decarboxylation, and it converts THCA into THC. Decarboxylation also activates other cannabinoids, such as CBD, CBN, and CBG, which can have a variety of therapeutic effects.
Why Decarboxylation is Important in Making Weed Cake
If you want your weed cake to be potent and effective, decarboxylation is essential. Without it, the THC in the cannabis won’t be activated, and you won’t get high from eating the cake. Decarboxylation also helps to ensure that the cannabinoids are evenly distributed throughout the cake, so you get a consistent dose with each serving.
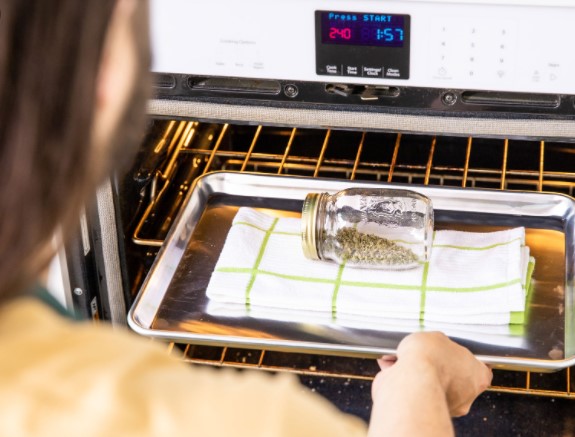
Steps to Decarboxylate Your Weed
Decarboxylation is a simple process that you can do at home with just a few tools. Here’s how to do it:
- Preheat your oven to 240°F (115°C).
- Grind your cannabis buds using a grinder or food processor.
- Spread the ground cannabis in a thin layer on a baking sheet lined with parchment paper.
- Place the baking sheet in the preheated oven and bake for 30-40 minutes, stirring the cannabis every 10 minutes to ensure even heating.
- Once the cannabis is lightly browned and fragrant, remove it from the oven and let it cool.
- Once the cannabis is cool, you can use it to make your weed cake.
Now that you know how to decarboxylate your weed, you’re ready to move on to the next step: making your weed cake.
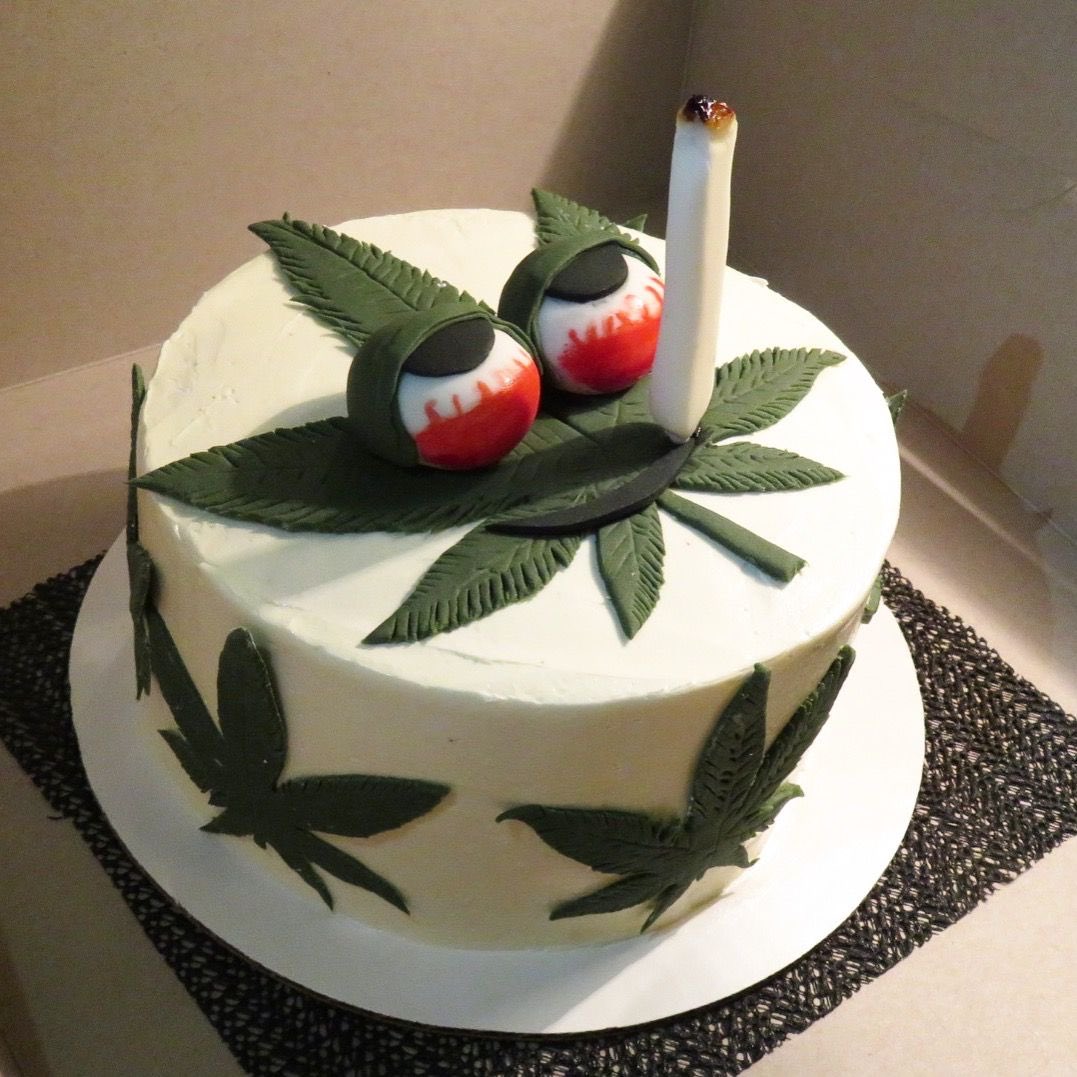
How to Make a Weed Cake
Recipe:
Making a weed cake is similar to making a regular cake, with the addition of decarboxylated weed. Here’s how to make a delicious and potent weed cake using the recipe provided:
Ingredients:
- 1 3/4 cups of flour(For a gluten-free option, you could substitute the 1 3/4 cups of flour with an equal amount of almond flour or coconut flour.)
- 3/4 teaspoon baking soda
- 1/4 cup of granulated white sugar
- 3/4 cup of brown sugar
- 1/2 teaspoon of salt
- 1/2 cup of cannabutter or 10 grams of decarboxylated and ground cannabis buds
- 1 egg
- 1 teaspoon of vanilla extract
- 1 cup of chocolate chips
- 1/2 can of chocolate frosting
Equipment:
- Mixing bowl
- Mixing spoon or spatula
- Baking pan
- Parchment paper or non-stick spray
- Casserole dish or baking tray
- Grinder
- Hand or electric mixer
Instructions:
- Preheat your oven to 350°F (180°C). Melt your cannabutter in the oven or on the stovetop. If you have decarboxylated weed, melt regular butter in the microwave for 10-20 seconds instead.
- Soften the chocolate chips in a casserole dish over low heat to prevent burning. While the chocolate is melting, mix the eggs and sugar in a mixing bowl until the mixture is fluffy. Then, add milk and mix again.
- Add 1/2 teaspoon of salt to the mixture, and then slowly add the flour, stirring until the dough becomes smooth. You can use an electric mixer for faster and easier mixing.
- Add the melted butter and decarboxylated weed or cannabutter to the bowl, followed by the dried fruits. You can also melt regular butter in a pan and mix it with the ground weed before adding it to the batter.
- Next, pour the melted chocolate into the mixture and mix everything thoroughly with a spatula or electric mixer.
- Grease your baking pan or line it with parchment paper. Pour the cake batter into the pan and spread it evenly. Bake the cake for 25-30 minutes, keeping an eye on it to avoid burning. To check if the cake is ready, insert a toothpick into the center. If it comes out clean, the cake is ready. If not, bake for a few more minutes.
- Once the cake is done, allow it to cool on a wire rack in the pan for about 20 minutes. Then, remove it from the pan and let it cool for another 20 minutes.
- You can decorate your cake with frosting and melted chocolate. If you want to layer the cake with cream, cut it into two parts and add the cream in the middle before joining the parts and layering the outside with frosting.
- If you’re short on time, you can use a boxed cake mix and substitute cannabutter for regular butter. Alternatively, you can add decarboxylated marijuana to the cake mix. Enjoy your delicious and potent weed cake, but remember to consume it responsibly and in moderation.
*Enjoy your delicious and potent weed cake, but be sure to start with a small serving and wait at least an hour before consuming more, as the effects of edibles can take a while to kick in.

Things to Know Before Eating Weed Cake
Before indulging in a delicious slice of weed cake, there are a few things you should know to ensure a safe and enjoyable experience.
The potency of weed cake can vary depending on the amount and quality of the cannabis used, so it’s important to start with a low dose and work your way up. A good rule of thumb is to start with 10mg of THC and wait at least an hour before consuming more. It’s also important to know the potency of the cannabis used and calculate the dosage accordingly.
- How Long it Takes to Feel the Effects
Unlike smoking or vaping, edibles take longer to kick in and the effects can last for several hours. It can take anywhere from 30 minutes to 2 hours to feel the effects of weed cake, so be patient and don’t consume more until you know how it’s affecting you.
- Possible Side Effects of Eating Weed Cake
Consuming too much weed cake can result in unpleasant side effects such as nausea, vomiting, dizziness, and anxiety. It’s important to start with a low dose and consume in moderation to avoid these side effects.
- Precautions to Take When Consuming Weed Cake
If you’re new to edibles or have a low tolerance, it’s best to consume weed cake in a safe and comfortable environment with people you trust. Avoid driving or operating heavy machinery while under the influence of weed cake, and be sure to store any leftovers in a secure place away from children and pets.
In summary, weed cake can be a delicious and enjoyable way to consume cannabis, but it’s important to start with a low dose, be patient, and consume in moderation to avoid any unpleasant side effects.
Here’s a simple and delicious icing recipe that would complement your weed cake:
Ingredients:
- 1/2 cup of unsalted butter(cannabutter to double your potency), softened
- 2 cups of powdered sugar
- 1/4 cup of cocoa powder
- 2-3 tablespoons of milk
- 1 teaspoon of vanilla extract
- Pinch of salt
Directions:
- Using an electric mixer, cream the butter in a mixing bowl until smooth and fluffy.
- Add powdered sugar, cocoa powder, vanilla extract, and salt to the mixing bowl.
- Beat the mixture at low speed until well combined.
- Increase the mixer speed to medium and gradually add milk until the icing is smooth and spreadable.
- Once the icing is at a desired consistency, use a spatula to spread it evenly over the cooled cake.
Note: You can adjust the amount of powdered sugar, cocoa powder, and milk according to your preference. You can also add food coloring or other flavorings to make the icing more appealing.