Discovering mold on soil amidst your cannabis cultivation might send shivers down your spine. Yet, fear not, for surface-dwelling mold typically proves innocuous, merely a superficial nuisance. However, its presence hints at deeper issues like overwatering or excessive moisture. Delve into the secrets of soil mold, uncover its mysteries, and master the art of eradication and prevention.
Table of contents
What does “Beneficial” Mold look like?
What does Bad Mold on Soil look like?
Mistaking Lime Scale Deposits for Mold on Soil
The Ramifications of Mold Infestation
How to get rid of Mold on Soil
Bonus Tips for Mold Prevention
Mold on Soil
When we talk about mold on soil, we’re delving into the world of fungal growth that can appear on the surface of the soil where plants are growing. This might sound alarming at first, but not all molds are harmful. In fact, there are different types of molds, some of which can actually benefit your plants while others can cause problems.
The “good” molds, such as Mycorrhiza and Trichoderma, form beneficial relationships with plants, aiding in nutrient uptake and protecting against harmful pathogens. These molds typically have a light grey-white to yellowish-green coloration.
On the other hand, the “bad” molds, like Pythium and Fusarium, are harmful because they are parasitic and can cause diseases such as root rot. These molds are typically detrimental to plant health.
So, before jumping to conclusions and taking action to remove mold from your soil, it’s important to understand whether it’s the beneficial type or the harmful type. This knowledge will help you determine the best course of action to ensure the health and vitality of your plants.
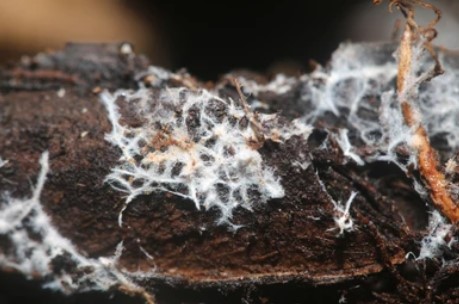
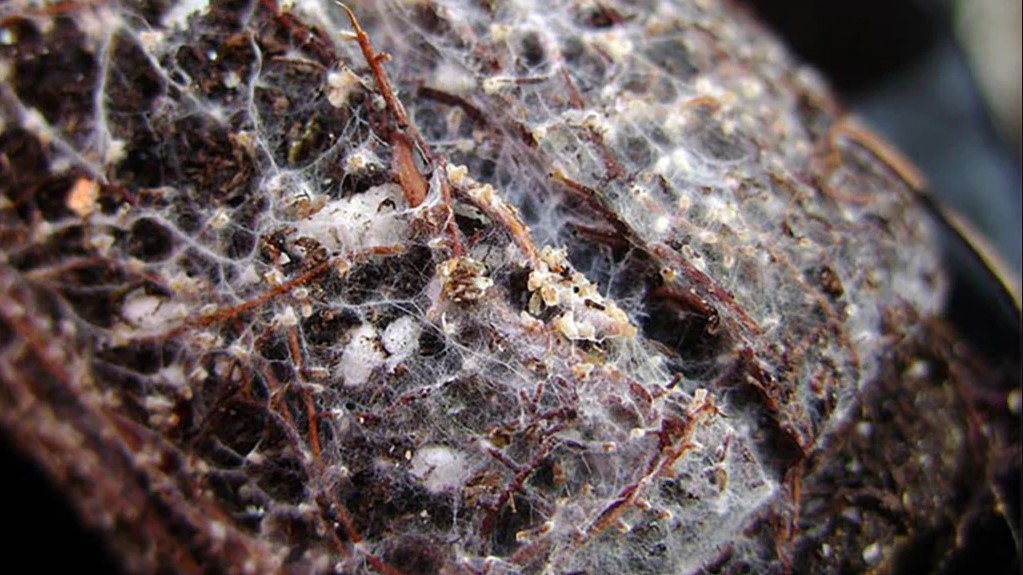
“Beneficial” Mold
First things first: beneficial mold thrives under specific conditions. It typically emerges in organic growing environments where mycorrhiza or Trichoderma are present in the soil or fertilizer mix. Take, for instance, Green House Feeding’s organic fertilizer, which explicitly mentions the potential formation of beneficial fungi on the soil. In fact, removing this fungus is strongly advised against.
High-quality organic soils often showcase mycorrhizal fungus upon opening the package. Alternatively, it may manifest over time or upon using the soil in pots. Mycorrhiza typically exhibits a whitish, gray, or yellowish-green hue, making it easily distinguishable from the soil. Unlike harmful molds, mycorrhiza engages in a mutually beneficial relationship with plants.
This symbiotic fungus aids in converting organic matter in the soil into essential trace elements readily absorbed by plant roots. Moreover, it fortifies the root system and enhances water and nutrient uptake. In exchange, plants provide mycorrhiza with carbohydrates.
Upon close examination, you can discern the delicate, hair-like fungal threads intricately weaving through the soil. In truth, these fine threads permeate the entire earth, a testament to the symbiotic dance between fungi and flora.
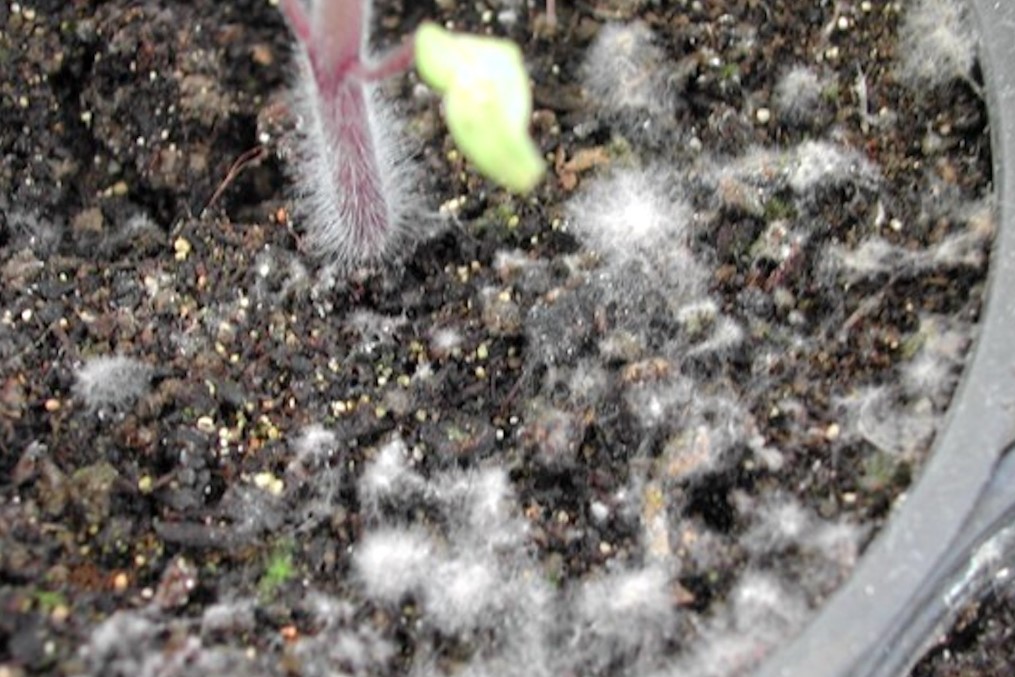
What does White Mold on Soil (Bad Mold) look like?
Detecting harmful mold in soil can be crucial for the health of your plants. A clear indicator of trouble is the unexpected appearance of mold. This typically occurs when using “non-living” soil and mineral fertilizers devoid of beneficial fungi like mycorrhiza. In such cases, the emergence of mold on the soil surface is often a red flag, signaling potential issues. It’s imperative to address this promptly to prevent further complications.
But how can you differentiate between beneficial and harmful molds, especially in organic growing environments? One helpful cue is color. Harmful molds often exhibit a distinctive blue-gray hue, making them stand out against the natural backdrop of the soil. In contrast, mycorrhiza, a beneficial fungus, tends to present itself in shades of white or yellowish-green.
Identifying and removing harmful mold is essential for maintaining a healthy growing environment. By staying vigilant and recognizing the telltale signs of trouble, you can take proactive measures to safeguard your plants from potential harm.
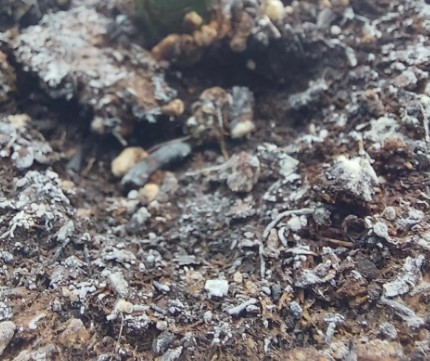
Mistaking Lime Scale Deposits for Mold on Soil
For growers residing in regions with hard water rich in lime, encountering limescale or mineral deposits on the soil surface is not uncommon. Unfortunately, these deposits can bear an uncanny resemblance to mold, leading to confusion and unnecessary concern.
It’s crucial to note that limescale deposits on soil pose no threat to plant health. Though unsightly, they are harmless. These deposits tend to be more prevalent in environments with elevated ambient temperatures, especially when plants experience warm root zones. Under such conditions, irrigation water percolates through the potting medium, evaporates at the surface, and leaves behind dissolved minerals.
Removing limescale deposits from the soil is a straightforward process. Simply lightly scrape the surface of the soil to eliminate the deposits, then replenish it with fresh soil. Cooling the root zone is essential to prevent further accumulation. This can be achieved by reducing temperatures in the grow tent if necessary. Additionally, ensuring adequate airflow around the pots is vital. Positioning circulating fans to direct cooler air towards the pots helps mitigate the buildup of limescale deposits, promoting a healthier growing environment for your plants.
The Ramifications of Mold Infestation
While mold on the soil surface might seem like a mere aesthetic nuisance, it can signify underlying issues that demand attention. Its presence often serves as a warning sign of potential overwatering or excessive humidity levels within the grow tent.
Furthermore, mold can hint at suboptimal ventilation within the grow box, exacerbating the problem. Promptly addressing these factors is essential to nip potential complications in the bud. Ignoring mold growth may lead to more serious issues beyond surface contamination.
In essence, while mold may not directly threaten plant health, its presence should not be overlooked, serving as a cue to investigate and rectify underlying environmental imbalances.
Identifying Common Culprits
- Overwatering or Poor Drainage: Mold on soil frequently indicates waterlogged conditions, often stemming from overwatering or inadequate drainage in the pot. Compacted soil or the absence of drainage holes exacerbates this issue, providing a conducive environment for mold proliferation.
- Excessive Humidity: High humidity levels within the grow box can foster mold formation. Enclosed environments like mini greenhouses with sealed lids or pots covered with foil pose a heightened risk of mold infestation due to trapped moisture.
- External Introduction of Mold Spores: Mold spores are ubiquitous in the environment, dispersing through air, soil, and water. They can infiltrate the grow box from outside sources such as clothing, contaminated seeds and soil, or even through pets. Ventilation systems lacking filters also facilitate the ingress of fungal spores into the grow box, exacerbating mold issues.
How to get rid of Mold on Soil
Encountering mold solely on the surface of the soil shouldn’t trigger alarm bells, especially if you’ve incorporated mycorrhiza into the soil or are using a substrate rich in this beneficial fungus. In such cases, mold can naturally emerge and is typically harmless.
To get rid of surface mold on soil, a simple solution suffices: lightly scrape away the affected soil and replace it with fresh substrate.
However, the sudden appearance of mold often signals underlying issues, such as watering practices or inadequate ventilation within the grow box. Therefore, it’s crucial to conduct a thorough assessment and make necessary adjustments:
- Assess Watering Behavior: Review your watering regimen. If mold appears unexpectedly, it may indicate excessive moisture levels in the soil. Adjust watering frequency and volume accordingly, allowing the soil to partially dry between watering sessions (known as dryback).
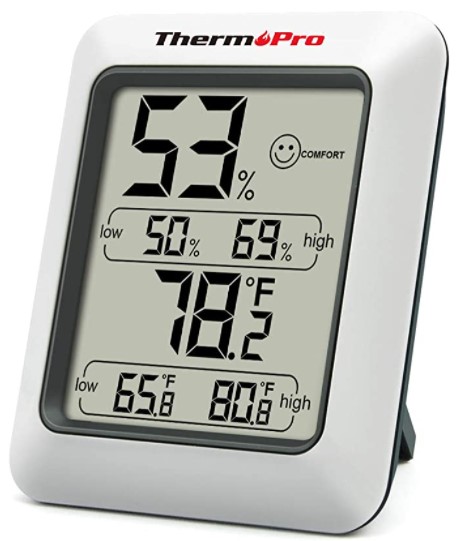
- Evaluate Ventilation, Humidity, and Temperature: Check the ventilation system and ensure adequate airflow within the grow box. High humidity levels can foster mold growth, so if levels are excessive, implement measures to reduce humidity. Additionally, maintain temperatures within the optimal range for plant growth. Refer to the table below for guidance on temperature ranges.
- Optimize Temperature and Humidity: If humidity levels are too high, take steps to lower them. Similarly, ensure that temperatures within the grow box remain within the optimal range. Consult the temperature range table for guidance.
- Monitor Temperature and Humidity: Keep a close eye on temperature and humidity levels, making adjustments as needed to create a favorable environment for plant growth.
By addressing these factors and maintaining optimal environmental conditions, you can effectively mitigate mold issues and foster a healthy growing environment for your plants.
How to Prevent Mold on Soil
Effectively ward off mold on soil with proactive measures:
- Maintain Optimal Temperature and Humidity Levels
- Ensure temperature and relative humidity (RLF) within the grow box remain within the optimal range. Additionally, monitor the temperature within pots, which may vary from ambient temperatures. Adjust ventilation to direct cooler air towards the pots if temperatures become excessive.
- Enhance Ventilation
- Improving airflow within the grow box can help prevent mold growth. Ensure adequate ventilation by using fans or air circulation systems to promote air movement.
- Practice Proper Watering Techniques
- Water plants judiciously, avoiding overwatering, which can contribute to soil moisture buildup and mold formation. Opt for pots with adequate drainage to facilitate proper water drainage.
- Maintain Cleanliness and Hygiene
- Regularly clean and sanitize equipment, grow containers, and surrounding areas to minimize the risk of mold contamination. Ensure proper hygiene practices to prevent the introduction of mold spores.
- Choose High-Quality Soil
- Selecting high-quality soil or substrate can help create a healthy growing environment and reduce the likelihood of mold infestation.
Optimal Temperature and Humidity Control
To prevent mold issues, maintaining optimal temperature and humidity levels within the grow box is crucial. Monitor both ambient and pot temperatures, making adjustments as necessary to create a favorable environment for plant growth.
Indoors, aim to maintain temperatures between 23 to 26°C during the growth phase. Relative humidity should ideally range from 40 to 70% during this stage. As plants transition to the flowering phase, humidity levels should be reduced to 40 to 50%. During late flowering, aim for a relative humidity level of around 40% to minimize the risk of mold formation.
Buds’ intricate structure can trap moisture, increasing the risk of mold development. Therefore, maintaining optimal humidity levels is vital throughout the growth cycle to mitigate mold risks effectively.
| Growth Phase | Optimal temperature | Optimal humidity |
|---|---|---|
| Germination & cultivation phase | 23 to 26°C | 40 to 60% |
| Vegetative phase | 20 to 30°C | 40 to 70% |
| Bloom phase | 18 to 26°C | 40 to 50% |
| End of the Bloom phase | 18 to 26°C | <40% |
| Temperature difference between light and dark phase | maximum 8°C |
Enhancing Ventilation
Adequate ventilation within the grow box is paramount to thwarting mold development. Here’s how to optimize airflow:
- Ensure Optimal Air Circulation:
- Confirm that air circulation within the box is optimal. If necessary, adjust the recirculation valve to a higher setting to increase airflow.
- Consider Additional Ventilation:
- If space permits, consider installing a second circulating air vent. Positioning two vents diagonally across from each other within the box and directing airflow towards each other promotes optimal circulation. This setup maximizes airflow, reducing the risk of stagnant air pockets where mold can thrive.
For more detailed insights into optimizing airflow and recirculation, refer to our comprehensive recirculation article. By prioritizing ventilation and implementing strategic airflow solutions, you can effectively minimize the risk of mold and create a healthier growing environment for your plants.
Proper Watering Practices: Avoiding Overwatering
To maintain healthy soil conditions and prevent mold growth, it’s crucial to water your plants correctly and avoid overwatering. Follow these guidelines for optimal watering:
- Ensure Soil Dries Between Watering:
- Avoid keeping the soil consistently wet. Allow the soil in the pot to partially dry out between each watering session. This prevents waterlogged conditions, which can promote mold growth.
- Utilize the “1/3 Rule” for Watering:
- The “1/3 rule” offers a simple yet effective approach to watering your plants. Follow these steps: a. Each time you water, provide approximately one-third of the pot’s volume in water or fertilizer solution. b. Water until drainage begins to flow out from the bottom of the pot. c. After watering, take note of the pot’s weight with the plant. This establishes the “fully watered” weight. d. When the pot’s weight decreases to approximately one-third less than the fully watered weight, it’s time to water again.
- Err on the Side of Underwatering:
- It’s better to water less frequently than too often and too much. Overwatering increases the risk of waterlogged soil and subsequent mold growth. Encourage dry intervals between watering sessions to promote healthier root development and prevent moisture-related issues.
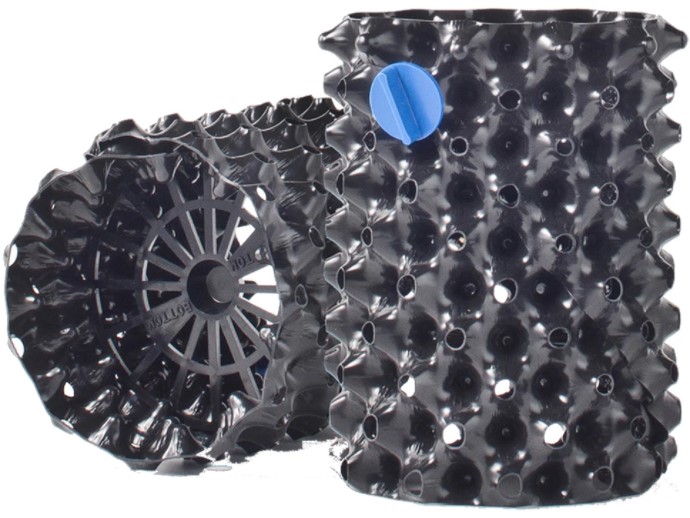
Optimizing Drainage: Selecting the Right Pots
To prevent waterlogging and the subsequent development of mold, it’s essential to prioritize optimal water drainage right from the start. This begins with the selection of suitable pots. When purchasing pots, look for those with ample drainage holes at the bottom to facilitate the immediate drainage of excess water during watering.
Consider using fabric pots (such as plant bags or “Smart Pots”) or airpots, as they offer superior drainage capabilities. These types of pots allow irrigation water to drain freely, reducing the risk of waterlogging and mold formation in the soil.
However, it’s crucial to note that plants should never be left sitting in water collected in saucers or trays. This stagnant water creates an ideal breeding ground for fungi and bacteria. Always discard any excess water from saucers to prevent moisture-related issues.
Prioritize Cleanliness and Hygiene Practices
Maintaining cleanliness during the cultivation process is paramount to minimizing the risk of mold development. Here’s how to uphold hygiene standards:
- Wear Protective Gear: Always wear nitrile gloves when handling plants to prevent the spread of contaminants. Regularly disinfect all tools, especially if they are also used in outdoor gardening or with houseplants, to eliminate potential fungal spores.
- Change Clothes and Shoes: Before entering the grow box, change into fresh clothing to prevent the introduction of fungal spores from the environment. Fresh shoes should also be worn to minimize the risk of contamination.
- Exclude Pets: Keep pets out of the grow box to prevent the introduction of fungal spores. Pets can inadvertently carry spores from the environment into the grow area, increasing the risk of mold development.
- Promptly Remove Organic Debris: Dispose of fallen leaves, branches, or other organic matter from the grow box immediately. Organic waste serves as a breeding ground for fungi and bacteria, posing a risk of mold infestation. Maintaining cleanliness within the grow box is crucial for mold prevention.
- Opt for Sterile Soil: Use sterile growing media, especially for seedlings, to minimize the risk of mold contamination. Sterile soil reduces the presence of harmful microorganisms and fungal spores, particularly important for the vulnerable seedling stage. Avoid reusing old potting soil or using soil of dubious origin, as they may harbor pests, fungal spores, and other harmful microorganisms.
Selecting High-Quality Soil
In addition to hygiene practices, soil quality plays a pivotal role in mold prevention. Here are key considerations:
- Ensure Adequate Water Drainage: Opt for loose and airy soil with good water drainage properties to prevent waterlogging and subsequent mold formation. Incorporating perlite into the substrate can improve soil structure and enhance drainage.
- Choose Trusted Brands: Use soil from reputable manufacturers such as FoxFarm or Biobizz to ensure quality and reduce the risk of contamination with fungal spores or pests. Poor-quality or improperly stored soil can introduce harmful microorganisms into the grow environment, leading to mold and other issues.
Bonus Tips for Mold Prevention
- Maintain Clean Equipment: Regularly clean and disinfect all equipment used in your grow operation, including pots, saucers, and tools like scissors and pipettes. Before each new grow cycle, conduct a thorough cleaning of the grow box and all equipment using alcohol or fungicidal disinfectants. This helps eliminate any potential sources of contamination and reduces the risk of mold infestation.
- Prioritize Post-Infestation Cleaning: If mold infestation occurs during cultivation, take immediate action to clean and sanitize all affected equipment. Mold spores can linger on contaminated pots and utensils, serving as catalysts for future mold outbreaks if not properly addressed.
- Opt for Proper Storage: Store equipment and unused growing materials in clean, dry environments to prevent contamination. Avoid storing items in damp or humid conditions, as this can promote mold growth on surfaces.
- Practice Personal Hygiene: Maintain personal cleanliness when working in the grow space. Wash your hands thoroughly before and after handling plants or equipment to prevent the spread of contaminants.
- Monitor and Maintain Environmental Conditions: Regularly monitor temperature, humidity, and airflow within the grow box to ensure optimal conditions for plant growth and minimize the risk of mold. Make adjustments as necessary to maintain stable environmental parameters.
- Use Beneficial Microbes: Consider incorporating beneficial microbes into your soil or hydroponic system. Beneficial bacteria and fungi can help suppress the growth of harmful pathogens, including mold, while promoting plant health and vigor.