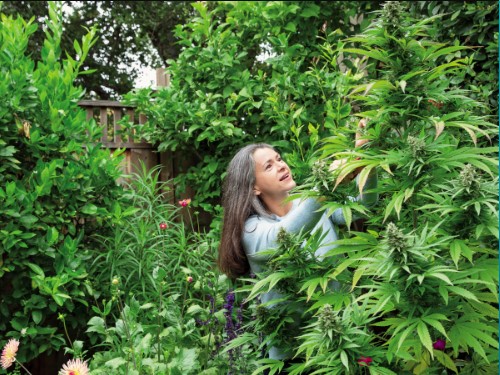
Growing cannabis outdoors is a rewarding and cost-effective way to cultivate your own supply of high-quality buds. With the right setup, you can optimize the environment for your plants, reduce costs, and achieve abundant harvests of sticky, sun-grown cannabis. In this comprehensive guide, we will walk you through the essential steps to create the best outdoor grow setup for cannabis.
Table of Contents
Preparing the Soil for Success
Selecting the Right Cannabis Strains
Transplanting Your Cannabis Plants
Providing Adequate Water and Nutrients
Protecting Your Plants from Pests and Diseases
Supporting Your Cannabis Plants with Staking
Harvesting and Curing Your Bountiful Buds
Choosing the Perfect Location
The location of your outdoor grow space plays a critical role in the success of your cannabis plants. Consider the following factors when choosing the best outdoor grow setup.
Climate
Cannabis plants thrive in specific climate conditions. Ideally, the daytime temperatures should range from 70-85°F (20-30°C) for optimal growth. However, cannabis plants can tolerate temperatures as low as 60°F (16°C) during the day and even cooler temperatures at night. Ensure that your location provides the necessary temperature range for healthy plant development.
Sunlight Exposure
Cannabis plants require ample sunlight to grow and produce high-quality buds. Look for a location that receives at least six hours of direct sunlight per day, for the best outdoor grow setup choose somewhere with full sun all day. Avoid areas with excessive shade or light pollution, as these can negatively impact plant growth and yield.
Wind and Air Circulation
Good air circulation is essential for preventing moisture-related issues and promoting healthy plant growth. Choose a location that offers a light breeze and adequate airflow while providing some protection from strong winds. Erecting windbreaks or installing protective barriers can help create a suitable microclimate for your plants.
Privacy and Security
Growing cannabis outdoors requires some level of privacy and security. Ensure that your chosen location is discreet and not easily visible to the public. If you live in an area with high crime rates or anti-cannabis sentiment, take extra precautions to secure your garden and deter potential theft or vandalism.
By carefully considering these factors, you can select a location that provides the best outdoor grow setup for your outdoor cannabis grow.

Preparing the Soil for Success
The quality of the soil in which your cannabis plants grow is crucial for their overall health and productivity. Follow these steps to prepare your soil for success:
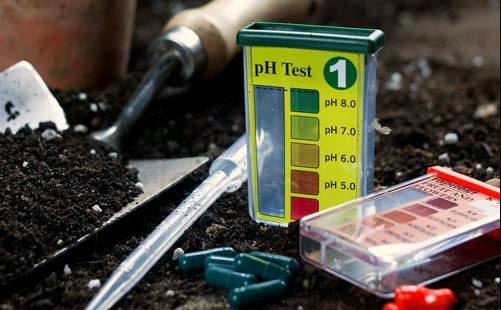
Testing the Soil
Assessing the pH levels in your cannabis soil is a breeze with the soil pH testing method using distilled water. Here’s how to do it effectively:
Step 1: Gather Your Gear Ensure you have these essentials on hand:
- pH testing kit or pH meter
- Distilled water
- Small containers for soil samples
- Mixing spoon or stick
Step 2: Sample Collection Grab soil samples from different spots in your growing area to capture pH variations. Use a trowel to gather samples from diverse depths, aiming for a representative mix that mirrors your soil’s overall condition. Avoid recently amended areas and remove any debris.
Step 3: Mix and Prep Combine the soil samples in a clean container and mix thoroughly. Add distilled water at a ratio of 1 part soil to 2 parts water. For instance, for 100 grams of soil, add 200 milliliters of distilled water. Stir well to ensure soil particles are fully suspended.
Step 4: Get Testing Now, test the pH of your soil-water solution according to your chosen method. Follow the instructions provided with your testing kit or pH meter. With a pH testing kit, add a few drops of the indicator solution to a sample and observe the color change. For a pH meter, dip the electrode into the solution and wait for a stable reading.
Step 5: Analyze the Results Interpret the pH reading in relation to the ideal pH range for cannabis plants. Typically, aim for a pH between 6.0 to 6.5, though slight deviations can be acceptable. Significant deviations outside this range may require corrective action. pH values below 5.5 or above 7.0 demand immediate attention to restore optimal pH levels.
Soil Amendments
Based on the results of your soil test, you may need to amend your soil to provide the optimal nutrient balance for cannabis growth. Soil amendments play a critical role in addressing any deficiencies and optimizing soil health for robust plant growth.
Organic Matter:
Organic matter, such as compost or well-rotted manure, is a cornerstone of soil fertility. These natural amendments enrich the soil with essential nutrients, improve its structure, and enhance moisture retention. Incorporating organic matter into your soil provides a sustainable source of nutrients, fostering healthy root development and microbial activity.
Mineral Amendments:
In addition to organic matter, mineral amendments like volcanic rock dust, perlite, and Oyster Shells can further enhance soil health. Volcanic rock dust provides a broad spectrum of minerals essential for plant growth, while perlite improves drainage and aeration in the soil. Oyster Shells add calcium and other trace minerals, promoting strong root development and overall plant health.
Nutrient-Rich Additions:
To provide a balanced nutrient profile, consider incorporating fish meal, bone meal, and bat guano into your soil mix. Fish meal is rich in nitrogen, phosphorus, and potassium, supporting vegetative growth and flowering. Bone meal contributes phosphorus and calcium, crucial for root development and flower formation, while bat guano offers high levels of nitrogen, phosphorus, and potassium, promoting soil fertility.
Beneficial Microorganisms:
Boosting soil biology with mycorrhizae can enhance nutrient uptake and plant resilience. Mycorrhizae form symbiotic relationships with plant roots, improving nutrient absorption and overall plant health. Adding mycorrhizae to your soil mix encourages robust root growth and nutrient assimilation, leading to healthier, more vigorous cannabis plants.
Biological Stimulants:
To further promote soil health, consider incorporating biological stimulants like compost tea. Compost tea is rich in beneficial microorganisms and nutrients, providing a natural boost to soil fertility and plant vitality. Applying compost tea to your soil enhances microbial activity, improving nutrient cycling and soil structure, ultimately supporting optimal plant growth and productivity.
Additionally, you may need to adjust the pH of your soil by adding lime to raise pH or sulfur to lower pH, ensuring that it falls within the range of 6.0-7.0 for cannabis.
Best Out Grow Setup – Super Soil Recipe:
| Ingredient | Quantity |
|---|
| High-quality potting soil. | 100 Gallons (380L) – 8 Large Bags |
|---|---|
| Worm Castings | 7 Gallons (28L) |
| Bat Guano | 5 Lbs.(2.2Kg) |
| Blood Meal Powder | 5 Lbs. (2.2Kg) |
| Fish Bone Meal | 2.5 Lbs. (1Kg) |
| Regular Bone Meal | 2.5 Lbs. (1Kg) |
| Alfalfa Meal | 3 Cups |
| Kelp Meal | 3 Cups |
| Oyster Shells | 3 Cups |
| Mycorrhizae | 2 tbsp. |
| Granular Humic Acid | 2 tbsp. |
| Diatomaceous earth | 2 Cups |
| Epson Salts | 3/4 Cup |
| Compost Tea mix | 2 tbsp.. |
Mix this recipe 6 months before use and let it ferment in Containers – mix with outdoor soil in a minimum 50-50 Ratio
Choosing Potting Soil or Raised Beds
If you prefer to grow your cannabis in containers or raised beds, selecting high-quality potting soil is essential. Look for potting mixes specifically formulated for cannabis cultivation or create your own by combining equal parts of compost, peat moss, and perlite. Potting soil should provide adequate drainage while retaining enough moisture for the plants.
By properly preparing your soil, you provide a solid foundation for healthy cannabis growth and development.
Selecting the Right Cannabis Strains
When choosing cannabis strains for your outdoor grow, consider the following factors:
Climate Adaptability
Different cannabis strains have varying degrees of adaptability to different climates. Some strains are better suited for warmer, sunnier environments, while others thrive in cooler, more temperate climates. Research and select strains that are known to perform well in your specific climate conditions.
Photoperiod or Auto-flowering
Cannabis plants can be photoperiod-dependent or Auto-flowering. Photoperiod-dependent strains require a specific light cycle (usually 12 hours of darkness and 12 hours of light) to initiate flowering. Auto-flowering strains, on the other hand, transition to the flowering stage automatically based on their age, regardless of light conditions. Consider your climate and the length of your growing season when choosing between these two types of strains.
Indica, Sativa, or Hybrid
Cannabis strains are typically classified as Indica, Sativa, or hybrid, based on their genetic characteristics. Indica strains tend to be shorter, bushier, and have a more sedating effect. Sativa strains are taller, with longer flowering times and a more energizing, cerebral high. Hybrids combine traits from both Indica and Sativa strains, offering a balanced experience. Consider your personal preferences and desired effects when selecting the right strain for your outdoor grow.
By choosing the right strains for your specific climate and preferences, you set yourself up for a successful and enjoyable outdoor cannabis grow.
Starting Your Seeds or Clones
Once you’ve selected your cannabis strains, you have two options for starting your plants: seeds or clones. Here’s what you need to know about each:
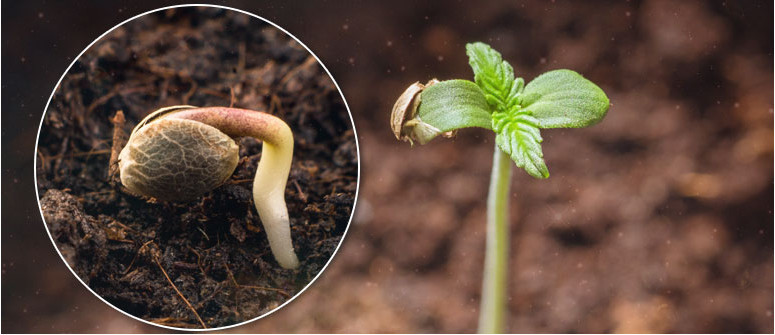
Seeds
Starting your cannabis plants from seeds offers the advantage of genetic diversity and the potential for vigorous growth. When purchasing seeds, look for reputable seed banks or breeders that offer high-quality, feminized, or auto-flowering seeds. Feminized seeds ensure that your plants will be female, which is desirable for bud production. Auto-flowering seeds transition to the flowering stage automatically based on their age, making them suitable for growers with shorter growing seasons.
To start your seeds, follow these steps:
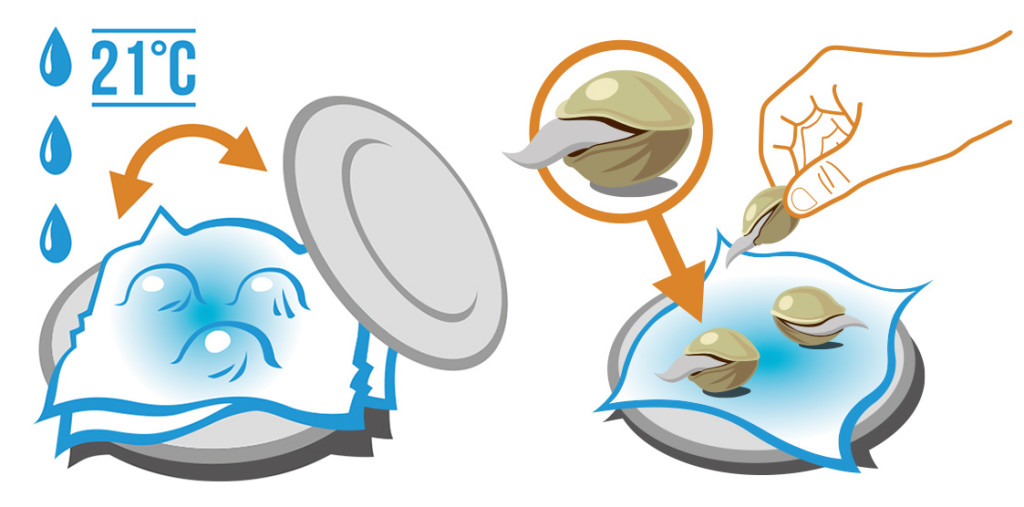
- Germination: Place your seeds in a damp paper towel or soak them in water until they crack open and a tiny taproot emerges.
- Planting: Transfer the germinated seeds to small pots or seedling trays filled with moist potting soil.
- Light and Temperature: Place the pots or trays under fluorescent lights or in a sunny location with temperatures between 70-85°F (20-30°C).
- Watering: Keep the soil consistently moist but not waterlogged. Water with care to avoid overwatering, which can lead to damping-off or root rot.
- Transplanting: Once your seedlings have developed several sets of leaves, they are ready to be transplanted into their final outdoor grow space.
Clones
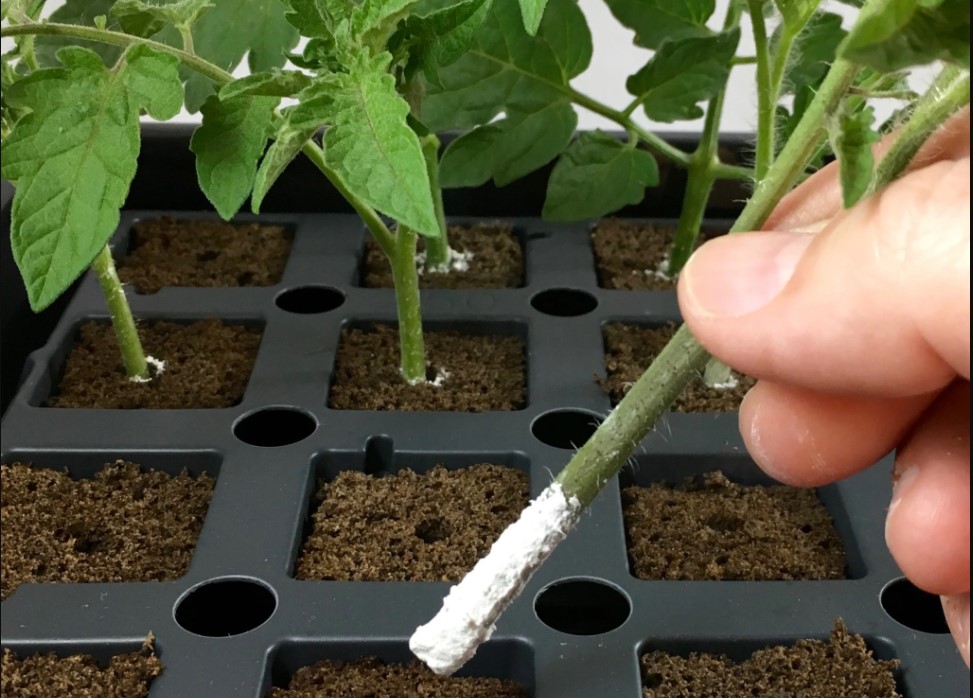
Clones are cuttings taken from mature cannabis plants that have been rooted and ready for transplanting. Cloning allows you to replicate the exact genetic makeup of the mother plant, ensuring consistent traits and characteristics in your crop. Clones are typically purchased from reputable nurseries or obtained from fellow growers.
To successfully transplant clones, follow these steps:
- Preparation: Prepare small pots or containers filled with potting soil or a hydroponic medium.
- Rooting: Dip the cut end of the clone in a rooting hormone and gently insert it into the prepared potting soil or hydroponic medium.
- Light and Temperature: Place the clones under fluorescent lights or in a warm, sunny location with temperatures between 70-85°F (20-30°C).
- Watering: Keep the soil or hydroponic medium evenly moist, ensuring that the clones receive adequate hydration without becoming waterlogged.
- Transplanting: Once the clones have developed a healthy root system, they can be transplanted into their final outdoor grow space.
Whether you choose to start from seeds or clones, proper care and attention during the early stages will set the foundation for successful outdoor cannabis growth.
Transplanting Your Cannabis Plants
Transplanting your cannabis plants from their seedling stage to their final outdoor grow space is a crucial step in their development. Here’s how to ensure a smooth and successful transplant:
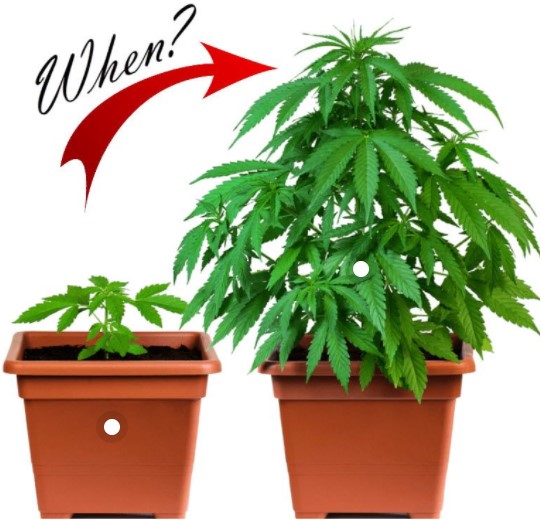
Timing
Choose the right time to transplant your cannabis plants based on the weather conditions and the maturity of your plants. Transplanting too early, when temperatures are still cool or there is a risk of frost, can stunt the growth of your plants. Wait until the threat of cold weather has passed and your plants have developed a healthy root system before transplanting.
Preparation
Before transplanting, prepare your outdoor grow space by clearing the area of weeds, rocks, and debris. If you’re planting directly in the ground, loosen the soil and amend it with compost or organic matter as needed. If you’re using containers, fill them with high-quality potting soil or a well-draining growing medium.
Digging Holes
Dig holes in your outdoor grow space that are slightly larger than the root balls of your plants. Space the holes at least 2-3 feet apart to allow for proper airflow and growth. Gently remove the seedlings or clones from their pots, being careful not to damage the roots, and place them in the holes.
Transplanting
Place each plant in its respective hole, ensuring that the top of the root ball is level with the surrounding soil. Backfill the hole with soil, gently firming it around the plant to eliminate air pockets. Water thoroughly after transplanting to help settle the soil and provide hydration to the newly transplanted plants.
By following these steps, you can successfully transplant your cannabis plants and set them up for healthy growth in their outdoor environment.
Providing Adequate Water and Nutrients
Water and nutrients are essential for the healthy growth and development of your cannabis plants. Here’s how to ensure they receive adequate hydration and nourishment:
Watering Practices
Water your cannabis plants consistently, providing enough moisture to keep the soil evenly moist but not waterlogged. The frequency of watering will depend on factors such as temperature, humidity, and the size of your plants. As a general guideline, water your plants when the top inch of soil feels dry to the touch.
Avoid overwatering, as it can lead to root rot and other moisture-related issues. Ensure that your outdoor grow space has proper drainage to prevent waterlogging and root suffocation.
Nutrient Requirements for Potting Soil without Amendments
TDS and EC levels for cannabis plants at each week of vegetative growth, followed by the first few weeks of flowering:
| Week of Growth | TDS Levels | EC Levels |
|---|---|---|
| 1 Vegetative | 100-250 ppm | 0.2-0.5 mS/cm |
| 2 Vegetative | 250-350 ppm | 0.5-0.7 mS/cm |
| 3 Vegetative | 350-500 ppm | 0.7-1.0 mS/cm |
| 4 Vegetative | 500-700 ppm | 1.0-1.4 mS/cm |
| 5 (early flowering) | 700-900 ppm | 1.4-1.8 mS/cm |
| 6 (early flowering) | 800-1000 ppm | 1.6-2.0 mS/cm |
| 7 (mid flowering) | 900-1100 ppm | 1.8-2.2 mS/cm |
| 8 (mid flowering) | 1000-1200 ppm | 2.0-2.4 mS/cm |
| 9 (late flowering) | 1100-1300 ppm | 2.2-2.6 mS/cm |
| 10 (late flowering) | 1200-1400 ppm | 2.4-2.8 mS/cm |
| 11 (late flowering) | 1300-1500 ppm | 2.6-3.0 mS/cm |
| 12 (ripening/harvest) | <1000 ppm | <2.0 mS/cm |
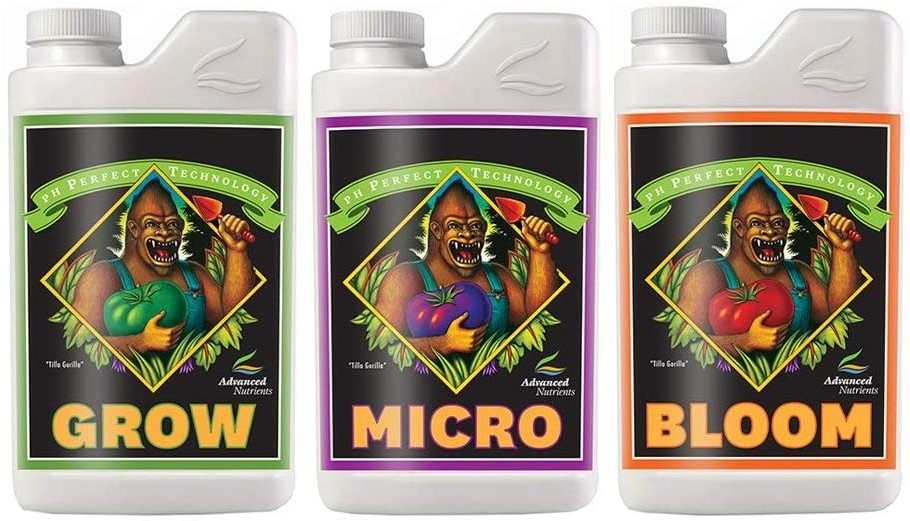
Cannabis plants have specific nutrient requirements at different stages of their growth cycle. During the vegetative stage, they require higher levels of nitrogen to promote leaf and stem growth. As they transition to the flowering stage, they require increased phosphorus and potassium to support bud development.
You can provide nutrients to your cannabis plants through organic amendments, such as compost or well-rotted manure, or through commercially available fertilizers specifically formulated for cannabis cultivation. Follow the instructions on the fertilizer packaging and monitor your plants for any signs of nutrient deficiencies or excesses.
Protecting Your Plants from Pests and Diseases
Outdoor cannabis plants are vulnerable to a variety of pests and diseases. Taking proactive measures to protect your plants will help ensure their health and productivity. Here are some strategies to consider:
Companion Planting
Companion planting involves growing certain plants alongside cannabis to repel pests or attract beneficial insects. Marigolds, basil, and dill are known to deter pests, while flowers like sunflowers and yarrow attract pollinators and beneficial insects. Consider incorporating these companion plants into your outdoor grow space to naturally protect your cannabis plants.
Integrated Pest Management
Integrated Pest Management (IPM) is a holistic approach to pest control that combines prevention, monitoring, and intervention strategies. Regularly inspect your plants for signs of pests or diseases, such as yellowing leaves, chewed foliage, or webbing. If you identify an issue, consider using organic pest control methods, such as neem oil, insecticidal soaps, or beneficial insects, to address the problem.
Proper Sanitation
Maintaining proper sanitation practices in your outdoor grow space is essential for preventing the spread of pests and diseases. Remove any dead leaves or plant debris from the area, as they can provide a breeding ground for pests and pathogens. Regularly clean your tools and equipment to minimize the risk of contamination.
Organic Pest Control
If organic pest control methods are not effective in controlling pests, you may need to consider using chemical pesticides as a last resort. However, exercise caution when using chemical pesticides, as they can have adverse effects on the environment and beneficial insects. Always follow the instructions on the pesticide label and apply them sparingly and judiciously.
By implementing these pest and disease management strategies, you can protect your cannabis plants and ensure their health and vitality throughout the growing season.

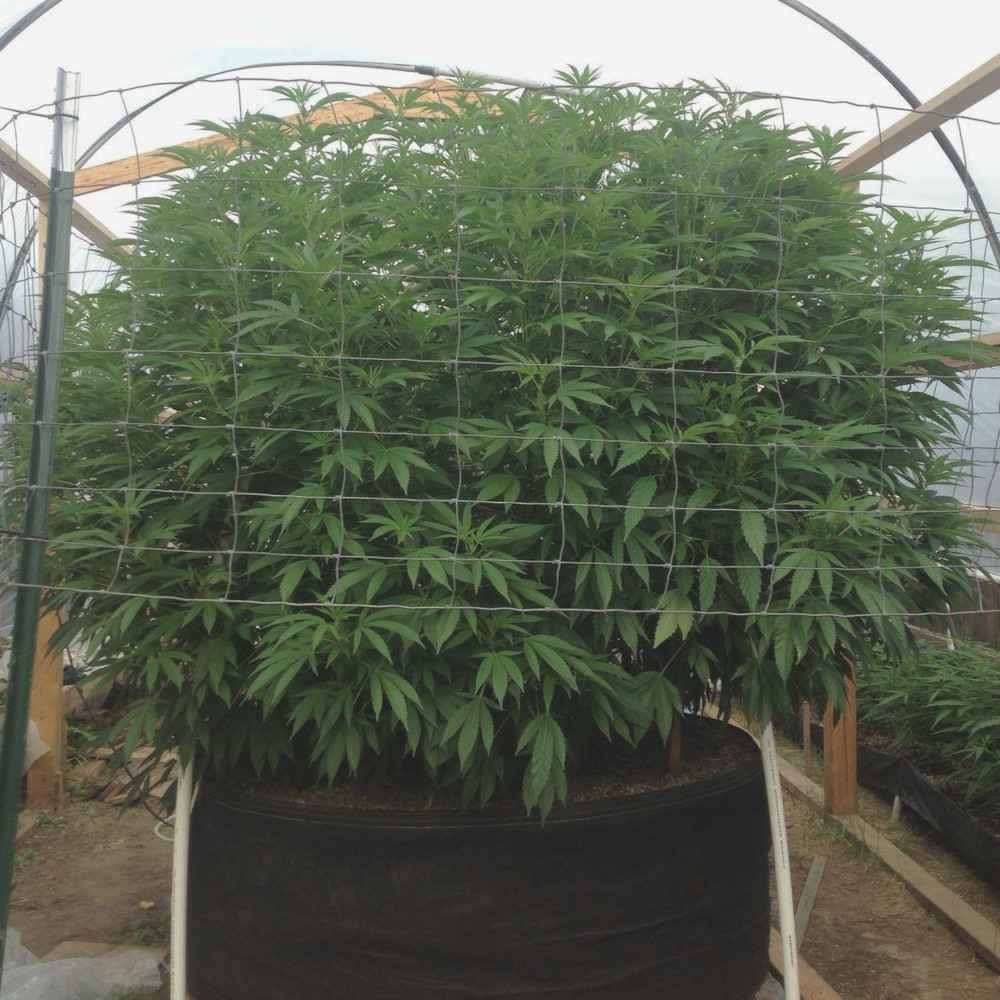
Supporting Your Cannabis Plants with Staking
As your cannabis plants grow taller and develop heavier buds, they may require support to prevent them from bending or breaking. Staking your plants provides the necessary stability and helps ensure proper airflow and light penetration. Here’s how to stake your cannabis plants effectively:
Choosing Stakes
Select stakes that are sturdy, durable, and long enough to support the height of your plants. Bamboo or wooden stakes are popular choices, as they are readily available and provide adequate support. Avoid using stakes that are too thick, as they may damage the roots when inserted into the soil.
Positioning the Stakes
Place the stakes in the ground around each plant, ensuring that they are positioned a few inches away from the main stem. Drive the stakes into the soil until they are firmly anchored and provide sufficient support for the plants.
Tying the Plants
Gently tie the main stem of each plant to the stake using soft plant ties or garden twine. Make sure the ties are secure but not too tight, as they need to allow for natural movement and growth. As the plants continue to grow, adjust the ties to accommodate their increasing height and weight.
By staking your cannabis plants, you provide the necessary support for their vigorous growth and protect them from potential damage.
Harvesting and Curing Your Bountiful Buds
After months of careful cultivation, the time will come to harvest and cure your bountiful buds. Follow these steps to ensure a successful harvest:
Determining Harvest Time
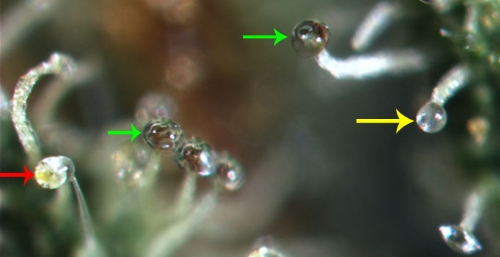
The right time to harvest your cannabis plants depends on the specific strain and your desired effects. As the plants approach maturity, the trichomes (resin glands) on the buds will change color from clear(Green Arrows) to milky(Yellow Arrow) or amber(Red Arrow). Use a jeweler’s loupe or a magnifying glass to inspect the trichomes and determine the optimal harvest window.
Harvesting
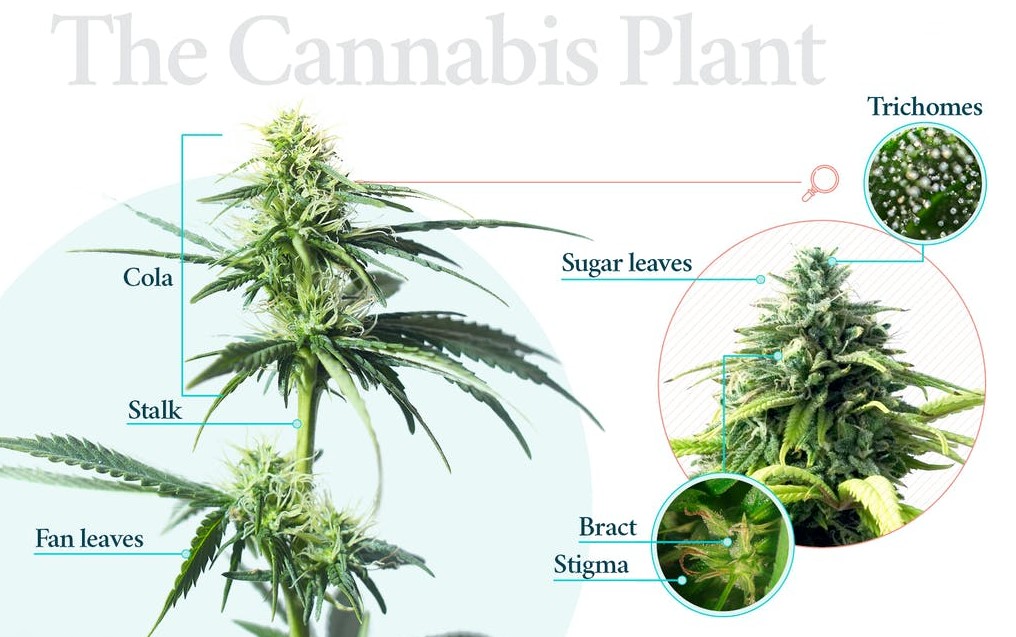
To harvest your cannabis plants, use clean pruning shears or scissors to cut the branches just above the main stem. Handle the plants gently to avoid damaging the buds. Remove any large fan leaves, leaving only the smaller sugar leaves surrounding the buds.
Drying and Curing
After harvesting, hang the branches upside down in a dark, well-ventilated area with temperatures around 60-70°F (15-21°C) and humidity levels between 45-55%. Allow the buds to dry slowly for about 1-2 weeks until they feel dry to the touch and the smaller stems snap instead of bend.
Once dried, trim the buds and place them in glass jars, filling them about 3/4 full. Store the jars in a cool, dark place and open them daily for a few minutes to release any excess moisture. This curing process allows the buds to develop their full flavor, aroma, and potency.
By following these steps, you can enjoy the fruits of your labor and savor the delightful flavors and effects of your homegrown cannabis.
Conclusion
Growing cannabis outdoors provides a rewarding and cost-effective way to cultivate your own supply of high-quality buds. By understanding the legalities, choosing the perfect location, preparing the soil, selecting the right strains, starting your seeds or clones, transplanting your plants, providing adequate water and nutrients, protecting your plants from pests and diseases, supporting them with staking, and harvesting and curing your bountiful buds, you can create the best outdoor grow setup for cannabis. Enjoy the journey and the abundant rewards of your outdoor cannabis grow!
Remember to always comply with local regulations and laws regarding the cultivation of cannabis. Happy growing!
Nature is always best at everything including growing cannabis