Curing cannabis stops the degradation process before volatile compounds like terpenes and cannabinoids break down or convert into less beneficial compounds.
From the moment the harvest occurs, the ingredients begin to break down as enzymes and aerobic bacteria break down excess sugars and starches. Curing cannabis essentially forces the plant to break down sugars, starches, and excess nutrients before they have a chance to dry out and become lodged in the plant.
If you’ve ever wondered why cannabis is more pungent or less palatable when smoked, it’s because these residual components weren’t properly removed from the plant before drying.
Good curing of cannabis not only improves the taste and smoothness, but also the potency of the product! This is because cannabinoid synthesis (the process of creating these valuable chemicals) continues even after harvest.
When freshly harvested cannabis buds are kept at the right temperature and humidity, non-psychoactive cannabinoids further convert to THCa, a precursor to psychoactive THC.
Curing & Drying Cannabis: Overview
Curing(fermentation) begins as soon as you harvest/cut off your plant. To get the most out of curing, you need to control/master the drying process of your buds.
An important part of the curing process takes place in the first few days when you start drying your buds. During this initial drying phase, the main goal is to allow your buds to dry out relatively slowly. Usually, 3-7 days while protecting the buds from mould and bacterial growth.
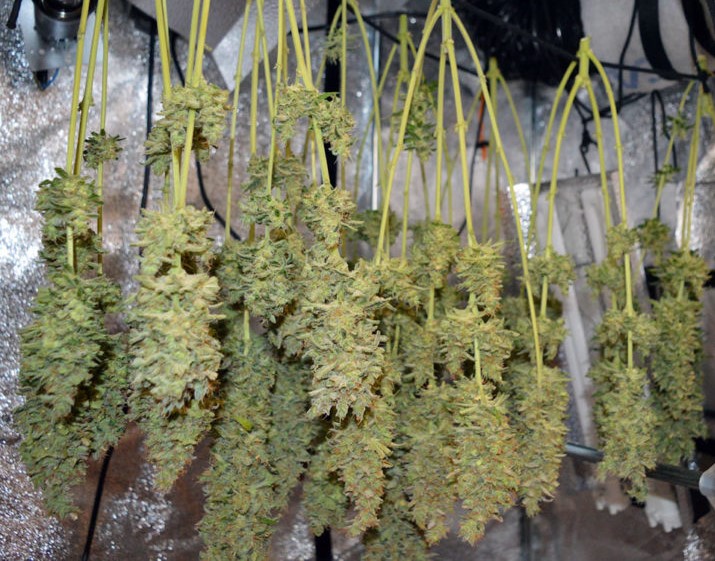
Most growers cut off the buds and hang them to dry. Leaving them until the outsides of the buds are dry and the small stems snap when you bend them. Basically, you can start when the flowers can be broken from the stems.
A relatively slow drying process (along with smart curing) gives you the most benefits. It doesn’t have to take forever either, but every time you “quick dry” your freshly harvested bud, you lose many of the benefits that curing cannabis brings. However, bud quality will still improve with curing, even if you dry your buds too quickly or too much.
Note: If you quickly dry your buds using a microwave or oven, they will taste really awful by comparison. There is no controlled curing here, as the moisture escapes from the plant parts too quickly and the curing process cannot take place.
Overview of the cannabis harvesting/drying/curing process
| Step 1 | Harvest your plant(s) | Step 2 | Remove any large leaves |
| Step 3 | Dry the flowers (slowly) | Step 4 | Buds feel dry (4-10 days) |
| Step 5 | Place the flowers in mason jars | Step 6 | Open the jars daily (1-3 weeks) |
Troubleshooting
| The flowers are…… | What to do …… |
| Wet: > 70%Humidity (RH) | Remove buds from the Jar and allow them to dry further. |
| Humid: 65-70% humidity (RH) | Leave the flowers in the jar with the lid open for 2-4 hours |
| Dry: 58-65% humidity (RH) | Ideal zone for Curing |
| Brittle: < 55% humidity (RH) | Keep buds in a jar (closed) and add Boveda |
Now we’re going to walk you through the process step-by-step so you can have a professional curing every time.
This method also works very well for beginners who have never cured cannabis before. Regardless of your experience curing cannabis, this method will ensure that the result is of the highest quality.
Curing and drying cannabis perfectly
What you need:
- Mason Jars with a large opening – 1 litre in size. These mason jars are also called storage jars with lids for airtight storage.
- Space to dry or drying net (optional): We usually hang our plants (flowers) upside down on clotheslines or hangers in a dark room or box. But you can dry your plants in any number of ways, as long as the conditions are right and they don’t get much light. A drying net is recommended when the humidity is high or when many buds need to be dried.
- Hygrometer (optional): For fermenting, we like to use a small Digital Hygrometer because it fits easily in mason jars. This measures the humidity in the vessel so you can make sure the air isn’t too humid or too dry for optimal fermentation.
- Humidipaks (optional): Boveda 58-62% packs are cheap and specially designed for storing cannabis so the buds don’t dry out too much and become brittle/crumbly during storage.
Step 1 Curing Cannabis: Harvest your plant
Some growers cut the plant off at the base and hang the whole plant upside down to dry. Others cut off branches and hang them up to dry. Still, others cut off individual buds so they can lay them out on a drying net and dry them.
How should you harvest your plant?
You can harvest your plant piece by piece. Some growers trim (remove the leaves) the buds while they are still on the plant so they can then hang the whole plant upside down to dry. Here is a detailed guide to harvesting cannabis.
Step 2 Curing Cannabis: Remove any large leaves
Before you start drying the buds, remove all the large leaves. And optionally the smaller ones that are attached to the buds as well. At the very least, you should cut off all of the large fan leaves. Although many growers also cut off the small leaves that grow on top of the buds.
This not only improves the appearance of the buds but most importantly makes for a more enjoyable smoke. Too much leaf material can make the smoke from buds harsh.
The amount of leaves you cut off depends on personal preference. However, you should leave more leaves on the plant if you live in a very dry area.
You should cut off as many leaves as possible when the environment where you are drying your cannabis buds is very humid to speed up the drying process and avoid mould. If it’s very humid where you live, you might want to consider removing the buds from the branches while they dry.
Step 3 Curing Cannabis: Dry the buds (slowly)
Why Slow Dry Your Cannabis Buds? Drying the buds is the first step and an important part of the curing process!
Optimal environment for drying cannabis flowers:
Room temperature: Approx. 20°C
Humidity: Approx. 50%
Here are some ideas for adjusting the indoor climate:
- Air Conditioning – Cools the air and lowers humidity
- Evaporative Cooler – Cools the air and increases humidity
- Dehumidifier – Warms the air and lowers the humidity
- Humidifier – Warms the air and increases humidity
- Heating – Warms the air and (usually) lowers the humidity
Buds that are quick-dried in a dehydrator/oven, dry ice, or microwave taste terrible. They smell even worse, and can also induce migraines or paranoia. If you dry your buds quickly, you’re skipping the most important part of the curing process entirely!
In fact, even drying your buds at higher temperatures, such as 30ºC, can volatilize valuable aromas (terpenes) and possibly certain cannabinoids. Proper drying & curing of cannabis accounts for around 50% of the overall & final quality of cannabis flowers.
You can take the best cannabis (from genetics & cultivation), but if it hasn’t been cured properly or at all, it’s medium quality at best! There are many ways you can dry your cannabis buds. Read more about how to properly dry cannabis here before proceeding to the cannabis curing guide.
Step 4 Curing Cannabis: The buds feel dry
Dry the buds until the outsides of the buds are dry to the touch and smaller stems break instead of bending when you bend them (usually 4-10 days).
If the buds dry in less than 4 days, it may mean you dried the buds a little too quickly. Getting the perfect result is difficult at first, as the size and density of the buds and the environment in which the cannabis was dried can vary greatly!
Even if the buds have been dried too quickly, they will still benefit from the curing process. However, it may take a little longer than normal for the buds to fully ‘cure’.
If you accidentally remove all of the moisture from the buds (drying your cannabis too long), the curing process will slow down dramatically, or possibly even stop for the most part. Overdried bud will cure(ferment), but it will take longer.
When should you put your buds in the Mason Jars?
If you have hung the buds (plants) upside down to dry, you can place them in jars when the outsides of all the buds are completely dry to the touch but not yet brittle/crumbly. The larger stems are still bendable, but the smaller stems will break if you bend them.
When the buds have finished drying, you can remove the smallest buds with your fingers without pulling a thread from the fibre. If a thread pulls itself, it means that there is still too much moisture inside.
Although the buds may feel dry to the touch at this point, the larger stalks still contain water that migrates out through the buds during the curing process. This is the perfect time to remove the buds from the stems/twigs and place them in the mason jars.
If you remove the buds from the branches before the smallest stems snap, you’ll find that when you put them in jars they’ll still be too wet, so you’ll need to dry them even longer anyway. However, if you find a stem that breaks when bent, it is better to remove the buds from the stems/stems sooner rather than later as water is much easier to remove than to add back.
For drying methods where the buds have been removed from the stems before drying, it is important to place the buds in the mason jars as soon as the buds feel dry on the outside and before the buds dry completely since there are no stems around that to retain water in the plant material for longer.
The idea is to place the buds in the jars at the right time, as this allows the remaining moisture from inside the buds to slowly diffuse out to continue the curing process seamlessly. Mould is unlikely to develop as long as the outside of the buds is dry to the touch. Mould generally grows where the outside of the bud feels damp or wet.
Some growers sample some of their buds at this point or immediately after harvest ( via quick drying in the oven or microwave ). Note, however, that the smell, taste, and potency aren’t anywhere near optimal just yet. Buds that have not been cured are usually pungent, tend to scratch the throat and give some people a headache.
Don’t worry, the quality of the buds will continue to improve as you ‘cure’ them, and the “bad traits” will wear off as you go.
Step 5 Curing Cannabis: Place the flowers in the mason jars
From this point on, the goal is to keep the buds in a controlled environment. You should keep the relative humidity in the closed jars stable at around 60-65%. This is the ideal environment to ferment cannabis flowers. By the time you’ve removed the buds from the plant/stems when the small stalks are breaking and the larger stalks are bending, the buds are probably already providing the perfect humidity level in the jars.
Optimal fermentation environment (in jars):
Temperature: 20-22°C
Humidity: 60-65%
Now, here’s how to properly place the cannabis buds in mason jars for proper curing. The ideal containers for cannabis buds are mason jars with a wide mouth. These can be found at major grocery stores, most craft stores, online, and in supermarkets.
You should use mason jars with a capacity of 1 litre. Each of these jars holds around 30 grams of dried bud, but it can be more or less depending on the consistency of the bud.
1-litre mason jars have proven to be the ideal size for properly curing cannabis. Larger jars are more likely to develop mould. Other containers don’t seal as well, which can result in buds not fermenting properly.
You should fill each jar 75% full with bud to leave some air at the top. If you shake the jars, the buds should be able to move. If they stick together it means they are still too wet and you should leave the lids open for a while to let them dry out a bit more.
Just like if the buds are too dry, this will slow down the curing process, but if they’re too wet you also risk mould growing on the buds. Never leave the buds in the jars if they feel wet or even damp on the outside!
Buds should always feel completely dry on the outside and not stick together. If you smell “ammonia” it means the buds are too wet and unwanted bacteria are starting to build up.
If some buds are still damp or wet to the touch, don’t put them in the jars just yet! Allow these buds to dry a bit more (slowly) until they feel dry on the outside as well. Then you can also put them in the jars.
Step 6 Curing Cannabis: The curing in the first few weeks
You may want to check on the buds even more than once a day for the first few days, especially if you’re concerned about mould or bacteria from too much humidity.
It’s important to check your buds at least every 24 hours in the early stages. Besides checking the buds, it is also important to open the jars once a day as the buds also need fresh air while curing.
If you smell ammonia or if the outside of the buds feels damp, they are too wet and need airing before you close the jars again. If it smells like the traditional fresh cannabis scent (of course this can vary depending on the strain), that means you’re doing it right!
For the impatient, this also gives a chance to taste your new buds and see how they improve during the curing process.
As mentioned, the trick to good cannabis curing is controlling the humidity (in the jars) .
Ideally, the buds should be kept in a closed container with a relative humidity of 60-65%. This is the perfect amount of moisture to dryness to get the fastest and best fermentation process.
To be able to read the current humidity level (so you can make sure they’re getting it perfect every time), you should get a hygrometer.
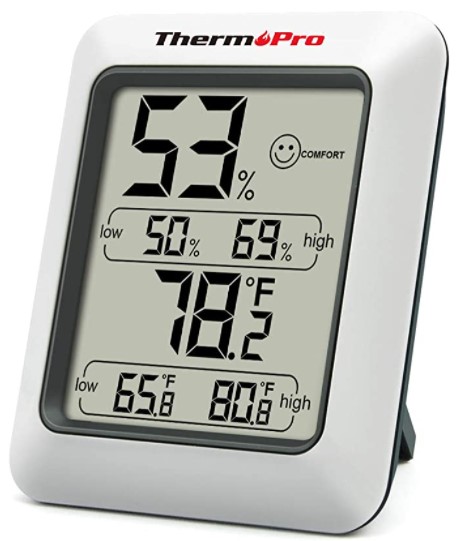
We like to use a Hygrometer that is small enough to fit in the mason jars and can be bought cheaply online. A hygrometer is optional and can be done without, but it takes the guesswork out of humidity.
Use a hygrometer to determine the humidity level for the cannabis curing process. This allows you to pinpoint exactly where you are in the curing process and identify potential moisture issues before they affect your buds.
Even if you only have a single hygrometer, you can put it in the different jars during your daily check to get an idea of the relative humidity in your jars.
Buds need a certain amount of time to start “sweating” in the jar before you can then give an accurate statement of how much moisture is actually in the jars.
Sometimes buds that appeared dry when stored in the jars may feel damp or even wet when you check them a few hours later. This is because the moisture that resides in the center of the buds spreads outward across the buds. This means that you then have to dry/air the flowers a bit again.
A hygrometer is the most accurate way to measure the relative humidity in your mason jars. However, we have been able to complete this process many times without additional tools by following the general guidelines below based on the look and feel of the buds.
Humidity when curing cannabis
For the first week, you should bleed the jars for a few minutes at least once a day. Just open and close all the jars once a day. With the jars open, check the buds to see how moist they are. You can also take the time to shake the jars to agitate the buds and make sure there are no wet spots and the buds aren’t sticking together in clumps.
IMPORTANT: Open all jars at least once a day for the first 1-2 weeks of fermentation
For the first 1-2 weeks, regardless of the readings, you should continue to check your buds and open all jars once a day. Even if the buds are too dry, it’s important that you air the buds quickly once a day during this initial stage, as they need air to continue the fermentation process.
If you are confident that the buds have been in the fermentation process for a few weeks, you may only be able to open the jars once a week or even less frequently.
Rehydrate flowers that are too dry
Boveda Packs
If you feel your buds are too dry, don’t panic! Sometimes it feels like the buds are too dry even when there is still moisture inside.
It’s a good idea to leave the buds in the jars for at least 2-3 days to see if moisture is wicking from the inside of the buds to the outside. If the buds are still feeling bone dry a few days after being placed in the jars, consider rehydrating (humidifying) the buds.
However, you should not attempt to rehydrate buds with any means or object other than specially made hydration packs, as rehydration increases the risk of mould growth, especially if you use something organic like an orange peel.
If you’ve been watching the buds closely from the start, they’re unlikely to become too dry. However, if you have over-dried bud, one way to reduce brittleness (re-hydrate the bud) is to add Boveda 62% packs to your jars, which will bring the humidity back up to 62%. However, these do not work well to reduce humidity but are designed to increase humidity to the 62% level. They help slowly return moisture to your buds without affecting flavour or increasing the risk of mould growth.
Once the buds have been re-hydrated, you can remove the Boveda pack. Some growers have reported that leaving the moisture pouches in the jars for the first 4 weeks of curing can reduce the taste/smell of the buds. However, when using humidity packs during the curing process, we could not detect any difference in smell or taste.
Step 7: Long term storage after curing
As long as the buds have been consistently cured in the ideal range (60-65% RH) for several weeks, you only need to open the jars once a month.
The buds can take up to 6 months to cure. After 6 months, further curing will not do much. At this point, you should prepare the buds for long-term storage to maintain potency for as long as possible.
For long-term storage (months), buds should be kept in airtight containers (the mason jars they were cured in are perfect) and in a cool, dark place.
For serious long-term storage (6 months or more), it’s best to keep the buds vacuum-sealed, or even better, in a freezer, in tightly packed mason jars.