

- Obtain good weed seeds to grow your best cannabis plants
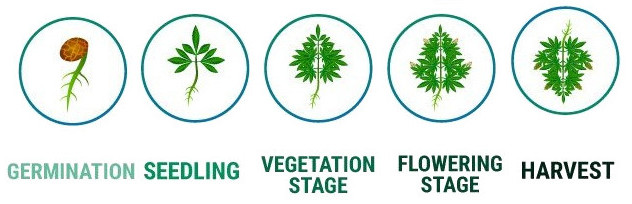
- Germination of your weed seeds
- Taking Care of your weed seedling
- Vegetative Stage Growth and Care
- Flowering Stage Growth and Care
- Harvesting and drying
Germination of your weed seeds
Put some moist paper towels on a plate. Place your seeds on top of the moistened paper towels and then cover with another layer of moist paper towel. Cover the bottom plate with another plate, so that the seeds are in total darkness and the environment stays humid and moist. Put the covered weed seeds in a warm environment. Check the seeds often, sprinkle the paper towels if needed to keep them moist but not wet. Transplant the seeds carefully after they open and the tip of the taproot becomes visible. Put the seed in a growth medium (soil or rock-wool), approximately a quarter-inch(about 5 mm) with the taproot pointed down (the tip where the root comes out).

Sowing directly in the growing medium
Place your marijuana seeds under the surface in the growing medium at approximately a quarter-inch(5 mm). Sprinkle the growth medium with water on a regular basis, but make sure that the germination medium does not become too wet. The seedling uses the stored food present inside the core of the seed for growing. Keep the germination medium airy, ie. don’t use compacted soil.
One of the great characteristics of using Rockwool to germinate is that it retains a lot of air. Be sure that the Rockwool cube is not sitting in a puddle of water and that the excess water is able to drain away. Rockwool has a good germination climate for the seeds. We here at Dagga Seeds use HollandBasics Qik Rooters to germinate, they have one of the best success rates. We just put the seed in the hole and tear a small piece from the side of the Qik rooter plug and cover the seed with it. They come premoistened but you may have to add a little water to the cube. They also work great for older seeds.
The humidity is super important during germination when the seedlings are extremely fragile. Humidity should be kept over 80% at this stage in the plant’s life to prevent the soil from drying too fast. Experimentation has shown that a relative humidity of 65% to 80% increases the growth rate. Low humidity values during the germination/seedling stage will cause the plants to develop narrow and thin leaves to try to prevent loss of water. Above 80% relative humidity the plant has trouble disposing of toxic chemicals through evaporation.
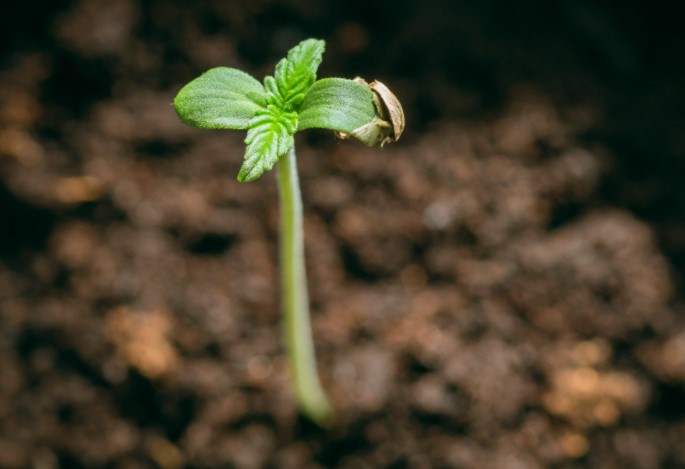
Taking Care of your Weed Seedling
When you have your little seedlings in the pots, you should sprinkle them with water every day and never let the soil dry out. It is important NOT to fertilize cannabis plants yet, it would only lead to overnutrition and mutated plants. The only thing you could do is add a very small amount of root growth stimulator.
When your plants are big enough to be transplanted in their large pots, you can start fertilizing them. If you are growing cannabis from cuttings, make sure the roots are well developed and normal growth has started. Your root system will be established within a couple of weeks and you can transplant them into larger pots. They are now going into the vegetative growth stage.
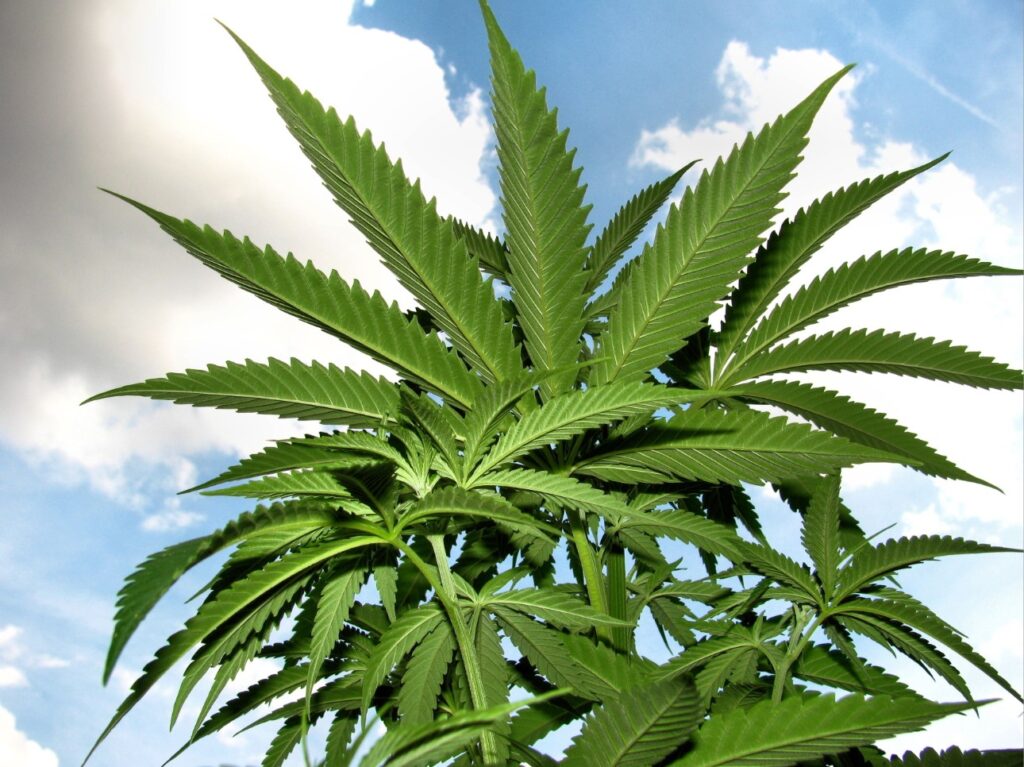
Vegetative Stage Growth and Care of Cannabis Plants
Growing photoperiod cannabis plants requires 18-24 hours of light a day and 0-6 hours of darkness. Ideal growth also requires a humidity of 50 to 60%. You can use different lights for the growth and the flowering period. Fluorescent lights work well and do not produce much heat and can be set up very close to plants.
Always keep the soil wet and never let it dry out, spray your plants with water from time to time. Cannabis plants not only absorb water through their roots, but they can also absorb water through their leaves. That means when the humidity is right and you spray them every now and then, you’re supporting the plant’s growth.
Vegetative Period Nutrients
Cannabis has high nutritional demands and requires different nutrients during the vegetative and flowering phases. In the vegetative period, cannabis plants require more nitrogen, which contributes to the new growth of leaves and stems. Potassium and magnesium levels will need to be higher in the Vegetative Stage to give the plant energy for photosynthesis. Don’t forget some calcium for overall health.
Growers can buy vegetative nutrients specially formulated to make things more simple. Products such as Advanced Nutrients provide all of the things a plant needs throughout the entire vegetative growing cycle. If you decide to grow hydroponically, buy specific hydroponic nutrients and apply as directed by the label.
Most Growers spend 4-6 weeks in the Vegetative Stage before moving to the flowering stage. This however won’t be up to you if you grow outdoors unless you grow with autoflowering cannabis seeds.

Flowering Stage Growth and Care of Cannabis Plants
The flowering period of female Cannabis plants is certainly the most exciting time in the life span of Cannabis. Here we try to anticipate the yield and also if the quality is high or low. After germination of the cannabis seeds, this is the second most critical of growth phases. The average flowering period is somewhere between 5 and 8 weeks. But be aware that there are some strains that are made for extremely fast flowering and some that take longer!
Starting the flowering period
Regular cannabis follows the changes in daylight hours, you will need to stimulate the natural habitat a bit. If you are using auto-flowering cannabis strains, then you don’t have to worry about this part. All the others have to change the light to a daily period of 12 hours. This will mimic the change in sunlight in natural habitats.

But it is also essential to take into account other aspects in addition to the daily daylight hours. The flowering period also requires another light spectrum, for indoor growers. This means they have to use a sodium vapour discharge lamp or an equivalent lamp. Another important point is to change the fertilization scheme if you are fertilizing at all. The cannabis plants now require more potassium and more phosphorus than during vegetation. You can find a large assortment of ready-to-use fertilizers, for all phases of growth of your cannabis plant.
During the first weeks of flowering
Within the first week, the changes are only minimal and you won’t be able to see a real big change in your cannabis plants. Within the second week that changes and now you will be able to see little white hairs or little green bumps.
If you haven’t been using feminized cannabis seeds, now is your last chance to separate the male plants from the female plants. Letting plants go to seed and you will end up with seedy buds with very low THC content.
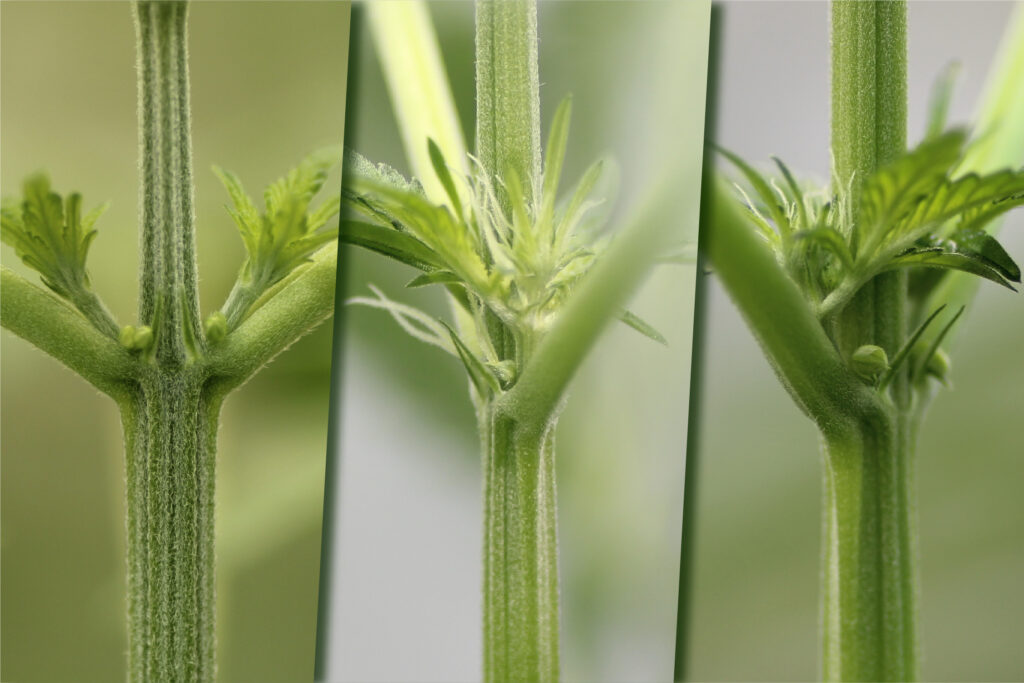
All plants with white hairs are female Cannabis plants and luckily they can stay where they are. Cannabis plants with green bumps are male plants and will produce pollen inside the bumps.
Most growers just destroy male Cannabis plants, they will be of no use to you in any way unless breeding seeds.
Now that there are only female plants left, you have to make sure that all the flowers get full light for the best results. Another important thing is to turn the plants a little every 2 days, this is to strengthen their stems. It’s also to prevent them from breaking under the weight of the flowers. This is especially a threat when using cannabis strains with huge buds. In some cases, you also have to tie the stems so that they cannot bend too much or even cause the plant to break.
Later phases of the flowering period
As has been said, the length of time it takes for the individual phases of the flowering period depends on the strain you are using. But to give an average, you will see a new change after about 5 or 6 weeks. The first white hairs of your cannabis plants will start to turn brown.
That does not mean that your plants are ready to harvest, it is just a sign of maturity. In this phase of the flowering period, the plants are very fragile against the mould of the buds. That means you have to check the humidity carefully and it shouldn’t exceed 50%. If you are already in the last phase of flowering, then you should also stop fertilizing 10 to 14 days before harvest.
When you stop fertilizing, you should give your plants plenty of water every day. This way your plants can use the nutrient debris and get rid of the fertilizer leftovers.
The last 2 days of flowering
Now you can stop watering your cannabis plants. This speeds up the drying process later, and will not lower the quality of the bud.
Give your plants the finishing touch, turn off the lights and keep them in the dark for the last 2 days before harvest. Lack of light will make your cannabis plants produce large amounts of resin. The dark also accelerates the maturation process.
To check it yourself, you can leave some of your plants in the light and others in the dark.
Plenty of Ventilation in your grow area
Weed like all other plants gets rid of its waste through its leaves. The Outdoors is specially equipped with wind, rain, and sun to remove these toxins from the surface of the leaves. Indoors the cultivator must try to replicate the outdoor environment to some extent. The easiest way to accomplish this is with a fan or three. If the growing area is too hot then an air conditioner may be needed to control temperatures and humidity.
If you are only growing in a small closet then just tending your plants daily will give them enough air. Even though it would be enough air you should always have air movement over your plant canopy. A thermostat-controlled fan will help regulate the temperature the best when you can’t be there to monitor the room. These can be found online or at hydroponics stores.
If you have a large grow operation then you will need dehumidifiers to keep your humidity lower during flowering. If your humidity levels are high you will most likely develop mouldy buds, no one likes mouldy buds!. A dehumidifier will set you back about $150 so don’t cheap out on a huge crop.
Harvesting and drying
How to harvest and cure your Cannabis plants
There are many different techniques for harvesting, cutting, and drying your Marijuana plants. The harvesting and drying process has a huge influence on the end quality of your weed. You first have to prepare your plants for harvest in the last days of the marijuana plant’s flowering period. The next step is the harvest itself, and how to cut the plants to prepare them for the drying process. The last step is the drying itself, and even here a mistake can be fatal.
Prepare your Cannabis plants for harvest
As stated in the previous posts on marijuana cultivation, you should stop fertilizing and spraying seed oil 2 weeks before harvest. Keep adding water to your pots and mist your plants with water daily. Two days before harvest, stop watering the plants. This will help with the drying process and help to reduce mould risks during drying. You can also turn off the light for the last 2 days, as this adds a final touch to resin production and can greatly increase the quality of your cannabis.
Harvesting your Cannabis plants
There are several methods available here, commercial growers who have large numbers of marijuana plants often just cut the buds and then start drying them. But this way you don’t get the best out of your plants, instead, you minimize your chances of increasing the quality of your Cannabis Buds. Especially when it comes to the taste and smell of marijuana.
To get the best out of your cannabis, you should harvest one plant after another. Cut the plant a few cm above the ground, now remove the large leaves from the plant, but make sure not to tear off the leaf stems as well. The leaves will simply absorb energy from the plant, which would otherwise go directly to your buds. Now you have the choice to leave the cannabis plants as is and hang them upside down in your drying room.

You can also choose to keep removing leaves, since the large leaves are already cute, take a pair of trimmers and cut the small size leaves. Finally, you can also take small scissors to even cut the leaves of the buds. When the plant is finally leafless, hang it upside down in your drying room.
Some weed growers also choose to cut the bigger branches to make them easier to handle, but that won’t make much difference in final quality.
Drying your Marijuana
This is the process in which the smell and flavour gain their final touch and it can be felt if you have obtained tasty and rich marijuana or common street cannabis.
Commercial cultivators are on the fast track, as speed is paramount to clearing the space for a new cannabis grow. So the cut buds are dried in a room with very low humidity and high temperatures. But in this way, your plants do not have the opportunity to transform the last nutrients into the taste, smell, and resin.
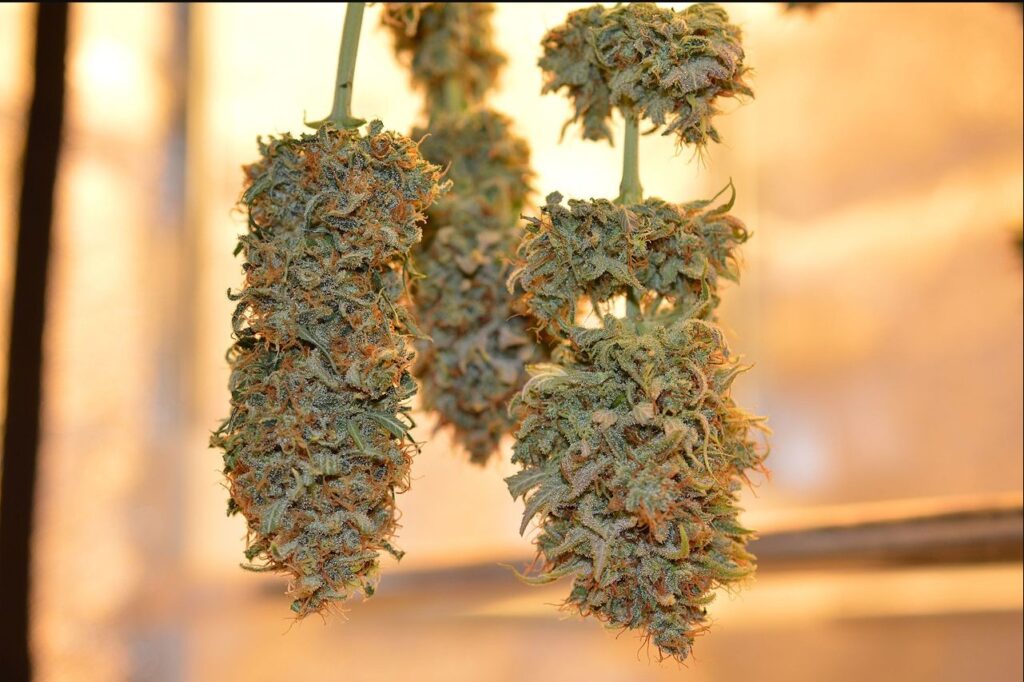
It is best to hang your cannabis plants without large leaves or without leaves in a row upside down, but be careful that they do not touch each other and that they have some space between them. Otherwise, you risk mould ruining your crop during this last step. Humidity should not be too high and proper ventilation should be ensured. A normal room temperature will do fine, under these conditions it will take around 2 weeks for your marijuana to be dry and ready to use.

Ah! One last thing, the room should be dark, so energy or nutrients are no longer used for photosynthesis. In this way everything goes to the buds, forming high-quality marijuana, thick, dense, rich, and with a good smell.
How to be sure when your cannabis plants are ready to use?
This can be done by trying to break the stems. If the stems of the buds break easily, your marijuana is done. If they are still elastic and bend instead of breaking, then your marijuana still needs more time to fully dry.
[…] nutrients to the water they enter the internal circulation of the system, and it uses them to fertilize the plant optimally over time. This is a great system for beginners because you do not have to adjust or set […]