Introduction
Growing marijuana from seeds to harvest can be an exciting and rewarding journey. Whether you’re a seasoned grower or a beginner, understanding the process of cultivating cannabis plants from seed is essential. In this comprehensive guide, we will walk you through the step-by-step process of growing marijuana from seed in a pot. From germination to harvesting, we will cover everything you need to know to successfully grow your own cannabis plants.
Getting Started: Germinating Your Cannabis Seed
The first step in growing marijuana from seed is germination. Germination is the process of getting the seed to sprout and develop into a seedling. There are several methods you can use to germinate your cannabis seeds, but one of the most common and effective methods is the water soak method.
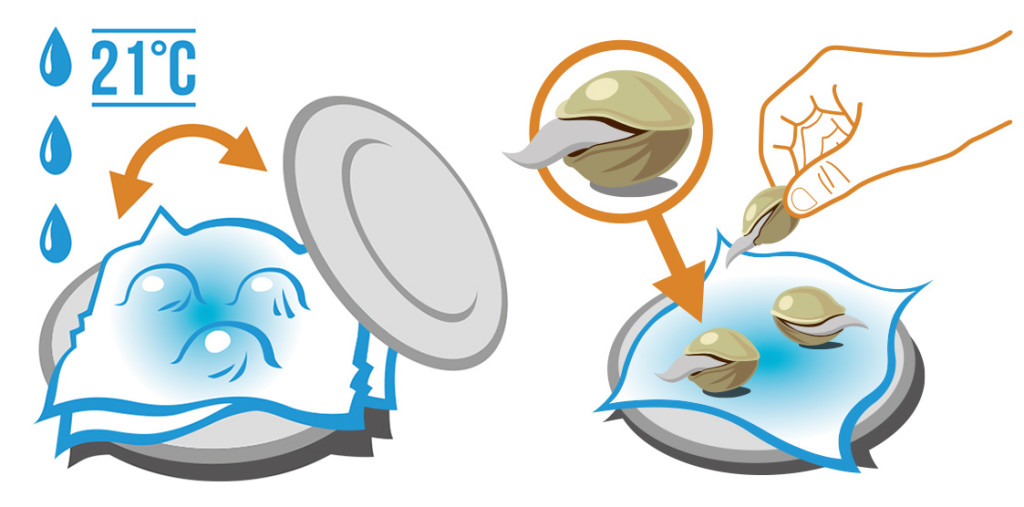
To germinate your cannabis seeds using the water soak method, follow these steps:
- Fill a small container with purified room temperature water.
- Place the cannabis seeds in the water and let them soak for 24-48 hours.
- After soaking, check if the seeds have sunk to the bottom of the container. Sinking seeds indicate that they are ready to be planted.
- If the seeds have not sunk, gently tap them to encourage sinking. If they still don’t sink, they can still be planted.
- Once the seeds have sunk or are ready to be planted, carefully transfer them to a damp paper towel or directly into a seedling pellet.
- Keep the paper towel or seedling pellet moist but not soaking wet, and place it in a warm and dark place.
- Within a few days, you should see the seeds sprout and develop a taproot.
Planting Your Weed Seed
Once your cannabis seeds have sprouted and developed a taproot, it’s time to plant them. Planting your weed seed properly is crucial for the healthy growth of your cannabis plants. Here’s how to do it:
- Prepare a growing medium for your seedling. We recommend using seedling pellets made of a mix of compressed peat moss and coco husk. Soak the pellet in water for 10-15 minutes until it expands.
- Gently squeeze the expanded pellet to remove any excess water. The growing medium should be damp but not soaking wet.
- Dig a small hole in the center of the pellet, about 1/4 inch deep.
- Carefully transfer the sprouted seed into the hole, making sure to position it with the taproot facing down.
- Lightly cover the seed with a thin layer of the growing medium.
- Place the planted seedling in a warm and well-lit area, ensuring it receives adequate light for healthy growth.
Weed Seedling Sprouts ?
After planting your weed seed, it’s time to nurture the seedling as it emerges from the soil. The seedling stage is a critical period in the life cycle of a cannabis plant, and proper care is essential for its healthy development. Here are some important factors to consider during the seedling stage:
- Light: Seedlings require a medium amount of light to grow. Place them in a sunny windowsill with at least half a day of sunlight or use a grow light placed 24 to 30 inches away from the seedlings.
- Watering: Seedlings don’t require a lot of water. Water them sparingly, allowing the top layer of the soil to dry out between waterings. Overwatering can lead to damping off, a fungal disease that can kill the seedling.
- Temperature and Humidity: Maintain a temperature of around 70-75°F (21-24°C) during the day and slightly cooler at night. Keep the humidity level around 50%.
- Air Circulation: Provide gentle air circulation around the seedlings to strengthen their stems and prevent mold growth.
- Nutrients: Seedlings don’t require additional nutrients initially, as they can rely on the nutrients stored in the seed. Once the seedling develops its first set of true leaves, you can start introducing a mild nutrient solution.
Lighting for Your Cannabis Seedling
Proper lighting is crucial for the healthy growth of your cannabis seedling. During the seedling stage, your plant requires a medium amount of light to establish strong roots and develop healthy leaves. Here are some important considerations for lighting your cannabis seedling:
- Natural Light: If growing your seedling outdoors, place it in a location where it will receive direct sunlight for at least 12 hours a day. Make sure to protect the seedling from extreme weather conditions.
- Artificial Light: If growing your seedling indoors, you can use a fluorescent light or a dedicated grow light. Position the light source 2-4 inches above the seedling and provide it with 18-24 hours of light per day. As the seedling grows, adjust the height of the light to maintain the optimal distance.
- Light Spectrum: Seedlings require light in the blue spectrum range (around 6500K) to promote healthy leaf development. You can choose fluorescent lights labeled as “cool white” or “daylight” for optimal results.
- Light Schedule: During the seedling stage, provide your cannabis seedling with 18-24 hours of light per day. This prolonged light exposure will help the seedling establish a strong root system and develop healthy leaves.
Watering Your Cannabis Seedling
Proper watering is crucial for the healthy growth of your cannabis seedling. Seedlings have delicate root systems and can be sensitive to overwatering or underwatering. Here are some important guidelines for watering your cannabis seedling:
- Soil Moisture: Check the moisture level of the soil by inserting your finger about an inch into the growing medium. If it feels dry, it’s time to water your seedling. If it feels moist, wait a little longer before watering.
- Watering Technique: Use a gentle watering technique to avoid disturbing the seedling’s delicate roots. Water the seedling slowly and evenly, allowing the water to penetrate the soil.
- Water Quality: Use filtered water or let tap water sit for 24-48 hours to allow chlorine to dissipate before watering your seedling. Chlorine can be harmful to the delicate roots of the seedling.
- Drainage: Ensure that the pot or container you’re using has proper drainage holes to prevent waterlogging. Excess water should be able to drain out freely to avoid root rot.
- Frequency: Seedlings don’t require frequent watering. Water them when the top layer of the soil feels dry, but avoid overwatering, as it can lead to damping off and other root-related issues.
First Cannabis Seedling Leaves & Hardening Off
As your cannabis seedling grows, it will develop its first set of true leaves. These leaves are different from the initial cotyledon leaves and are a sign that your seedling is maturing. Here’s what you need to know about the first cannabis seedling leaves and the process of hardening off:
- First True Leaves: The first true leaves of a cannabis seedling typically appear after the initial cotyledon leaves. They are usually serrated and resemble the mature leaves of a cannabis plant.
- Hardening Off: Hardening off is the process of gradually exposing your seedling to outdoor conditions, preparing it for life outside the controlled environment. This process helps the seedling adapt to fluctuating temperatures, wind, and sunlight.
- Thickening of the Stem: During the hardening off period, you may notice that the stem of your seedling starts to thicken. This is a natural response to the changing environment and is a sign that your seedling is becoming more robust.
- Increased Sunlight Exposure: As your seedling develops its first true leaves, it can tolerate more direct sunlight. Gradually increase the amount of sunlight your seedling receives by exposing it to a few hours of direct sunlight each day. Monitor the seedling for any signs of stress, such as wilting or leaf discoloration.
- Transitioning to the Outdoors: Once your seedling has been exposed to a few hours of direct sunlight without any adverse effects, it’s ready to be planted outdoors. Choose a location with well-draining soil and gradually transplant the seedling, ensuring it receives adequate water and light.
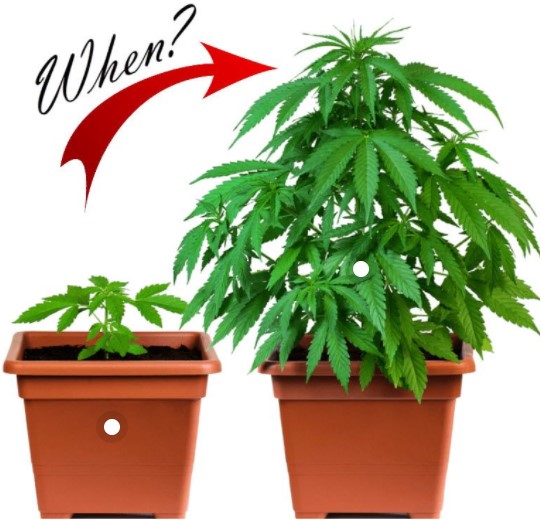
Transplanting Cannabis Seedlings
Transplanting your cannabis seedlings is an important step in their growth journey. It allows the seedlings to establish a stronger root system and provides them with more space to grow. Here’s how to transplant your cannabis seedlings properly:
- Timing: Transplant your seedlings when they have developed a strong root system and have outgrown their current container. This is typically around 10 days after germination or when the roots start emerging from the bottom of the seedling pellet.
- Choose a Bigger Pot: Select a pot or container that is at least one size larger than the current container. This will provide enough space for the seedling to grow and establish a stronger root system.
- Prepare the Growing Medium: Fill the new pot with a well-draining growing medium, such as a mixture of potting soil, perlite, and coco coir. Make sure the medium is moist but not soaking wet.
- Transplanting Process: Gently remove the seedling from its current container, taking care not to damage the roots. Place the seedling in the center of the new pot and fill the remaining space with the growing medium. Press the medium gently around the seedling to secure it in place.
- Watering: After transplanting, water the seedling thoroughly to help settle the growing medium and provide the roots with moisture. Avoid overwatering, as it can lead to root rot.
Nutrient Levels for each Stage of Cannabis Growth
TDS and EC levels for cannabis plants at each week of vegetative growth, followed by the first few weeks of flowering:
| Week of Growth | TDS Levels | EC Levels |
|---|---|---|
| 1 Vegetative | 100-250 ppm | 0.2-0.5 mS/cm |
| 2 Vegetative | 250-350 ppm | 0.5-0.7 mS/cm |
| 3 Vegetative | 350-500 ppm | 0.7-1.0 mS/cm |
| 4 Vegetative | 500-700 ppm | 1.0-1.4 mS/cm |
| 5 (early flowering) | 700-900 ppm | 1.4-1.8 mS/cm |
| 6 (early flowering) | 800-1000 ppm | 1.6-2.0 mS/cm |
| 7 (mid flowering) | 900-1100 ppm | 1.8-2.2 mS/cm |
| 8 (mid flowering) | 1000-1200 ppm | 2.0-2.4 mS/cm |
| 9 (late flowering) | 1100-1300 ppm | 2.2-2.6 mS/cm |
| 10 (late flowering) | 1200-1400 ppm | 2.4-2.8 mS/cm |
| 11 (late flowering) | 1300-1500 ppm | 2.6-3.0 mS/cm |
| 12 (ripening/harvest) | <1000 ppm | <2.0 mS/cm |
Grow Weed Plant, Grow!
Once your cannabis seedling has been transplanted into a larger pot, it’s time to focus on its vegetative growth. The vegetative stage is a period of rapid growth, where your plant will develop more leaves and branches. Here are some key factors to consider during the vegetative stage:
- Light: Provide your cannabis plant with 16-18 hours of light per day during the vegetative stage. This can be achieved using a combination of natural sunlight and artificial grow lights.
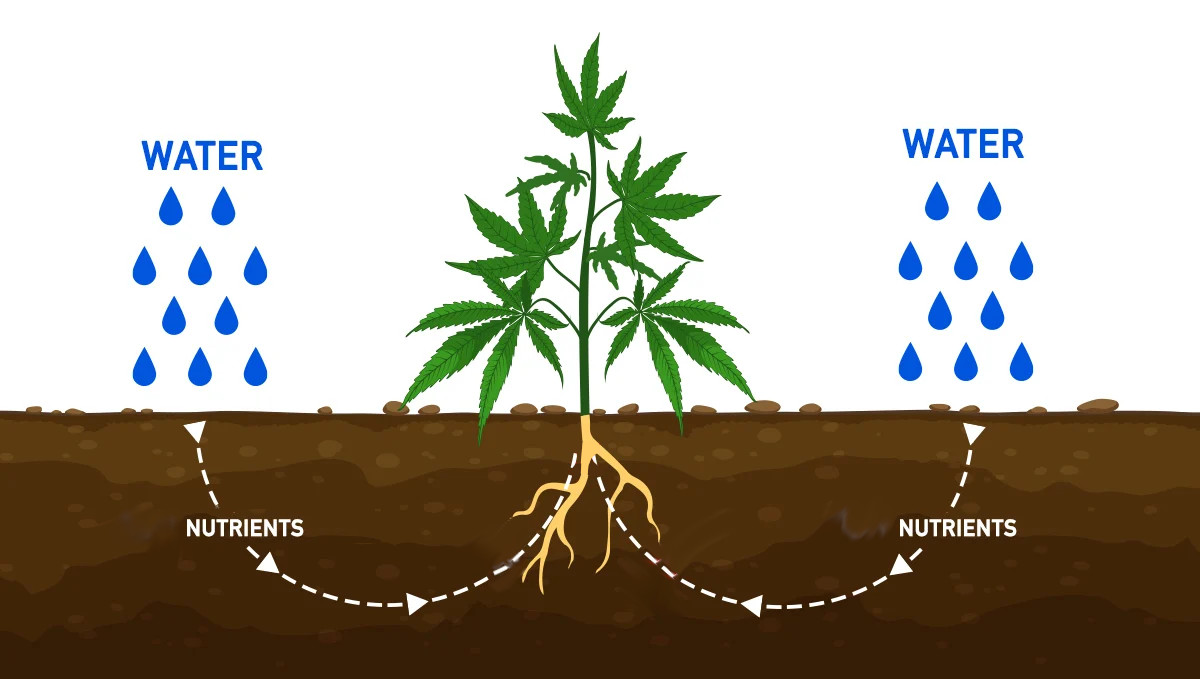
- Nutrients: Feed your plant with a balanced nutrient solution specifically formulated for the vegetative stage. Follow the recommended dosage instructions from the above chart or one provided by the fertilizer manufacturer.
- Watering: Monitor the moisture level of the soil and water your plant when the top inch feels dry. Avoid overwatering, as it can lead to root rot. Allow excess water to drain out freely from the drainage holes.
- Pruning and Training: During the vegetative stage, you can prune and train your plant to promote bushier growth and increase yield. Remove any yellowing or damaged leaves and consider techniques like topping or low-stress training.
- Environmental Factors: Maintain a temperature of around 70-85°F (21-29°C) during the day and slightly cooler at night. Provide good air circulation and ensure humidity levels are between 40-60%.
- Pest and Disease Prevention: Regularly inspect your plant for pests like aphids, spider mites, or fungus gnats. Use organic pest control methods, such as neem oil or insecticidal soap, to prevent infestations. Keep the growing area clean and free from debris to minimize the risk of diseases.
Marijuana Flowering Stage
After the vegetative stage, your cannabis plant will transition to the flowering stage. This is when your plant will start producing buds, which contain the cannabinoids and terpenes that give cannabis its unique properties. Here’s what you need to know about the marijuana flowering stage:
- Light Schedule: To initiate the flowering stage, your plant needs 12 hours of uninterrupted darkness and 12 hours of light each day. This mimics the natural light cycle during the fall season.
- Light Spectrum: During the flowering stage, your plant requires light in the red and far-red spectrum range. Use a flowering-specific grow light or adjust the light spectrum of your existing grow light to promote bud development.
- Nutrient Requirements: Switch to a nutrient solution specifically formulated for the flowering stage. These solutions are often higher in phosphorus and potassium, which are essential for bud development.
- Watering: Adjust your watering schedule to accommodate the changing needs of your plant. Monitor the moisture level of the soil and water when the top inch feels dry. Avoid overwatering to prevent root rot.
- Pruning and Defoliation: During the early stages of the flowering stage, you can remove any large fan leaves that are blocking light to the lower bud sites. However, avoid excessive pruning or defoliation, as it can stress the plant.
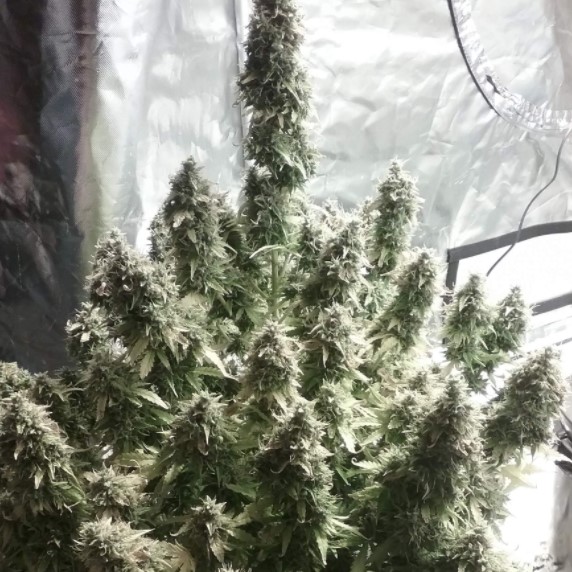
- Harvest Time: The length of the flowering stage varies depending on the strain and growing conditions. Generally, cannabis plants flower for 8-12 weeks. Harvest your plant when the majority of the trichomes (crystals) on the buds have turned from clear to milky white or amber.
Harvesting Your Weed Plant
After patiently nurturing your cannabis plant through the germination, vegetative, and flowering stages, it’s time to harvest the fruits of your labor. Harvesting your weed plant at the right time will ensure the highest quality buds. Here’s what you need to know about harvesting your cannabis plant:
- Trichome Evaluation: The trichomes on the buds are the best indicator of harvest readiness. Use a magnifying tool to examine the trichomes – they should appear milky white or amber. Harvest when the majority of the trichomes have turned milky white with a few amber ones.
- Stigma Evaluation: Another way to determine harvest readiness is by evaluating the color of the pistils (stigmas) on the buds. Most strains have pistils that change from white to brown or orange as they mature. Harvest when around 80% of the pistils have changed color.
- Flushing: Before harvest, it’s important to flush your plant with plain water for 1-2 weeks. Flushing helps remove any residual nutrients or chemicals from the plant, resulting in a smoother smoke and better flavor.
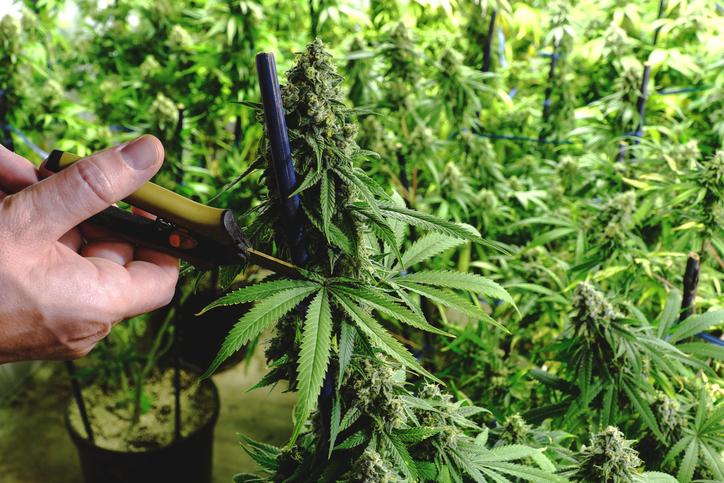
- Harvesting Technique: Use sharp pruning shears or scissors to cut the branches of your plant. Start by removing the larger fan leaves, then cut the branches into manageable sections. Hang the branches upside down in a dark and well-ventilated area for drying.
- Drying and Curing: Allow the harvested branches to dry for 7-10 days until the smaller stems snap instead of bend. Once dry, trim the buds from the branches and place them in glass jars for curing. Cure the buds for at least 2-4 weeks, burping the jars daily to release excess moisture.
Conclusion
Growing marijuana from seed in a pot can be a fulfilling and rewarding experience. By following the step-by-step process outlined in this guide, you can successfully cultivate your own cannabis plants from seed to harvest. Remember to provide your plants with the right environment, nutrients, and care throughout each stage of their growth. With patience and dedication, you’ll be rewarded with high-quality buds that you can enjoy and share with others. Happy growing!