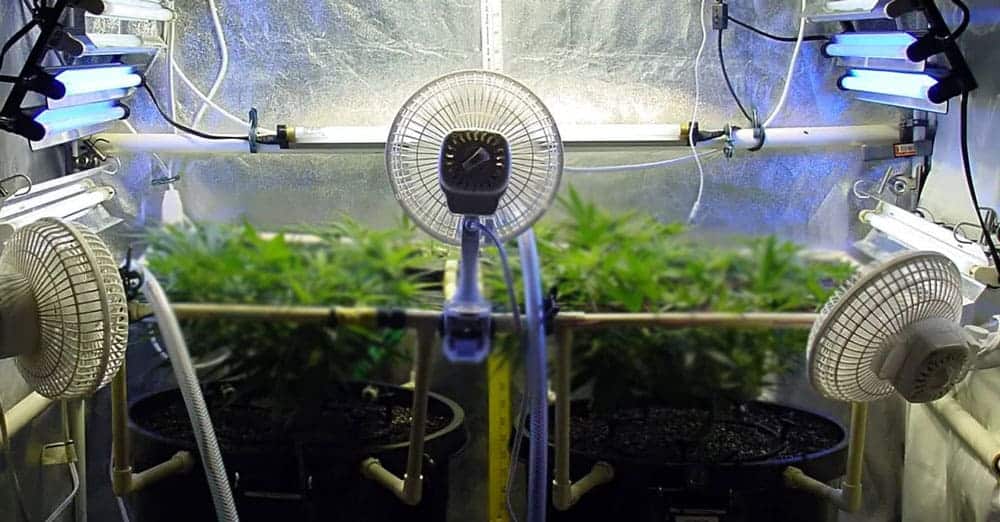
This is a simple beginner’s guide on how to grow marijuana from seeds indoors.
- Growing Equipment necessary to Grow Marijuana from Seeds
- Getting Started – Germination Stage – Grow Marijuana from Seeds
- Vegetative Stage – Grow Marijuana from Seeds
- Flowering Stage – Grow Marijuana from Seeds
1. Grow Equipment – What do you need?
- You will at least need a good quality grow light.
- A good growing operation also needs a grow tent and fans.
- Other necessary things are pots, odour filter, soil and fertilizer.
All this can be purchased online, mostly from Amazon.
Equipment Lights
Cannabis needs a lot of light. The more the better!
Light = weight (of your harvest).
The better your light, the more you’ll harvest.
The 2 most common types of lamps are used:
- HID lamps
- LED lamps
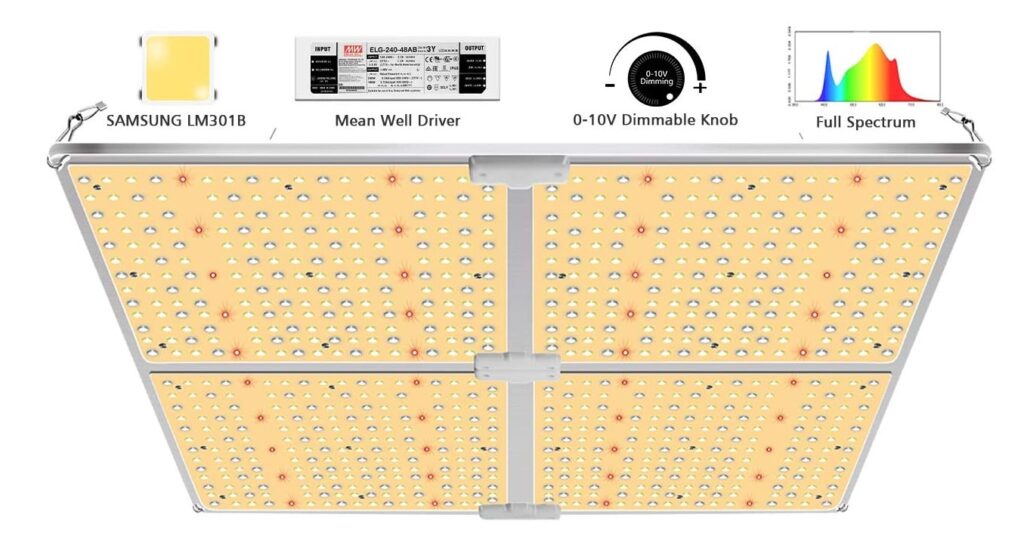
LED is modern and energy-efficient.
They are expensive to buy.
But they use little electricity. What you spend at first you’ll save later.
Cheap LED lights are available, but they produce small tiny buds and you’re wasting time.
A good quality quantum board LED is more expensive but they can surpass the amount of light that HID lamps can produce at the same wattage. New technology LED’s are currently able to produce a good harvest.
HID lamps
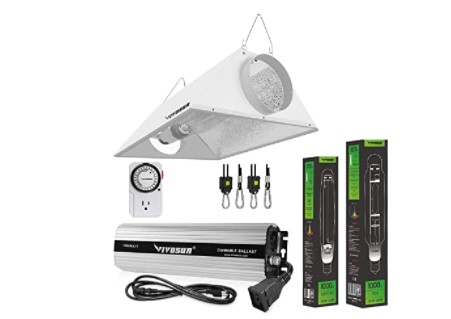
HPS grow light
Means that means High-Intensity discharge.
They come as High-Pressure Sodium(HPS) or Metal Halide (MH).
It’s a bit of an old-school light.
It can deliver a huge harvest but lots of electricity.
These lamps are cheap to buy. What you save on the initial purchase, you lose over time on electricity.
Equipment – Ventilation
Cannabis needs fresh air to grow properly. Grow areas that are not well ventilated tent to develop insects like spider mites which will diminish the harvest. Clip-on fans work best in a grow tent to keep a light breeze moving over the plant canopy. If you have a larger grow room then free-standing fans will be needed to keep a breeze over the entire canopy.
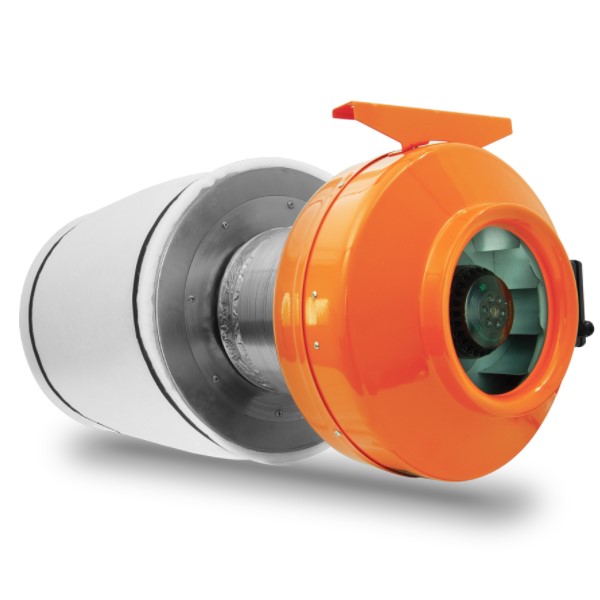
You also need to get rid of the old air used by the plants. For example, from a window or vent.
The carbon filter can remove most of the odour of growing marijuana so other people won’t have to smell it.
A very small setup with only 1 Compact Fluorescent lamp can work without active ventilation.
Equipment – Pots and Soil
Pots
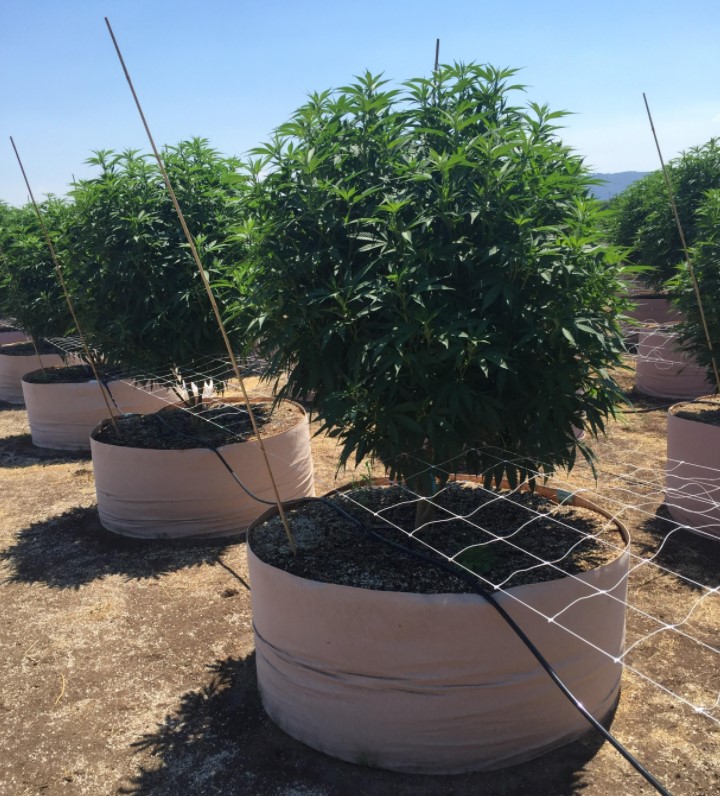
Pots made of cloth let your plants breathe. Fabric Pots are a new development. They work better than solid plastic pots because the roots can benefit from extra oxygen and excess water can drain. 3-5 gallon fabric flower pots work well for indoor growing rooms. If you are growing outdoors you may use fabric pots as large as 100 Gallons to maximize yields.
Soil
Buy good quality vegetable soil from the garden center/hardware store. Get the best one you can. It’s the basis for your healthy plants. Now add at least 15% perlite to ventilate your soil giving your roots oxygen. If budget isn’t an issue you can purchase pre-made super soil that is specially designed for growing marijuana from seeds. Be careful though, these pre-made soils may burn young seedlings so it’s best to start them in seed starting soil that doesn’t contain fertilizer. Once they have a couple of sets of leaves you can start to feed them.
2. Getting started – Grow marijuana from seeds
Germinate some seeds!
How many seeds should you germinate? It depends.
Let’s say your growing tent fits 10 plants
If you have feminized seeds, which means that all the seeds will be produced by female plants, you will start with 12 seeds. (2 in reserve).
If you have regular, not feminized seeds, you will end up with about 50% male and 50% female.
Males don’t produce smokable Marijuana, so you will ‘delete’ them. later.
So you would ideally start with 20 plants but less than that if you are limited on space to grow them into the flowering stage.
Start with as many as you can. Using feminized seeds is the most effective.
Germination Process
Presoaking
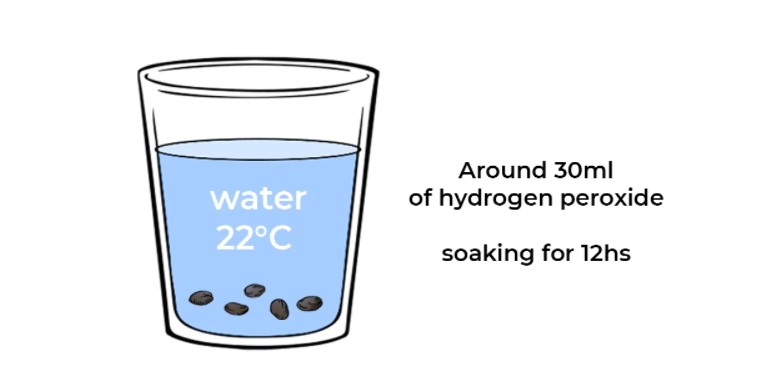
The process of germination awakens the marijuana seed from its dormancy. Breaking the seed dormancy happens when it makes contact with water and room temperature. Water is necessary, for as soon as the seed has absorbed enough water, the seedling begins to grow its root system. A tiny amount of oxygen is also required for seed germination, so do not drown your seeds, allow some contact with air between the paper towels. Next the seeds break through their shell.
Once the seed casing has broken open, the germinating seedling needs oxygen for it to keep growing. If the germination medium is waterlogged, it might cut off the oxygen supply and prevent the seed from germinating as it prevents aerobic respiration, which is the main source of energy until it starts to develop leaves. At this time the temperature, moisture and oxygen have to be provided in balance to maintain a healthy germination process.
Germinating Seeds in a Ziplock bag
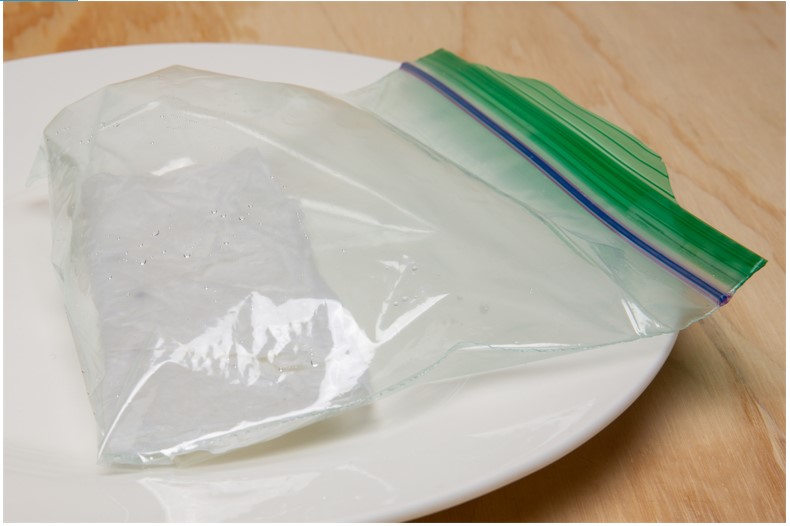
After you have let your seeds soak for 12 to 24 hours you can now transfer them to a piece of paper towel folded inside a ziplock bag. The paper towel should be slightly damp. Make sure the seeds are covered completely and the damp paper towel is in contact with the seeds. Place in a dark warm place and allow to germinate for up to 2 to 4 days. Check your seeds often, some will grow faster than others. Once each seed has a tail of at least 1 cm you can put the seed in a growth medium (soil or rock-wool), approximately 5 mm under the surface) with the root pointing down. They will stay in the starting pot (typically a solo or beer cup) for approximately 2 weeks.
Between two plates.

Put some moist tissues on a plate. Put the seeds on top of them and then put a layer of moist paper towel on top of the seeds. Cover your seeds with a second plate upturned on the first as pictured above. The seeds need to remain in absolute darkness and moist the entire time. Put the covered marijuana seeds in a warm place (21-22°C). Check the marijuana seeds every day, add some water to the paper towels if necessary to keep them moist but not wet, and carefully transplant the marijuana seeds when they open and the tip of the root is at least 1 cm long. You can plant the seed in a medium (soil or rock-wool), approximately 5 mm under the surface) with the root pointing down. They will stay in the starting pot (typically a solo or beer cup) for approximately 2 weeks.
Transfer the young cannabis plants to the final pots
When the plant gets root bound in the starting container, transplant it to a pot of fresh garden soil.
Fill the pot with soil, make a deep hole in the middle and insert the young plant.
Put it quite deep into the pot, burying a little of the stem for extra support. The buried stem will grow roots.
Gently and lightly press the soil and slowly add some water.
And put it back under the light.
Watering a young marijuana plant
Marijuana grows fast and drinks a ton of water. Nevertheless, excessive irrigation can kill these plants very quickly.
Young plants need water about once a week. Flowering plants as much as once a day.
One trick is to touch the ground with the back of your fingers. Is it a little cool? This means that there is enough water left. But if it feels warm, you have to give water.
If your plants suddenly have their leaves hanging down, it probably means that they are dangerously thirsty. Put water and the leaves will return to normal.
Another way to tell if your plants need water is to lift the pot when fully watered and again when it starts to droop with lack of water. Take note of how heavy the plant feels in each instance, and water accordingly. This is the best method and how we do it here at Dagga Seeds.
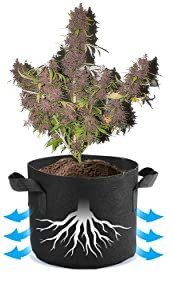
Excess water must be allowed to drain away and out of the pots. Drainage is never a problem if you use fabric growing pots, and they are among the cheapest to buy. Don’t leave your plants sitting in water, they may drown. As more and more chemicals are added to our water supplies, it can be beneficial to use rainwater or filtered water.
3. Vegetative Phase – Grow marijuana from seeds
Your plants are now germinated. You put them in pots. It stands under your rising lights. Not too close to prevent leaf burns.
The light is on for 18 hours and 6 hours. Some growers may say to leave the light on 24-7. I personally recommend turning them off for 6 hours a night to let them stretch the distance between leaf nodes. If you are limited on height then keeping the light on 24 hours a day can limit the stretch of your plants slightly.
Leave them under 18 hours of light for 3.5 to 4 weeks. Water if needed, but not too much.
How often to give fertilizer?
You start fertilizing when the plants are 2 weeks old.
If you want your plants to be healthy and strong, use Rule 3: 1.
This means that you apply fertilizer 3 times and then add clean water 1 time.
For example: if you have young plants, you can water them every 2nd day.
You give water fertilizer Monday, Wednesday, Friday. And on Sunday you will give them clean water.
So you avoid creating excess salts in the soil that could damage your plants.
I also recommend using filtered water to really give your plants the best possible life.
You will need a TDS Meter to fertilize your plants properly.
| Growth Stage | TDS meter reading |
| Seedlings | 0 – 100 ppm |
| Start of Vegetative Stage (Week 2-3 Vegetative Stage) | 200-300 ppm |
| End of Vegetative Stage (Week 4 Of Vegetative stage) | 450-700 ppm |
| Early Flowering (Week 2 of Flowering Stage) | 750 – 950 ppm |
| End of Flowering (Week 4 – Last Week of Flowering Stage) | 1000-1600 |
| Last Week before Harvest. | 0 ppm pH adjusted water water |
Always keep an eye on your plants. If the leaves aren’t nice, darkish green they may be hungry a need more food.
4. Flowering Stage – Grow marijuana from seeds
Start flowering in the 4th week
It’s time to make them bloom! After approximately 4 weeks, switch the light to 12 hours on / 12 hours off.
Now the plants will change from a “vegetative ‘(growth) phase to a “ flowering ”phase. the plant now thinks it’s late summer a time to make seeds.
You will see the first buds after approximately 3- 4 weeks of 12/12 hour light. Hurray! But now… you have to eliminate the males.
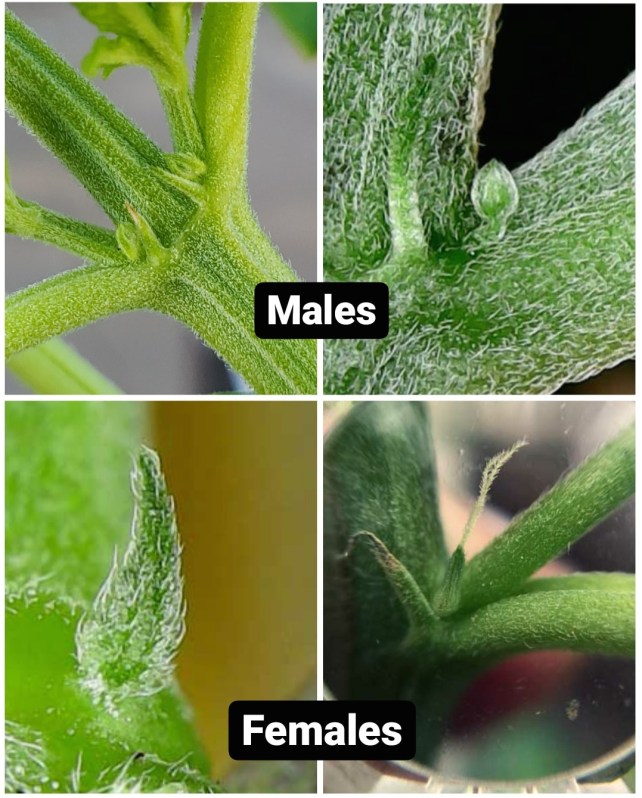
How to recognize a male plant
4 weeks into flowering you’ll see first buds.
Both men and women have buds. they look different.
Females are whitish hairs, males hang balls.
You must carefully chop down the male marijuana plants once you have identified them. Because they will pollinate the females and ruin your smokable crop with seed-packed buds.
It will take 2-3 months of flowering until they are ripe. During this time, the buds will grow. All you have to do is put water and fertilizer. Your plants are ripe after 2 – 3 months of flowering. You can tell they are mature when most of their white hair is brown.
Plant growth will also slow down. The buds will feel denser and will be compact and hard.
If you have a microscope, you can check the trichomes (sticky, icy-looking things covering the buds) for their colour. If they look brownish, this is another indication that the plant is ready for harvest.
Plants harvested very late tend to have a drowsy effect. Plants harvested soon seem to have a more active high value.
Harvest Time
Harvesting is easy. Cut the whole plant just above the ground, and the hardest part is done. You have grown the plant so there’s not much that can go wrong now.
Do not touch the sticky buds. Everything stuck to your fingers is lost.
Pruning buds
Use small scissors (nail scissors) to remove the leaves from the buds.
Those big leaves can go in the trash. They have no active ingredients. Smoking would only make you cough.
Then, between the buds, the smaller leaves are covered with icing(sugar leaves). Cut them out (most of them), but leave them.
They are smokeable, but best left for making hash or weed butter to cook with.
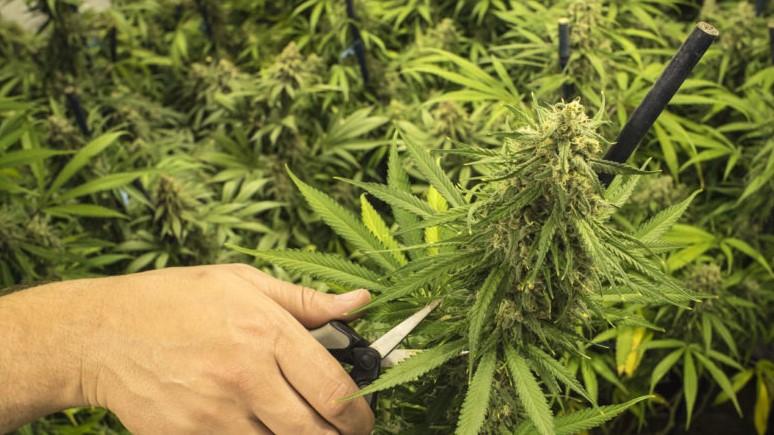
Trimming and Drying Buds
The tighter you trim your buds, the better bag appeal they will have. Plus being smoother to smoke.
Drying precious harvest
Dry slowly but not too slowly.
For example, a good way to dry is to spread your buds on paper and leave them in a dark room. They dry slowly that way.
It’s a bad idea to dry the material with a hairdryer or in the oven. Then it will taste like hay.
But if they dry out too slowly, they can catch mould, which will destroy everything you worked so hard for.
Drying them slowly causes them to create a pleasant aroma and taste. Slow drying will also make the smoke smoother.
Your buds should feel dry after around 10 days. Then you put them into a large plastic bag overnight (don’t compress).
On the next morning, they’ll feel dry again. Leave them dry for another 12 -24 hrs a put them back into the plastic bag.
Carefully slow down the drying process.
At some point, the stems are is dry enough to snap upon bending. They should make a nice ‘crack’ sound.
This is the time to stop drying. You don’t want to make it 100% totally dry. Some humidity is required for the curing process to succeed. You can now go ahead a smoke some. But it won’t have its full strength yet.
Curing. Make good buds even better
Freshly dried marijuana can be consumed. It will still have great effects, but it could be much better.
Over the next 2 – 4 months or so, chemical processes in the weed will decrease chlorophyll and increase THC + other active substances.
This means that things are easier to consume and more effective in their effect.
Curing is best done in glass containers. The glass is neutral, the plastic could leave its taste on the buds.
Put it in glass jars and store it in a dark place. Open glasses every few days to leave some oxygen.
This process is sort of like aging fine brandy or cheese. There are no hard and fast rules. Make your own.
Done!
Marijuana plant pests
Pests can also occur indoors, where there is seemingly no way to get into the box. Somehow they show up anyway.
If you notice small white spots on the leaves, take a good look at the underside. If you can see small bugs moving slowly then you may have spider mites. They need to be eliminated quickly or they’ll wrap up your plants in webs.
To combat these militants buy a mild organic pesticide. I recommend Neem Oil with a wetting agent. It is derived from plants.
For a comprehensive guide on how to exterminate spider mites on cannabis organically Click Here

